
Affiliate disclosure: This post may contain affiliate links. Please see full disclosure.

I’ve been gardening long enough to know that spending more money doesn’t automatically mean growing more food. Some of my worst harvests happened the years I splurged on fancy fertilizers and premium seedling trays. And some of my best came from seasons where I was watching every penny and had to get clever about it.
The truth is, productive gardens are mostly about timing, observation, and doing the right small things consistently. None of that costs much. And a lot of the genuinely useful upgrades (better drainage, improved soil biology, smarter spacing) cost almost nothing if you know what you’re doing.
So here are 18 practical things you can do this season to squeeze more out of your growing space, without spending a lot. Some are free. A few cost a couple of dollars. None of them are complicated.
Start a worm bin from kitchen scraps

Worm castings are, genuinely, some of the best stuff you can put on your soil. They’re rich in available nutrients, beneficial microbes, and compounds that improve soil structure. Commercial worm castings cost around $20–$40 for a small bag. A basic worm bin costs almost nothing to set up.
All you need is a lidded plastic tub (drill some ventilation holes in the lid and sides), damp shredded cardboard for bedding, and a starter population of red wigglers. Red wigglers (not regular earthworms) are the species you want for composting. You can order them online for around $20–$30, or get a handful from someone who already has a bin. From there, feed them your vegetable peelings, coffee grounds, and crushed eggshells. Within a few months you’ll have a steady supply of castings to top-dress your beds.
Top-dressing established plants with just half an inch of worm castings around the root zone mid-season can visibly improve leaf color and fruit set within 2–3 weeks.
Make compost tea
If you already have a compost pile, you’re sitting on free liquid fertilizer. Compost tea is just water that’s been steeped with finished compost; the nutrients and microbes leach into the water, and you apply it directly to the soil or as a foliar spray.
The simplest version: fill a 5-gallon bucket with water (leave tap water to sit for 24 hours to off-gas chlorine, or use rainwater), add a couple of generous scoops of finished compost in an old pillowcase or mesh bag, and let it steep for 24–48 hours. Stir it a couple of times. Then dilute it to the color of weak tea and water your plants with it. Do this every 2–3 weeks during the growing season and your plants will notice the difference.
Collect and save your own seed
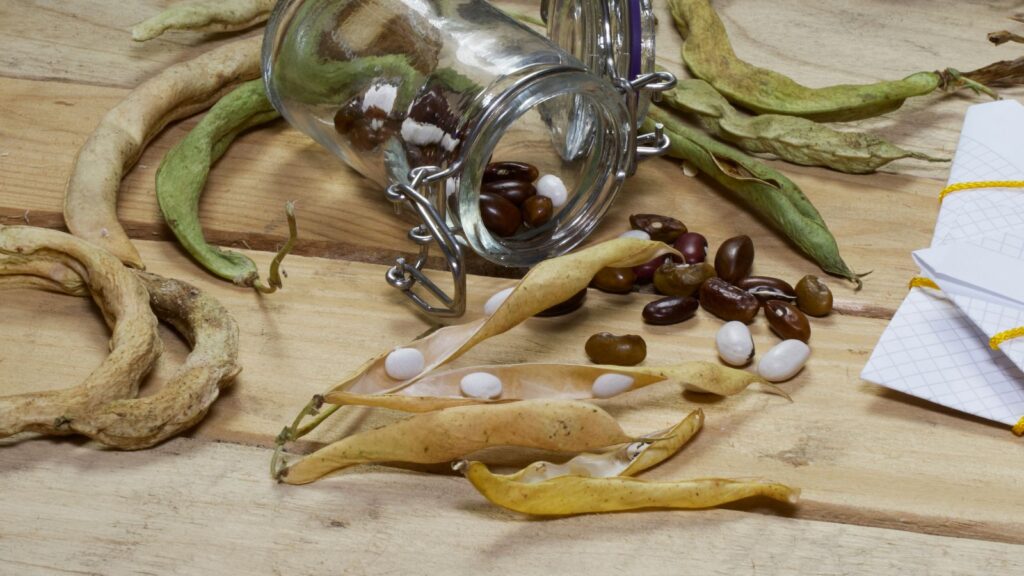
This one pays back every season for the rest of your gardening life. If you’re growing open-pollinated or heirloom varieties (and you should be, precisely because of this), you can save seed from your best-performing plants and replant them next year for free.
Start with easy crops: tomatoes, beans, peas, and lettuce. These are all self-pollinating, which means there’s minimal risk of cross-pollination confusing your seed stock. Tomatoes are particularly beginner-friendly: squeeze the seeds into a jar of water, let them ferment for 2–3 days (this removes the germination-inhibiting gel), rinse, dry on a paper plate, and store in a labeled envelope in a cool, dry place. Bean and pea seeds just need to dry fully on the vine before you shell them out.
Note: hybrids (labeled F1 on the packet) don’t come true from seed, so stick to open-pollinated varieties for saving. Most seed companies clearly label this.
RELATED: Seed Saving Basics: How to Save Seeds for Beginners
Use succession planting to stop gaps in your harvest

One of the most common reasons people end up with a glut then nothing is planting everything at once. You sow all your lettuce in April, it bolts in June, and then you have a bare patch and no salad for the rest of summer.
Succession planting means sowing small amounts every 2–3 weeks instead of one large sowing all at once. For fast-growing crops like lettuce, radishes, spinach, and bush beans, this is especially valuable. Sow a short row, wait two to three weeks, sow another. It doesn’t cost anything extra; you’re just using the same packet of seeds over a longer period, and you get a steady harvest instead of a one-time explosion followed by nothing.
Sheet mulch your paths and bare soil right now
Bare soil loses moisture fast, grows weeds that compete with your plants, and degrades in both structure and biology every time it’s exposed to rain and sun. Mulch solves all three problems at once.
Cardboard from moving boxes or appliance deliveries is free and works brilliantly. Lay it directly on paths between beds, overlapping the edges by at least 6 inches so weeds can’t sneak through the gaps, and wet it down thoroughly. Top with a layer of wood chips, straw, or even dried grass clippings 2–4 inches deep. This combination suppresses weeds for months, retains moisture in the soil underneath, and slowly breaks down to feed your soil biology. You can get free wood chips from local tree surgeons, and many will deliver a truckload for nothing because it saves them a dump fee.
Plant a green manure in any gap or bare patch

Any bare patch of soil is an opportunity, and leaving it uncovered is a waste. Green manures are plants grown specifically to be dug back into the soil, where they decompose and add organic matter and nutrients. They also protect the soil surface from erosion and compaction.
Leguminous green manures like clover, vetch, or field beans fix nitrogen from the air into the soil via root nodules, meaning you’re adding a slow-release nitrogen fertilizer for free. Clover seed is particularly cheap, around $5–$8 for a packet that covers a large area. Let it grow for 6–8 weeks, then chop it down and cover it around 2–3 weeks before you need the bed. The nitrogen is released as the plant material breaks down.
Water in the morning, not the evening

This one is completely free and makes a real difference. Watering in the evening leaves foliage wet overnight, which is exactly the condition fungal diseases love. Powdery mildew, botrytis, blight: they all thrive when leaves stay damp through cool nights.
Morning watering means the leaves dry off quickly once the sun is up, and the water reaches the roots during the cooler part of the day before peak evaporation. You lose less water to the air and give less opportunity for disease to take hold. If you can, water at the base of the plant rather than overhead. A simple soaker hose made from a length of old hose with small holes punched in it will do this for next to nothing.
Make your own liquid feed from comfrey or nettles

Comfrey leaves are genuinely excellent fertilizer. They’re high in potassium, which is the nutrient that drives flowering and fruit development, and they’re very easy to make into a liquid feed at home. If you don’t have comfrey, nettles are a good substitute and are high in nitrogen, which drives leafy growth.
Pack a bucket tightly with comfrey or nettle leaves, weigh them down with a brick, fill with water, cover with a lid (this will smell bad, and you’ve been warned), and leave for 3–4 weeks. The resulting liquid is dark, concentrated, and potent. Dilute 1 part comfrey liquid to 10–15 parts water before using it, or you’ll scorch your plants. Apply as a liquid drench every 2 weeks once plants are flowering and setting fruit. Comfrey grows back fast after cutting, so a single plant can provide multiple feeds per season for years.
RELATED: The Ultimate Guide to DIY Organic Fertilizers
Get your soil pH right before you add anything else

You can pour all the compost and fertilizer you like onto your beds, and if the soil pH is badly off, your plants still won’t be able to access it. Soil pH affects the availability of nutrients, and most vegetables perform best in soil with a pH of 6.0–7.0, and outside that range, key nutrients get locked up even when they’re present.
A basic soil pH test kit costs around $8–$10 and tests multiple samples. If your pH is too low (acidic), add garden lime. If it’s too high (alkaline), work in sulfur or a lot of acidic organic matter like pine needles or composted wood chips. Don’t guess. Test first, and if your plot has been struggling with yellowing leaves and poor growth despite good inputs, pH is often the culprit.
Use interplanting to make every inch productive
Most home gardeners grow plants in blocks or rows with bare soil between them. A more productive approach is interplanting: filling the gaps between slow-growing crops with fast-growing ones that will be harvested before the main crop needs the space.
Classic combinations: plant lettuce, radishes, or spinach between brassicas or squash while the main plants are still small. The quick crops are harvested long before the squash closes the canopy. Similarly, fast-maturing salad greens between tomato plants will give you a harvest from ground that would otherwise just be bare. No extra space needed, and you’re doubling or tripling the productivity of every square foot.
Make a simple cold frame from salvage

A cold frame is one of the most useful things you can have in a garden, and you don’t need to buy one. An old wooden pallet base, four lengths of timber, and a salvaged glazed window is all it takes. The frame doesn’t even need to be perfectly built. Its job is simply to trap a pocket of warm air around plants and protect them from frost and wind.
A cold frame can start seeds 4–6 weeks earlier in spring than direct outdoor sowing, harden off indoor seedlings before transplanting, protect autumn crops from the first frosts, and overwinter cold-hardy plants like chard and kale in better condition than they’d manage unprotected. One cold frame, in a four-season climate, easily adds 6–8 extra weeks to your growing season at each end.
Add organic matter to your soil every single year
This sounds obvious, but I see a lot of gardeners who fertilize regularly and never improve their actual soil structure. Fertilizers feed your plants; organic matter feeds your soil. The difference matters because soil rich in organic matter holds moisture better, drains excess water better, and supports a thriving community of organisms (earthworms, beneficial bacteria, fungi) that make nutrients available to your plants over time.
You don’t need to buy in expensive soil conditioner. Homemade compost, leaf mold (leaves piled up and left to decompose for 6–12 months), grass clippings worked into the surface, or even just covering beds with cardboard and wood chips over winter all build organic matter slowly and steadily. Aim to add at least 2 inches of organic material per bed per year.
Grow companion plants that do real work

Companion planting gets a lot of hype and a fair amount of pseudo-science, but some combinations are genuinely useful. Marigolds (Tagetes species, not calendula) release chemicals from their roots that suppress soil nematodes, so plant them thickly around tomatoes and peppers if nematodes are a problem in your area. Nasturtiums are reliable aphid magnets, drawing aphids away from crops and onto themselves where you can squash them or leave them for predatory insects. Borage attracts pollinators and is said to repel tomato hornworm.
The key is to grow companion plants that actually do something (pest confusion, pollinator attraction, ground cover, nitrogen fixing) rather than just planting basil next to tomatoes and expecting miracles. Many companion plants are also edible or medicinal, so they earn their space twice over.
RELATED: 12 Best Herbs and Flowers for Companion Planting With Vegetables
Fix your watering so you stop under- and over-watering

Inconsistent watering causes more garden problems than most people realize. Blossom end rot in tomatoes and peppers is caused by calcium deficiency, but calcium deficiency in the plant is almost always triggered by inconsistent soil moisture; the calcium is present in the soil, but the plant can’t take it up properly when moisture fluctuates wildly. Splitting fruit is the same issue. So is tip burn in lettuce.
The best fix is also cheap: a finger in the soil. Push your finger 2 inches into the soil. If it feels dry at that depth, water thoroughly. If it still feels moist, leave it. For most vegetables in summer, this means watering deeply every 2–3 days rather than lightly every day. Deep, infrequent watering encourages roots to go down, which makes plants more drought-resistant and better able to access nutrients from deeper in the soil profile.
Ferment your seeds before sowing to improve germination rates
Most gardeners don’t know about this one, and it makes a genuine difference to germination rates and seedling vigor, particularly for tomatoes and peppers. Fermenting seeds before storage removes the germination-inhibiting compounds from the seed coat and also kills seed-borne pathogens like some strains of early blight.
For tomatoes (as mentioned in the seed saving section), the fermentation process is part of correct seed saving. But for saved or purchased seed you’re about to sow, a shorter soak of 12–24 hours in warm water, sometimes with a few drops of diluted hydrogen peroxide, can improve germination rates, especially for older seed. For peppers especially, germination is notoriously fussy. Soaking pepper seeds in plain warm water for 8–12 hours before sowing, then sowing immediately, can shave several days off germination time and improve the percentage that actually sprout.
Build a simple rainwater collection system
Tap water works, but collected rainwater is genuinely better for your plants. It’s slightly acidic, chlorine-free, and at ambient temperature, and plants prefer all three of those things. And if you’re in an area with a dry summer, having a reserve of water costs nothing once the system is set up.
The simplest version is a barrel connected to your downspout with a basic diverter fitting, which you can buy for around $15–$20. A single standard water butt holds 50–100 gallons, which adds up fast. If you have the room, connecting two or three barrels in series with overflow pipes dramatically increases your storage. Position them slightly elevated so you can use gravity to fill a watering can, or use a simple submersible pump if the barrel is at ground level.
You might also like……
How to Grow Strawberries From Scraps
10 Easy DIY Ways to Grow Strawberries for Big Harvests in Small Spaces