Affiliate disclosure: This post may contain affiliate links. Please see full disclosure.
You walk out one chilly spring morning, coffee in hand, and there they are.
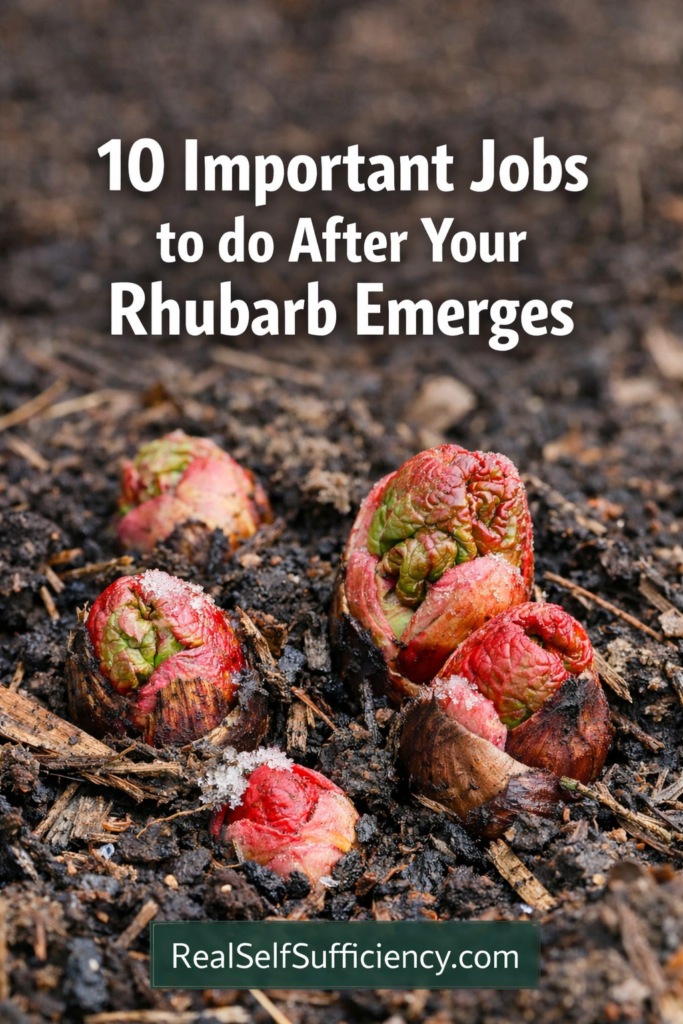
Those knobbly pink rhubarb noses, punching up through the mulch like they own the place.
It’s exciting. It’s also exactly when you can quietly make or break your rhubarb harvest for the whole year.
Rhubarb is a big, hungry perennial. If you look after it now, it’ll sit there for a decade or more, handing over armfuls of fat stalks every spring with very little effort. If you ignore it, you’ll still get something, but it’ll be thin, sulky stems and a plant that declines faster than it should.
I’m going to walk you through what I do with my own rhubarb patch once those buds show. Think of it as a spring tune-up so you get loads of big, beautiful stalks instead of wondering what went wrong.
What your rhubarb is actually doing right now
Under that clump of soil and mulch is a chunky crown and a serious root system. All winter, that crown has been asleep, living off the energy it stored last year.
When the soil warms up into the low 40s°F (around 5°C) and days get a bit longer, the buds wake up and push those little “alien brain” nubs to the surface. The plant’s priorities right now are simple: grow leaves, start photosynthesizing like mad, refill the batteries in the roots, and only then be generous with stalks.
That’s why the way you treat it in this early window matters so much. Good soil, steady moisture, and no competition means it can afford to send you thick, juicy stems and still keep enough energy to come back strong next year. Poor conditions now mean thin stalks, early sulking, and a plant that never really hits its stride.
Uncover the crowns without wrecking them
If you mulched in fall with leaves, straw, or compost, you’ve done the right thing. The trick now is to uncover without going overboard.
I always start with my hands, not a fork or a hoe. I gently pull the mulch back until I can actually see the crowns. You want the top of each crown just at, or barely above, soil level, not buried under several inches of soggy material. Too much on top keeps them cold and wet and encourages rot.
Healthy crowns feel firm and solid and the buds look plump, pink or red, and alive. If you poke one and it feels mushy, black, or smells bad, that part of the crown is rotting. Sometimes it’s just a little patch you can trim away with a clean knife; sometimes the whole crown is gone and that plant isn’t coming back. In heavy, waterlogged soil, crown rot can be a real issue, so this quick inspection tells you a lot.
In very cold climates, you might also notice the whole crown has been nudged up by freeze–thaw cycles, so roots are exposed and the plant sits high. In that case I lift the plant just enough to tuck some compost underneath, then settle it back so the crown is level with the soil, not perched on top and not buried deep. Firm the soil in around it gently with your hands.
While you’re there, strip off last year’s dead, slimy leaves and any old stalk stubs. Don’t yank so hard you loosen the crown; just peel them away or trim them off. That dead material is slug heaven and disease starter, and you don’t need it hanging around.
Give it a spring meal
Rhubarb is a heavy feeder. That big root system supports a lot of growth, but only if there’s enough nutrition in the soil. If you want thick stalks instead of skinny, floppy ones, this is where you earn them.
My base rule is simple: every spring, when the buds are showing but the leaves aren’t huge yet, I give each mature plant a generous ring of well-rotted compost or manure. We’re not talking a sprinkle. Aim for two to three inches deep over the soil in a wide circle around the plant. I keep it a couple of inches away from the crown itself so I’m not smothering the buds.
This does a few things at once. It feeds the soil slowly, improves structure, and helps hold moisture, which means less watering for you and less stress for the plant. If you’re composting your own kitchen scraps and garden waste, this is basically free fertilizer with no mystery ingredients.
If your soil is already rich and your stalks have been thick and generous in past years, that compost alone may be enough. If your patch is on sandy or tired ground, or you’ve noticed stalks getting thinner over the last couple of seasons, you can back up the compost with a measured dose of organic fertilizer.
If you haven’t had a soil test, err on the light side and let the compost do most of the work. You can always top up lightly after the main harvest if the plant still seems hungry.
RELATED: 23 Organic Fertilizers You Can Make At Home
Mulch for moisture and weed control
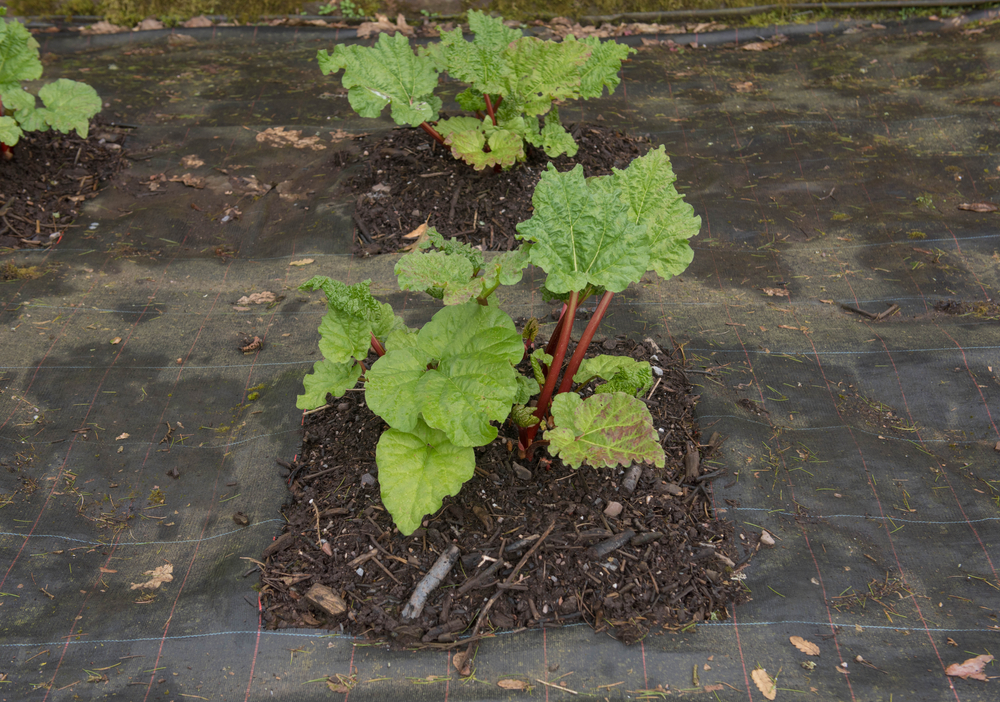
Once I’ve fed the bed, I go right back in with mulch. It’s the same idea as tucking a blanket around a kid after you’ve given them dinner.
Rhubarb likes its soil evenly moist, not bone dry one week and swampy the next. A two to three inch layer of organic mulch helps keep the moisture level more stable, which prevents stress and makes the plant a lot happier. It also keeps weed seedlings from stealing all that lovely feed you just applied.
You’ve got options here. Shredded leaves, straw, half-finished compost, or even wood chips all work around the plant. Just keep the mulch pulled back a bit from the crown itself so it isn’t sitting in damp, rotting material. That’s the quickest way I know to invite crown rot.
If your summers are hot and dry, this one step can be the difference between stalks that stay fat and harvestable for a couple of solid months and stalks that shrivel and go stringy as soon as the weather turns.
Sort out water before the heat arrives
Once the ground has thawed and growth starts, rhubarb needs consistent water. It doesn’t want boggy soil, but it absolutely does not like to dry out completely. When rhubarb goes short on moisture during its main growth spurt, stalks stay shorter and tougher and the whole plant sulks.
A good general rule is to give the plant about an inch of water a week during active growth, including rain.
In practice, I keep it simple. I poke a finger into the soil under the mulch. If the top couple of inches are dry and crumbly, it’s time to water. If it still feels slightly damp and cool, I leave it alone. In heavier clay soil, that might mean watering every 7–10 days in spring. In sandy beds or raised planters, you might need to water more often, especially when the weather suddenly turns warm and windy.
When you do water, water deeply, right at the base of the plants. A slow soak is better than a light sprinkle that barely wets the mulch. Morning is best so any water that splashed on leaves can dry before nightfall; that cuts down on leaf spot and general fungal nonsense.
If you’re in a very wet climate where rainfall more than covers that inch a week, your job is actually the opposite: make sure the bed drains. In that case, the compost and mulch are still useful, but you might want to ease off on watering unless you have a rare dry spell.
Clear the competition and tidy the bed

While you’re messing around at soil level anyway, this is the moment to get ruthless with weeds.
Rhubarb has a big root system and it does not enjoy sharing with deep-rooted bullies like dock, thistles, or coarse grasses. Those weeds don’t just grab water and nutrients; some of them also give shelter and alternate food sources to pests that specifically target rhubarb. The rhubarb curculio beetle, for example, loves dock and big weedy stems just as much as it loves rhubarb itself.
I work my way around each clump and pull or dig out anything that isn’t supposed to be there, trying to get as much root as possible. Close to the crowns, I mostly use my hands so I don’t stab or slice those tender buds with a tool. Once the soil is clean, I pull the mulch back into place.
If your rhubarb bed blends into lawn, it also helps to cut a clear edge so grass doesn’t creep in. Even just slicing a narrow trench with a spade around the bed once a year makes a difference. Tidy beds aren’t just prettier; they genuinely give the rhubarb a better shot at feeding itself instead of all the freeloaders.
Watch for flower stalks and deal with them early

Some years, especially on older crowns or plants that have been stressed, you’ll see thick, hollow stems rising from the center with big, knobbly buds that don’t look like normal leaves. That’s the plant gearing up to flower and set seed.
They look dramatic. They’re also a complete energy drain. If you want good harvests and long-lived plants, cut off flower stalks as soon as you spot them.
I use a sharp knife or pruning shears and cut the flower stalk right at the base, as close to the crown as I can manage without gouging into it. Don’t eat the flower stalks. They’re tough and fibrous and not worth the chewing.
If a plant insists on producing flower stalks over and over even in good conditions, that’s often a sign it needs dividing and rejuvenating, which we’ll come to in a bit.
Decide how you’re going to harvest this year
This is the point where everyone gets impatient and starts yanking stalks. I get it. That first rhubarb crumble of the year is powerful motivation.
But how much you take, and how you take it, changes how that plant performs for years.
If your rhubarb was planted last year, don’t harvest at all. Let it build a root system. If it’s in its second year, you can take a few stalks over a couple of weeks, but keep it light. From the third year onward, once stalks are a decent length, you can harvest more generously for six to ten weeks in spring, depending on your climate and how vigorous the plant is.
I wait until stalks are at least 10–12 inches long, and in many varieties they’ll happily grow to 15 inches or even two feet. The stalks should feel firm and about as thick as a thumb or thicker.
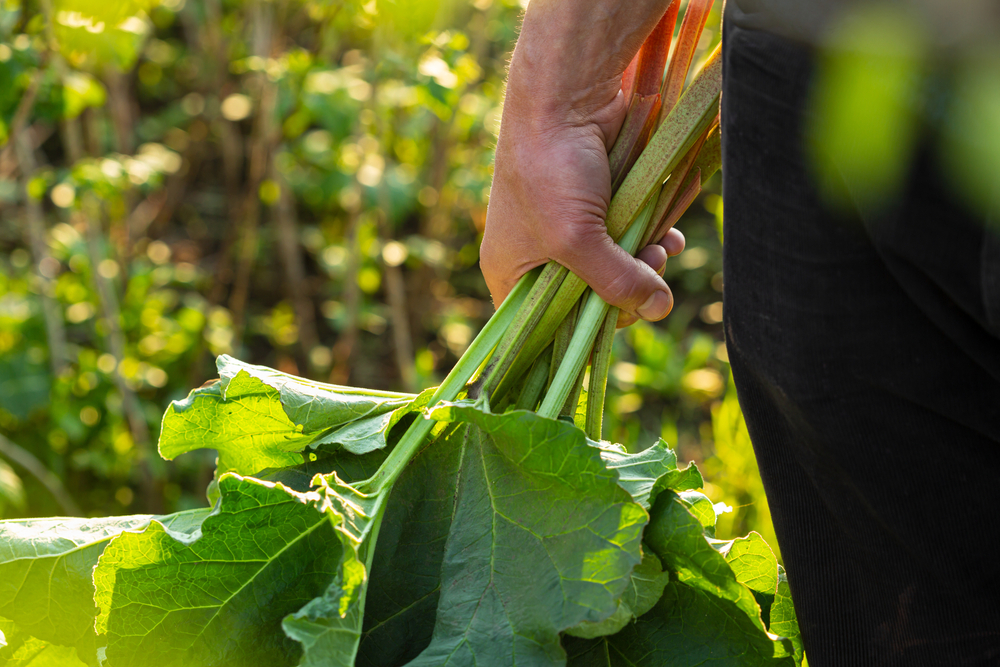
When you pick, don’t just slice them off halfway. Wrap your hand around the stalk down near the base, close to the soil, and pull while giving a gentle twist to one side. The whole stalk should pop free from the crown. That twisting method avoids leaving little stubs that can rot right into the crown.
As soon as you’ve pulled a stalk, chop off the leaf and toss it on the compost pile. Only the stalk is edible; the leaves are high in oxalic acid and can be poisonous if eaten in quantity, for people and for animals.
The other big rule is to never strip a plant bare. At any given time, I leave at least a third of the stalks on the plant so it still has enough leaf area to feed itself. Later in the season, when stalks start to come up much thinner than usual, that’s your sign to stop harvesting and let the plant rest and recharge.
There’s a weird old myth that rhubarb becomes poisonous if you harvest after June. That isn’t true. The stalks don’t suddenly become toxic, but if you keep yanking them all summer you do weaken the plant. So use the “stalk thickness” rule rather than the calendar.
Handle frost damage the right way
Because rhubarb is usually one of the first things to show up in spring, it often gets caught by late frosts. Sometimes that’s no big deal. Sometimes it’s a problem.
Light frosts around 30–32°F (about 0°C) might just nip the leaf edges. In that case, stalks usually stay firm and upright and are fine to eat, even if the leaves look a bit sad. If the stalks look normal and the leaves only have minor edge damage, you can harvest and use them as usual.
Hard freezes down into the mid-20s°F (around –4°C) are a different story. That can cause serious injury. The classic signs are leaves that go limp and blackened and stalks that collapse, turn soft, or feel mushy. When that happens, most experts recommend you don’t eat those stalks. There’s some evidence that severe freezing can push more oxalic acid from the leaves into the stems, and even if it didn’t, they’re half rotten anyway.
My rule is simple. If stalks and leaves are firm and upright after a cold night, I’m not worried. If the leaves are badly damaged or the stalks feel floppy or water-soaked, I pull those damaged stalks and compost them. Then I let the plant resprout. New growth that emerges after the freeze is considered safe to eat.
So if you get hit by a nasty cold snap, don’t panic. Clean the plants up, compost the casualties, and then wait. Rhubarb is tougher than it looks and will usually send up a fresh flush of stalks once things warm up again.
RELATED: How to Protect Your Plants From Frost
Keep an eye out for pests and disease while things are small
Rhubarb is blessedly low-maintenance, but “low-maintenance” doesn’t mean “invincible.”
Early in the season, when leaves are still smaller, it’s easy to spot problems. I glance over the plants for slug and snail damage, which shows up as holes in young leaves and slime trails. I also look for clusters of aphids on tender stems and for brown or reddish spots that might indicate leaf spot.
If you catch things early, you usually don’t need anything fancy. I hand-pick slugs, use boards or overturned pots as traps, and dispose of the little terrors in the morning. Aphids can often be blasted off with a strong spray of water, and if they really set up camp a simple insecticidal soap usually sorts them out.
Crown rot is the big nasty one, and we already talked about that. It usually shows up as parts of the crown going soft and black, with shoots that wilt or fail to appear. Good drainage, not burying the crown under mulch, and not drowning the bed with water are your main defenses.
Where I live, the more obscure pest is the rhubarb curculio, a rusty-colored weevil that drills into stalks and crowns. There aren’t any home-garden insecticides approved for it, so the recommended control is mostly cultural: keep the area weeded, especially docks and other big, coarse weeds that give it a home, and remove and destroy any stalks you see with obvious borer holes or damage.
Again, the easiest time to spot all of this is right after the plants emerge, when the crowns and first leaves are still visible and not buried under a jungle of foliage.
Decide whether it’s time to divide

You don’t have to divide rhubarb every year. In fact, you definitely shouldn’t. But every four to seven years or so, most long-established clumps benefit from being lifted, split, and replanted.
Early spring, right as the buds are swelling or just starting to poke through the soil, is considered an ideal time. After emergence, you can get a really good look at how each crown is behaving and decide if this is the year.
There are a few red flags I look for. If a plant that used to give me thick stalks starts producing mostly skinny ones despite good feeding and water, that’s one. If the crown has spread into a big, woody donut with a dead or weak center, that’s another. If the plant is clearly crowded and growing into its neighbors, that also tells me it’s ready.
Dividing sounds dramatic, but it’s straightforward. On a cool, overcast day, I dig up the entire crown carefully with a spade or fork. Then I set it on a tarp or path and look it over. I use a sharp spade to chop it into chunks, each with at least one good, fat bud and a healthy section of root attached. Two or three buds per chunk is ideal for a strong new plant.
Those divisions go back into well-prepared soil with plenty of compost mixed in. I space them about three feet apart so they have room to spread. Crowns sit so the buds are just at or slightly above soil level. Then I water them in and mulch lightly.
Treat those divisions like brand-new plants. That means no harvesting in the first year after division. Let them settle, grow roots, and rebuild before you start pulling stalks again.
The nice part is that one tired, over-grown clump can often become three or four vigorous new plants, which means more stalks for you and maybe a crown to share with a neighbor. That’s the self-sufficiency win I love: one purchase, or even one gifted plant, turning into a patch that feeds several households for years.
You Might Also Like…
12 Best Flowers and Vegetables for Companion Planting Vegetables