Affiliate disclosure: This post may contain affiliate links. Please see full disclosure.

My neighbor stopped me at the fence a few years back and watched me struggling to stake a young apple tree branch down with string and a tent peg. “Why don’t you just use a clothes peg?” he said. He was in his seventies. He’d been doing it for decades. It took me about thirty seconds to understand why it worked and why I’d never heard of it. That’s the thing about old school garden tips: they tend to be so specific and so obvious in retrospect that you feel mildly stupid for not knowing them already.
This isn’t a list of generic gardening advice. You don’t need me to tell you to water your plants or rotate your crops. What I’m sharing here are the actual techniques (the ones with specific mechanics, specific methods, specific results) that I’ve either used myself, learned from people who’ve been growing food longer than I’ve been alive, or researched until I understood exactly why they work. Every single one of them is chemical-free, most of them are free full stop, and all of them will make a real, noticeable difference in your garden.
1. Use a sprung clothes peg to train young fruit tree branches
This is probably my favorite tip on the whole list. When you’re training a young fruit or nut tree (apple, pear, plum, hazel, whatever) you want the scaffold branches to grow outward at roughly 45 to 90 degrees from the trunk rather than straight up. Horizontal branches fruit earlier, fruit more heavily, and create a stronger structure. Vertical branches create weak, narrow crotch angles where bark gets trapped and the union is fragile. The problem is getting those young branches to grow where you want them.
The clothes peg method is this: take a standard spring-loaded clothes peg (it must be the sprung kind; the old wooden doll peg won’t work) and clip one end onto the central leader just above a young shoot you want to train outward. The peg body then rests against the young shoot and pushes it downward to the angle you want. You’re aiming for 45 to 90 degrees from the trunk. The branch tissue is soft and supple in its first season, and it only takes a few weeks for it to lignify and hold the new position. Remove the peg once the branch has set, and reuse it on the next shoot. Do this in the first and second year of the tree’s life, and you’ll build a beautifully structured tree with almost no effort. This is standard practice in commercial orchards and almost completely unknown to home gardeners.
One note: go slowly if the branch has even a slightly narrow crotch against the trunk. Forcing it too fast can split it right off. Gentle, progressive pressure over a couple of weeks is all you need.
2. Bury kitchen scraps directly between crop rows
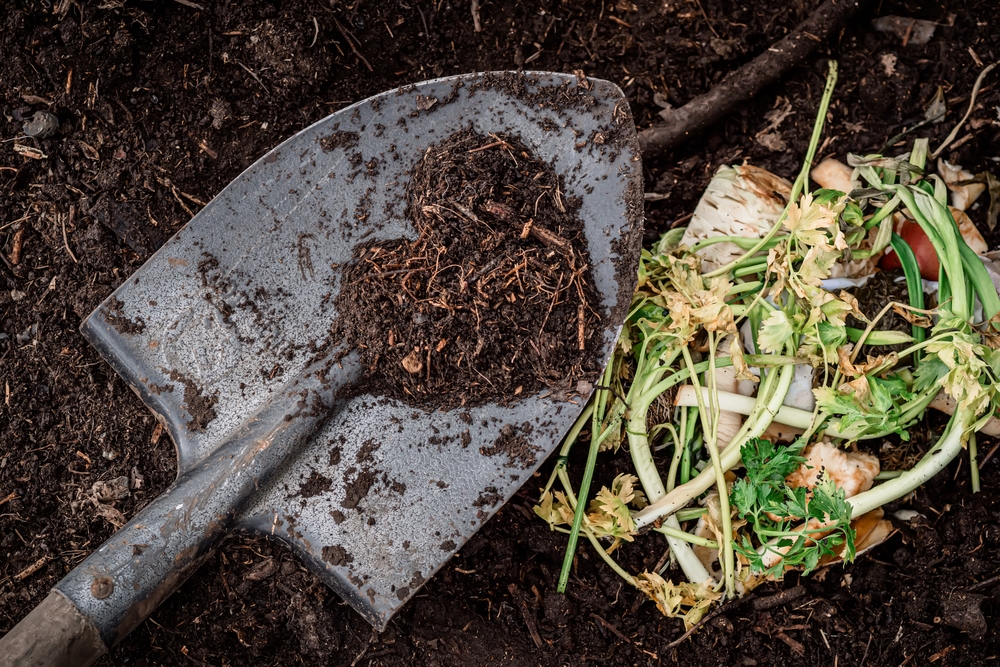
If you don’t have a compost pile, or your pile can’t keep up with your kitchen waste, or you just want to feed specific beds directly, bury your scraps in place. This is called trench composting, and it’s been used by pretty much every gardening culture in history for good reason. You dig a hole 12 to 18 inches deep between your crop rows, drop in your vegetable peelings, coffee grounds, fruit scraps, and eggshells, cover with at least 8 inches of soil, and walk away. The earthworms find it within days. By the time you’re planting the same spot next season, it’s gone and the soil above it is noticeably better.
I like this setup because it means your beds are perpetually improving without any external inputs at all. And you don’t have to disturb the soil excessively, either. Just keep filling the trench little by little and covering it over with the soil you removed. You encourage worms to move back in quickly and start breaking down all the scraps. And once good-sized trench feeds a large area, A few things to leave out of the burial: meat and cooked foods (wildlife will dig them up), diseased plant material, and weeds that have already set seed.
3. Sprinkle wood ash over pea and bean seeds to deter mice
If you’ve ever sown a row of peas or beans and come back three days later to find every single one has been neatly excavated and eaten, you’ve met the mouse problem. They can smell the seeds, they know exactly where the row is, and they are absolutely relentless. Netting is fiddly, and barriers are easy to bypass. Wood ash is the old solution, and it works remarkably well.
Once you’ve planted your seeds, sprinkle a generous helping of wood ash over top of the row. The ash deters mice (the theory is that it irritates their feet and noses and masks the smell of the seeds) and it has the bonus of adding a little potassium and calcium to the soil as it washes in. Use only ash from untreated wood. Coal ash is not the same thing and shouldn’t go near food crops. If you don’t have wood ash, a sprinkling of powdered chili has a similar deterrent effect, though it washes off faster. The ash method has been used by vegetable growers for generations and is one of those tips that sounds too simple to work until the first season you try it and your entire row germinates intact. If it washes away, you’ll want to replace it until the seeds germinate.
4. Bury fish heads and scraps under heavy feeders
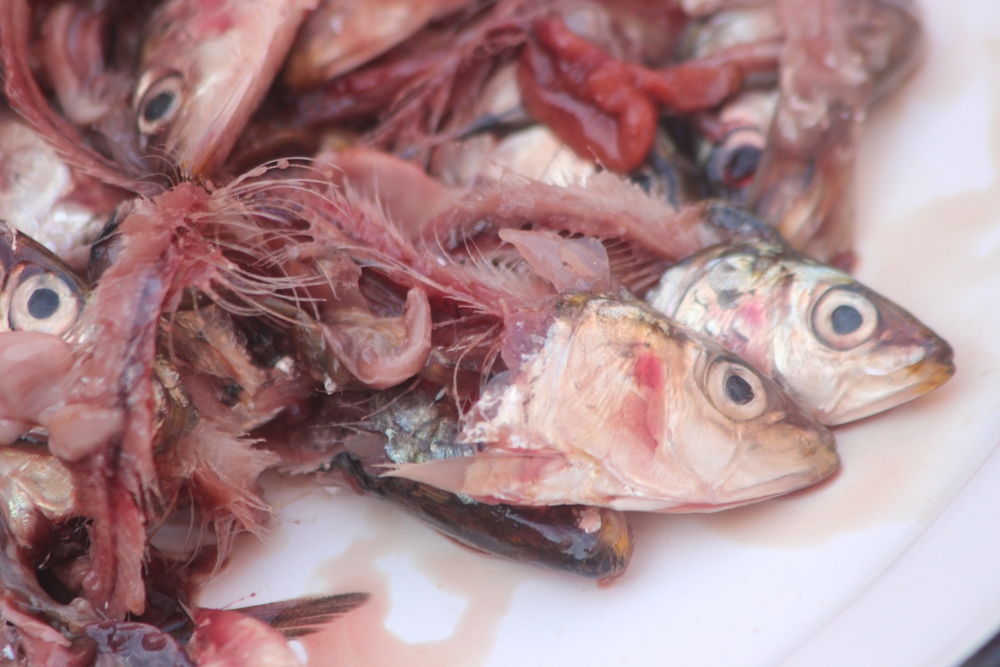
This one goes back thousands of years. Indigenous peoples in North America buried fish with their corn as standard practice, and it worked then for the same reason it works now. Fish decompose into a slow-release fertilizer that’s genuinely exceptional: high in nitrogen, phosphorus, and potassium, with trace minerals including calcium and magnesium that synthetic feeds don’t deliver. Tomatoes and roses are the classic beneficiaries, but any heavy feeder does well with this treatment.
Bury the fish heads or scraps at least 12 inches deep, ideally 18 inches if you have wildlife pressure, since anything shallower will be dug up by foxes, dogs, or raccoons. Bury them before planting if you can, or beside an established plant, not directly under the crown. Raw fish only. Cooked fish can carry pathogens and smells worse above ground. Don’t plant root vegetables directly over the burial site, as pathogens can infect edible roots; fruit-bearing crops like tomatoes are the right choice because the fruits themselves are far enough from the soil. The fish will have completely broken down within a few weeks in warm soil, and the plant above it will be feeding off the results for the entire season. Ask your fishmonger for scraps. Most will give them away for free.
5. Make liquid feed from nettles and comfrey
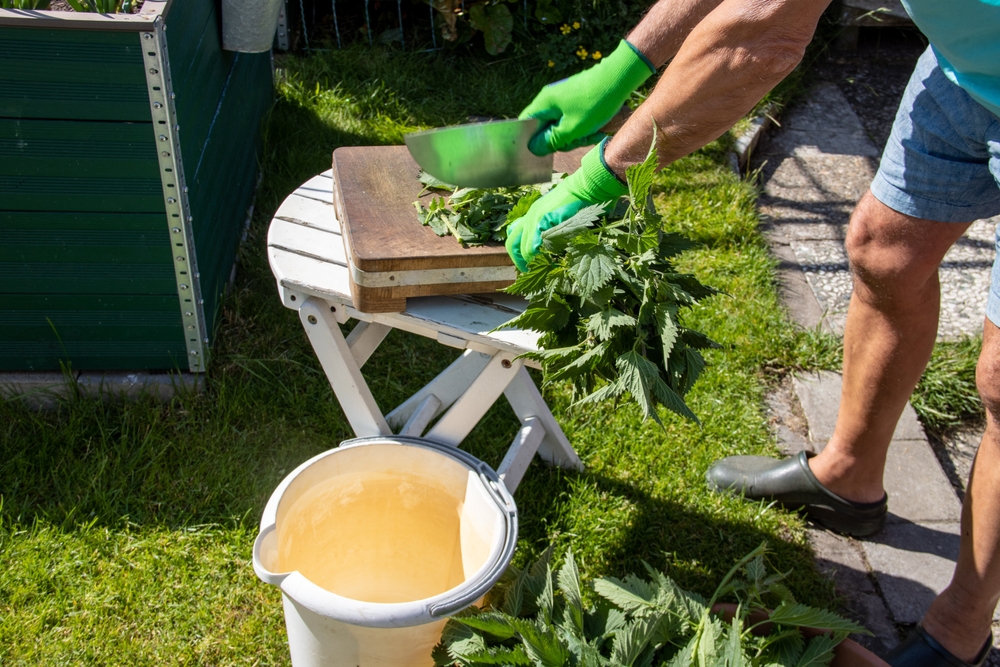
If you have stinging nettles or comfrey growing anywhere near your garden, you’re sitting on free, outstanding liquid fertilizer. Both plants have extraordinarily deep root systems that mine nutrients from lower soil layers. Comfrey in particular is so high in potassium it’s sometimes called “the gardener’s potash.” Cut a big armful, stuff it into a bucket, weigh it down with a brick, fill with water, cover loosely, and leave it for three to four weeks. It smells absolutely rank. It’s worth it.
Dilute the resulting dark liquid at a ratio of 1 part feed to 10 parts water before applying. Any stronger and you risk root burn. Use it every two weeks through the growing season on tomatoes, squash, brassicas, and anything else that’s a heavy feeder. Comfrey feed is especially good once fruiting starts because of its high potassium content, which supports fruit development. Nettle feed is higher in nitrogen and better for leafy growth earlier in the season. I keep two buckets going, one nettle and one comfrey, and alternate them. The smell disappears within minutes of being diluted and watered in.
6. Make proper leaf mold and use it everywhere
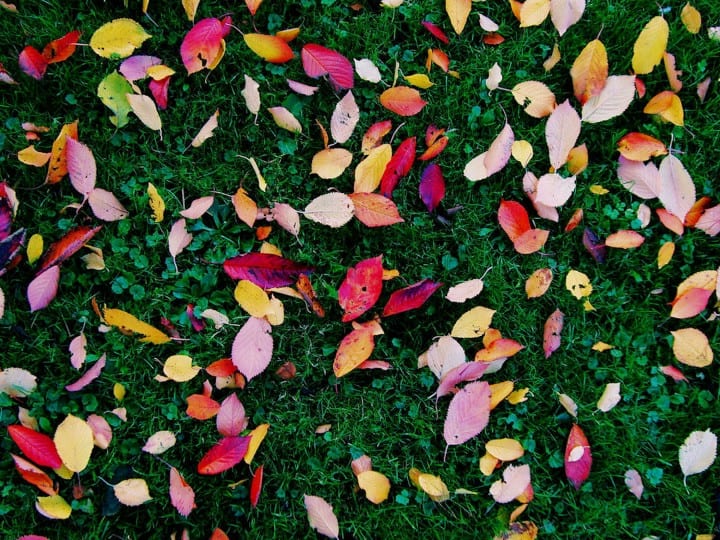
Leaf mold won’t add a huge burst of nutrients to your soil, and that’s not really the point. What it does is improve soil structure in a way that almost nothing else matches. It opens up clay, helps sandy soil retain water, and feeds the fungal networks that your plants depend on. It’s also completely free, takes no effort to make, and autumn gives you a massive supply of raw material every single year.
Rake or blow your autumn leaves into black garbage bags, add a splash of water if they’re very dry, tie loosely, and stab the bags a few times for airflow. Leave in a corner for 12 to 18 months. What comes out is dark, crumbly, and earthy-smelling: one of the best mulches and soil amendments you can put around fruit trees, under shrubs, or worked into the surface of vegetable beds. Oak and beech leaves make the finest leaf mold. Avoid using large quantities of pine needles, as they break down too slowly and acidify the soil aggressively. Everything else (maple, ash, hornbeam, apple) works perfectly. If you want to speed things up, run the leaves over with a mower before bagging. Shredded leaves decompose in 6 to 9 months rather than 12 to 18.
7. Plant shallow-rooted herbs under fruit trees
The bare circle of earth that most people maintain under their fruit trees is a missed opportunity. That ground is sheltered, partially shaded, and sitting in the drip zone of the tree, and those conditions suit a whole range of useful plants perfectly well. The shallow-rooted, shade-tolerant herbs you plant there won’t compete meaningfully with the deep tree roots, and many of them actively benefit the tree by attracting predatory and pollinating insects to the exact spot where they’re needed.
Comfrey is the obvious choice. It mines deep nutrients that become available to the tree as the leaves break down, and it makes the liquid feed described above. Chamomile, sweet cicely, and lemon balm all tolerate partial shade and attract beneficial insects. Wild garlic suppresses weeds and deters some pests. Nasturtiums provide a cheerful, edible ground cover and act as a trap crop for aphids, drawing them away from the tree. Avoid planting anything in the immediate crown area. Keep a clear foot or so around the trunk to prevent disease and pest pressure against the bark. But from there outward to the drip line, fill that ground with something useful.
8. Use companion planting deliberately, not decoratively
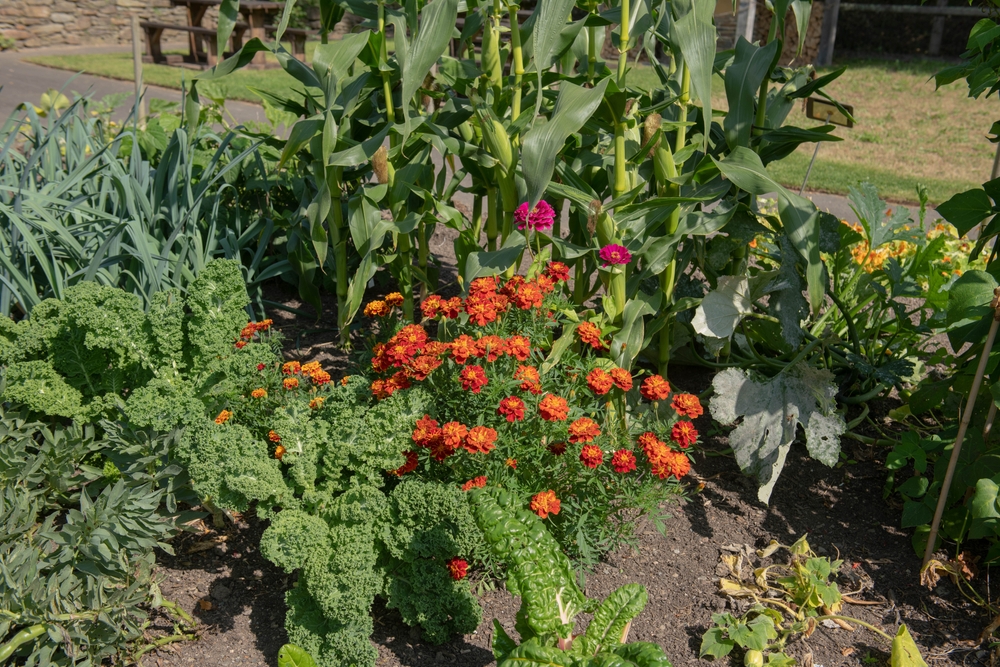
The word “companion planting” has become so associated with pretty cottage garden aesthetics that people forget it’s a functional pest management system. The combinations that actually work do so because of specific, measurable mechanisms: volatile chemical compounds that repel or confuse insects, root exudates that suppress soil pests, flower structures that attract and feed the exact predatory insects you need.
French marigolds (Tagetes patula) planted near tomatoes and squash genuinely suppress soil nematodes through root exudates and deter whitefly. Chives alongside carrots mask the scent that carrot fly uses to locate its host. Nasturtiums act as an aphid trap crop. The aphids colonize the nasturtiums and stay there rather than spreading to your vegetables, and the bright flowers attract the hoverflies and ladybugs that eat them. Dill and fennel attract parasitic wasps that lay their eggs in caterpillars. A single parasitic wasp can eliminate a hornworm infestation faster than any spray. The principle throughout is the same: mix things up, keep it diverse, and you create a garden that regulates itself far better than any monoculture ever will.
9. Scarify hard seed coats with sandpaper or a nail file
Some seeds have evolved to take years to germinate in the wild because they need their tough seed coat broken down by soil acids, freezing, or the digestive systems of animals before water can penetrate. In your garden, that means disappointing germination rates and long waits. The fix is scarification: deliberately nicking or roughing up the seed coat before sowing so moisture can get in.
For large seeds like sweet peas, morning glory, nasturtiums, and lupins, rub them gently against a piece of fine sandpaper or draw a small nick in the seed coat with a nail file. You’re just breaking through the outer layer, not damaging the embryo inside. After scarifying, soak the seeds in lukewarm water for 12 to 24 hours before sowing. You’ll see many of them visibly plump up as they absorb water. Germination rates that were previously patchy and slow become fast and uniform. This is particularly worth doing with any older seeds that have been stored for a few years and have hardened further.
10. Chit your potatoes before planting
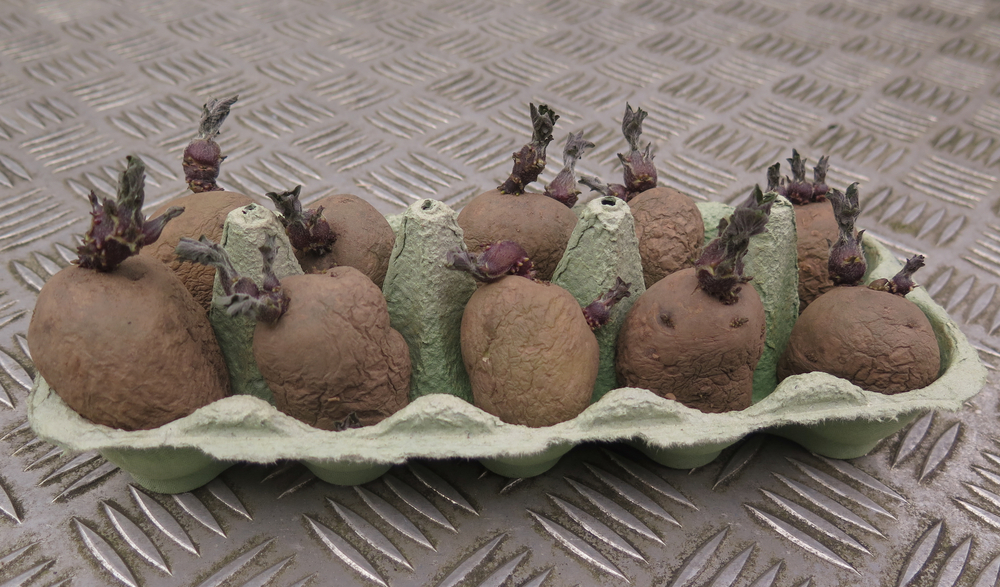
Chitting means setting seed potatoes in a cool, light place to develop short, stubby sprouts before planting. It gives you a head start of 2 to 3 weeks on the growing season. That matters a lot in a short season, and it means your potatoes are already actively growing when they go into the ground rather than starting from scratch in cold soil.
Set your seed potatoes in egg cartons, rose end up (the end with the most eyes), in a cool room with good light. A garage windowsill or spare bedroom works well. Around 50°F (10°C) is ideal. Leave them for 4 to 6 weeks before planting. You want sprouts that are about an inch long, dark green or purplish, and sturdy. Pale, leggy sprouts mean it’s been too dark or too warm. If you have a large tuber with many sprouts, you can rub off all but 3 or 4 of the strongest ones before planting. The potato will put all its energy into fewer, stronger shoots and you’ll get larger, heavier tubers than if you left every sprout to fight for resources.
11. Use cardboard as a base layer under mulch
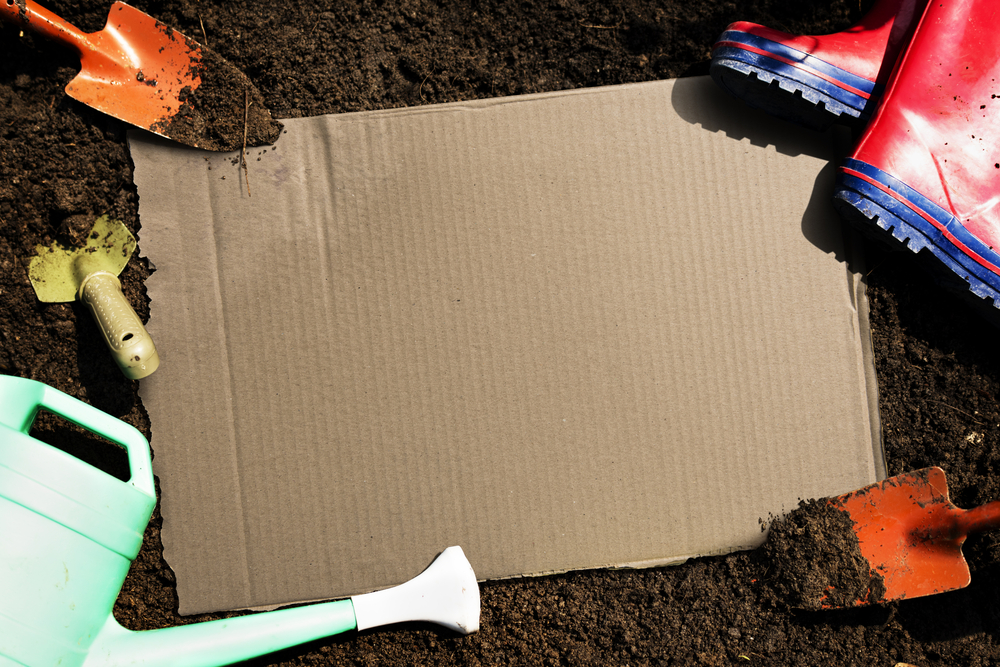
Cardboard is one of the most useful things in a no dig garden and most people throw it in the recycling without a second thought. Laid directly on the ground (over weeds, grass, or bare soil) and covered with a 3 to 4 inch layer of compost, wood chip, or straw, it acts as a physical weed barrier while it decomposes. Unlike plastic membrane, it breaks down completely within a single season, feeding the soil as it goes and leaving the worm population undisturbed.
The technique for converting a new growing space is simple: mow or cut down whatever is growing there, lay cardboard directly on top overlapping the edges by at least 6 inches so light can’t get through the seams, wet it thoroughly, and cover it with your mulch layer. You can plant through it immediately by cutting slits or circles in the cardboard. The weeds and grass underneath break down rather than regrow, and the earthworms go absolutely crazy for it. Cardboard is essentially a worm magnet, and within a few months the soil underneath becomes noticeably more alive. Remove any tape and staples before laying, and use plain unprinted cardboard where you can, particularly around food crops.
12. Use copper barriers and sharp mulches for slugs
Slugs are responsible for more seedling losses than almost any other cause, and the old school solutions (copper and texture) work through straightforward physical and chemical mechanisms rather than poison. Copper reacts with the slug’s mucus to produce a mild electric-like deterrent effect. A band of copper tape around a pot or raised bed edge, kept clean and free of soil bridges, will turn slugs back reliably. It won’t catch the ones already inside the barrier, so clear those first.
Sharp-textured mulches work through simple abrasion. Crushed eggshells laid around vulnerable transplants create a surface slugs avoid crossing. Sharp grit works on the same principle. Neither is completely foolproof in very wet conditions when slugs are most active, but both significantly reduce damage without harming the ground beetles, hedgehogs, frogs, and birds that are your best long-term slug control. Those predators need slug populations to stay alive, which is exactly why chemical pellets, even so-called wildlife-friendly ones, undermine the natural system you’re trying to build.
13. Sow a pinch of radish seed with slow-germinating crops
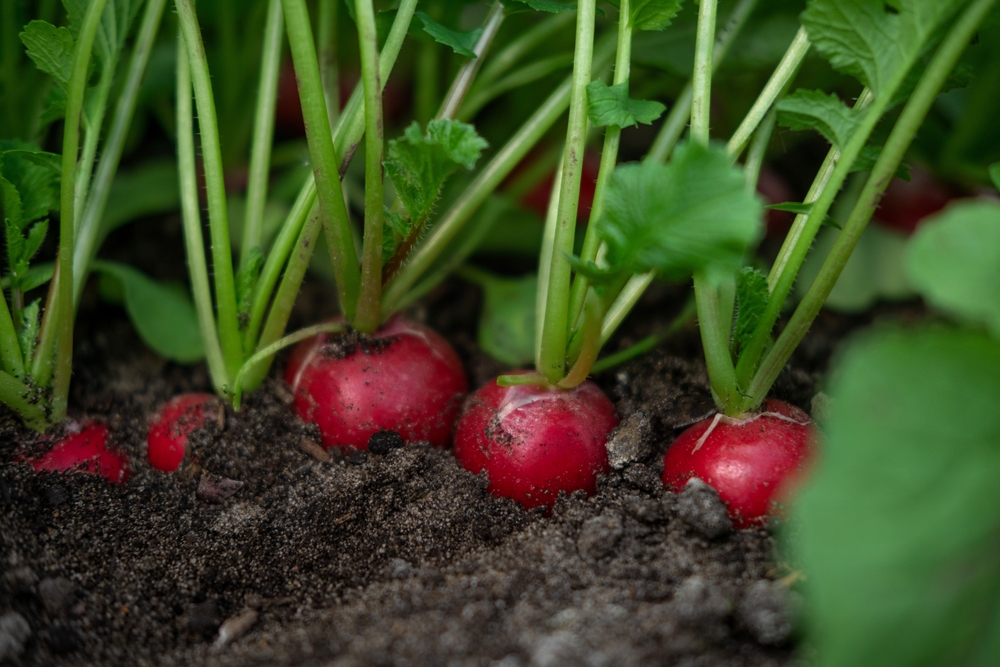
Parsnips can take 3 to 4 weeks to germinate, and in that time the row is invisible. You can’t hoe without risking the seedlings you can’t see, weeds get ahead, and you end up either doing nothing or on your hands and knees hand-weeding. The old trick is to sow a few radish seeds in the same drill when you sow your parsnips, carrots, or any other slow germinator. Radishes come up in 5 to 7 days, clearly marking the row so you know exactly where it is and can hoe right up to the line without guessing.
By the time the main crop needs the space (6 to 8 weeks in) the radishes are ready to pull and eat. They’ve marked the row, suppressed the weeds in the row itself, and fed you in the process. It’s one of those tips that seems almost too neat to be true, but it solves a genuinely annoying problem perfectly. Use it for beets and leeks too, any time you’re sowing something that sulks underground for weeks before showing itself.
14. Grow green manures on empty beds
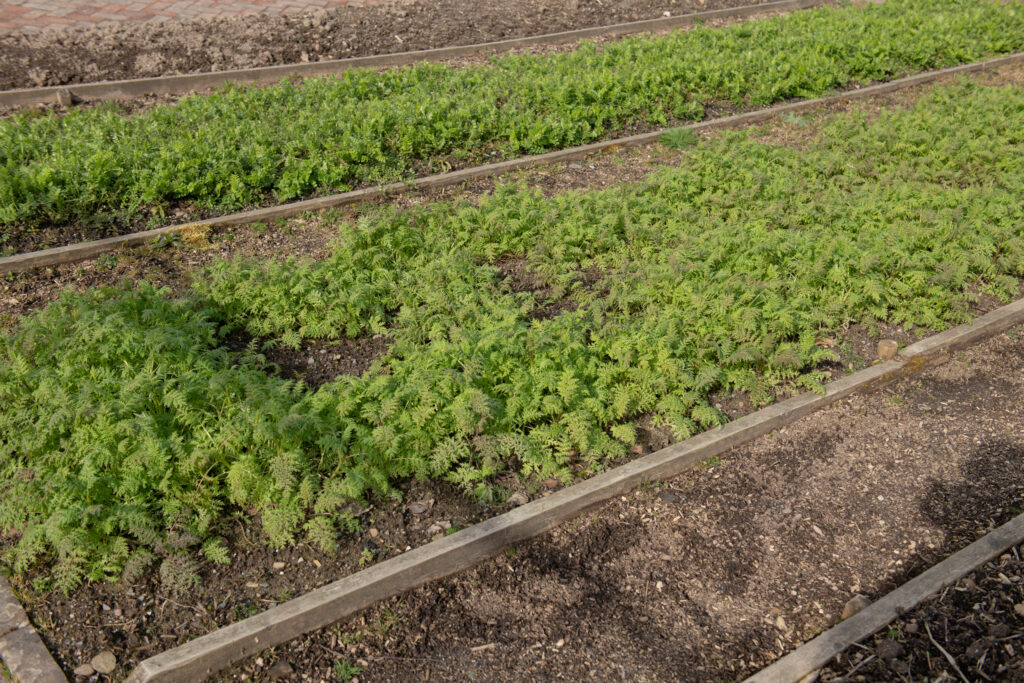
An empty bed is a wasting asset. Rain compacts and erodes bare soil, weed seeds blow in and germinate freely, and nutrients leach out over winter without plant roots to hold them. The old solution is to sow a fast-growing cover crop, a green manure, any time a bed finishes producing. Cut it down before it sets seed and leave the material on the surface to break down, which it does in weeks. The roots decompose in the soil, adding organic matter, improving drainage, and in the case of nitrogen-fixing species, actively boosting fertility.
Phacelia is one of the best all-round choices. It covers a bed in 6 to 8 weeks, produces flowers that are spectacular for bees, and is killed by hard frost so you don’t even need to cut it down in autumn. Field beans and clover fix nitrogen and add significant organic bulk. Winter rye sown in September provides dense weed suppression through winter and is cut down in early spring before planting. You don’t dig any of this in. Cut at soil level, leave the tops in place, apply compost on top, and let the worms do the rest.
15. Soak seeds before sowing for faster germination
Water is what triggers germination. It activates the enzymes that start breaking down stored food in the seed and signals the embryo to grow. Soaking seeds in lukewarm water for 8 to 24 hours before sowing gives them a head start by saturating the seed coat before it ever goes in the ground, which means the trigger happens faster and more uniformly than when you rely on soil moisture alone.
This is particularly valuable for seeds with hard coats (sweet peas, beans, squash, corn) and for sowing in marginal conditions: early spring when the soil is cold and dry, or midsummer when surface soil dries out fast. Don’t soak for longer than 24 hours or in hot water; you’re looking for hydration, not cooking. Seeds that have visibly swelled have absorbed water successfully. Drain and sow immediately. Don’t leave them sitting wet in a cup for days or they’ll start to go moldy or sprout in the wrong place.
16. Use a toilet roll tube to direct-sow deep-rooted transplants
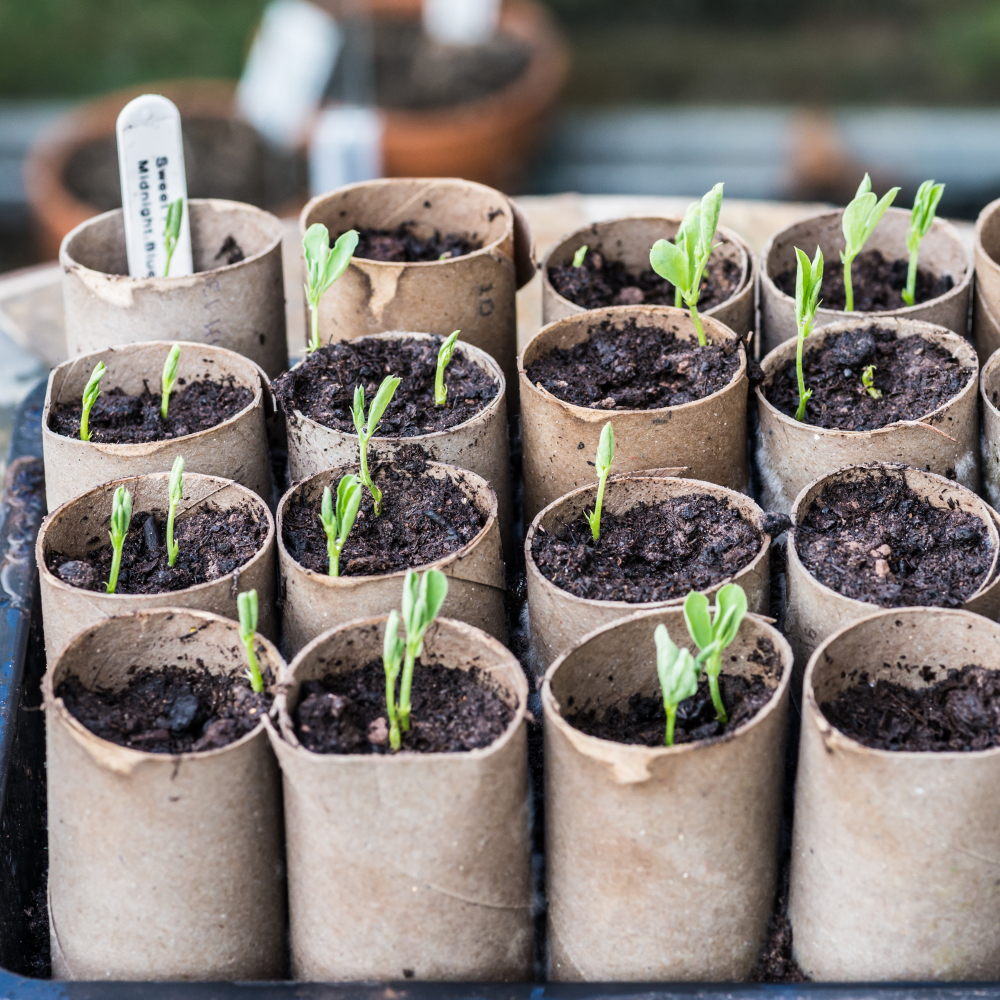
Parsnips, carrots, and sweet peas all produce long taproots that resent any disturbance to their root system at transplanting. The standard advice is to direct sow them, but this leaves you at the mercy of slugs, cold soil, and uneven germination. The toilet roll tube method gives you the best of both: germinate indoors in deep, protected conditions, then plant out the entire tube without disturbing the root at all.
Fill toilet roll tubes tightly with a good seed starting mix, stand them upright in a tray, sow one or two seeds per tube, and germinate indoors on a warm windowsill. When the seedlings are ready to go out, plant the entire tube directly into the ground. The cardboard decomposes quickly, the root grows straight down through the bottom without any disturbance, and you’ve bypassed the trickiest weeks of early seedling vulnerability. This works brilliantly for sweet peas, parsnips, and any other tap-rooted plant that normally sulks after transplanting.
17. Feed the soil under established trees with surface compost, not digging
A lot of people think that to feed an established tree, you need to dig fertilizer into the root zone. You don’t, and you shouldn’t. Tree feeding roots are in the top 6 to 12 inches of soil, spread out to the drip line and beyond, and digging anywhere near them severs them and invites disease. The old orchard keeper’s method is to mulch heavily and let it work its way down.
In autumn, spread a 3 to 4 inch layer of compost, well-rotted manure, or leaf mold from the trunk outward to the drip line and beyond. Keep a clear foot around the trunk itself so the bark doesn’t rot against damp organic matter. That’s all. The earthworms pull the nutrients down over winter, the roots follow, and by spring the tree has been fed without a single thing being dug in. Do this every year and fruit trees will reward you for decades. Neglect it and no amount of liquid feeding will make up for a depleted, compacted root zone.
18. Observe your garden with specific attention, not a general glance
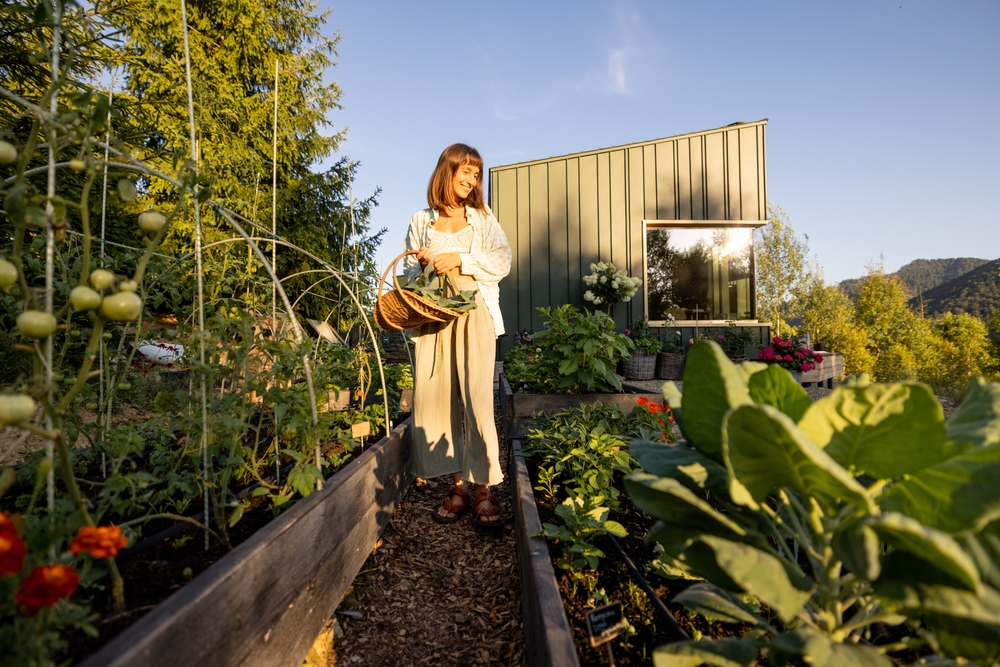
This is the one tip you can’t buy anything to help with, which is probably why it gets left off most lists. The gardeners who grow food most consistently well are the ones who look carefully. Not a general sweep of the eye while walking past, but turning leaves over, checking the undersides of brassica leaves for cabbage white eggs, noticing which end of the bed drains slowly after rain, seeing which plant is the first to show nutrient deficiency every year without fail.
Catching a pest problem early changes everything. A hundred cabbage white eggs wiped off the underside of a leaf with your thumb takes five seconds. The same infestation three weeks later is a full defoliation. An aphid colony on a new shoot, caught at 20 individuals, is nothing. The same colony at 2,000 is a real problem that’s already spreading. Spend ten minutes walking slowly through the garden before you start any task, look at things rather than just seeing them, and your interventions will be smaller, faster, and more effective every single time. That’s not poetic advice. It’s practical mechanics.
The common thread
Every one of these tips works by working with something that already exists: the biology in your soil, the structure of the plant, the behavior of the pest, the chemistry of the compost. None of them require you to override a natural system with a purchased substitute. That’s what makes them old school: not that they’re antique, but that they were developed by people who understood their gardens intimately because they depended on them, and they passed down what actually worked.
Start with the ones that solve a problem you already have. The clothes peg if you’re training fruit trees. The wood ash if mice keep getting your peas. The fish scraps if your tomatoes have always been underwhelming. Get those working, then add more. The tips compound. A garden with good soil biology, good companions, and active observation needs very little else.