Affiliate disclosure: This post may contain affiliate links. Please see full disclosure.

(Last updated September 2025)
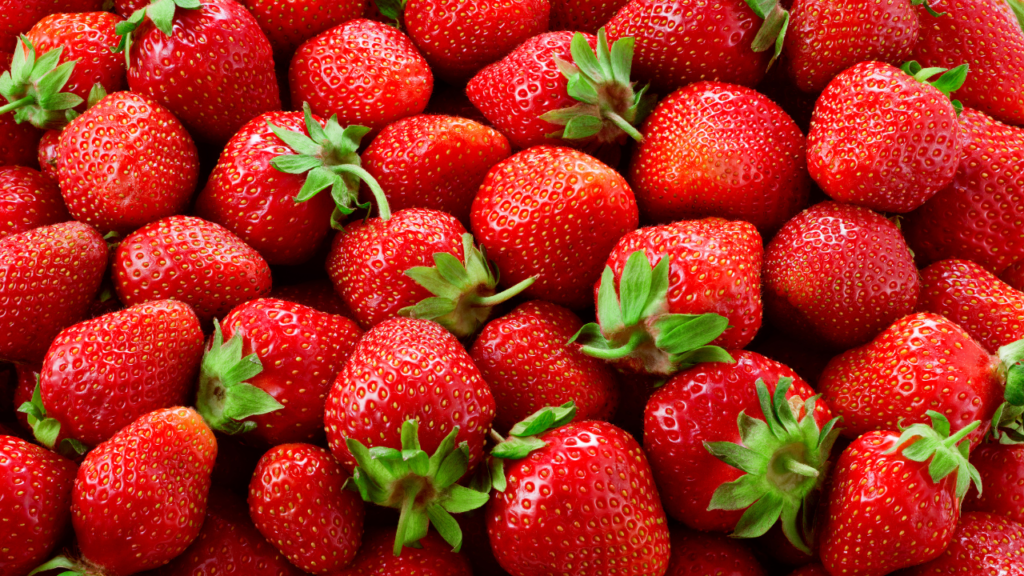
Strawberries are a delicious summer treat. Naturally sweet and bursting with good stuff, but they’re expensive from the grocery store, and you end up with wasted strawberry tops. But did you know that you can grow strawberries from scraps?
Well, you can!
Strawberries are versatile and, as long as you choose the right varieties, they’re easy to grow, and you’ll have beautiful fruit from early summer to early fall.
But you really don’t need to spend a small fortune on expensive hybrid plants from the nursery. Instead, simply learn how to grow strawberries from scraps.

Can you plant old strawberries? Sure! But the best results don’t come from just burying old berries, they come from doing just a little bit of prep work to separate seeds from flesh to get the seeds germinating at a higher rate.
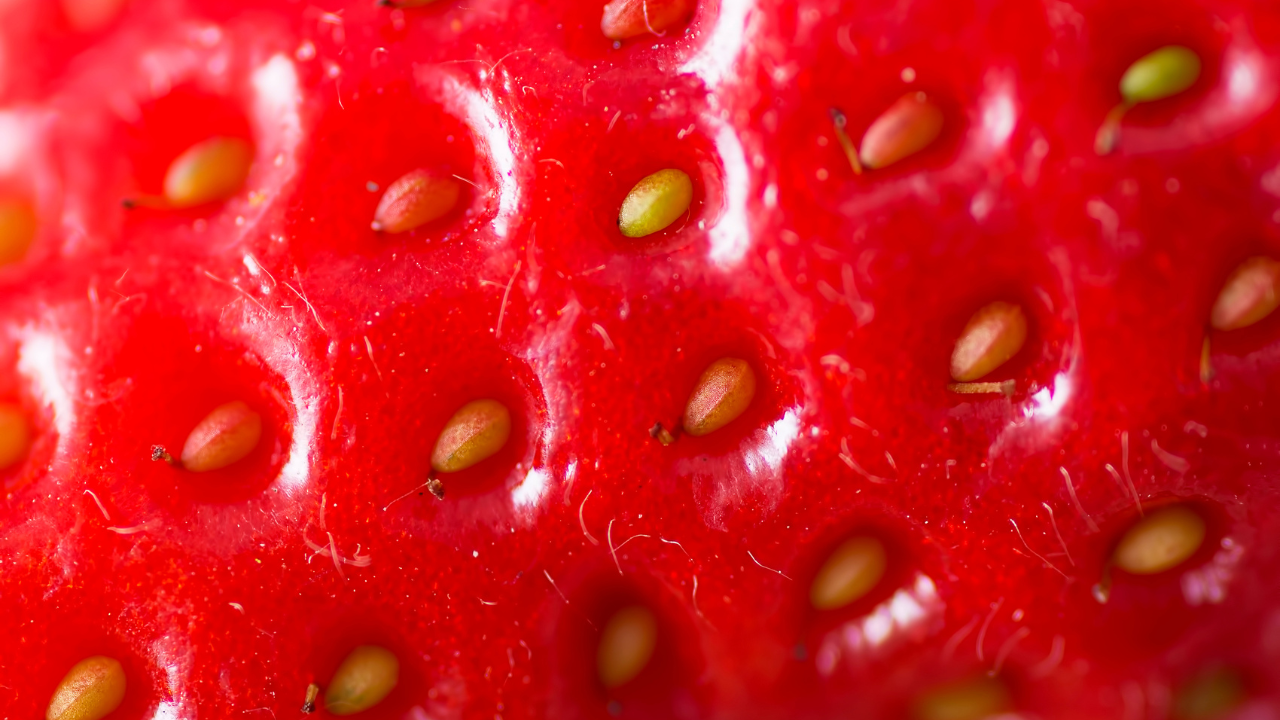
When you cut fresh strawberries and discard the scraps, you’re usually throwing away viable seeds, too.
If you prepare them properly, you can grow new strawberry plants from these scraps, but you can’t just bury a whole strawberry and expect it to grow a bunch of new plants – it’ll just rot in the ground.
While I actually don’t need to do this on a regular basis, because my strawberries usually produce plenty of runners and maiden plants each year, I’ve done it with great success. I made it a fun project for me and the littles, and I’ve used this method to produce enough new plants for friends as extra-thoughtful gifts so they have enough plants to start their own strawberry garden.

Step 1. Choose the Right Strawberries to Grow From Scraps
This is the most important step. Get this wrong, and you’ll never grow fruit-bearing plants. You want local and organic.
Why?
Because locally grown strawberries are proven to grow well in your area. They are varieties that are guaranteed to do well in your soil and climate.
Just using generic fruits that are force-grown or imported that you buy from the nearest supermarket or grocery store won’t give you the results you want.
Even if you got them in the organic section, there’s a significant chance that these fruits won’t be well-suited to your climate.
Organic is a must. It’s as important as the locally grown element.
Unless you buy organic fruits, you don’t know what they’ve had sprayed on them, and commercially-grown inorganic fruit like strawberries often have chemicals sprayed on them to prevent regrowth, so however much care you take, you’ll never grow new plants from this type of seed.
Therefore, get a punnet of organic, locally grown fruit for the best chance of growing strawberries from scraps.
If you can, find a local homesteader or grower like me, who will more than likely be happy to let you have some beautifully ripe berries.
Step 2: Leave to Ripen
You can either eat all the fruit and keep the tops with some flesh and seeds on, or you can just set aside three or four berries.
Leave them in a sunny spot until they are approaching extreme ripeness, heading to over-ripe (but not moldy).
Step 3: Separate Seeds From Flesh – How to Harvest Strawberry Seeds
Now, you could get a pair of fine-tipped tweezers and gently pick each seed of the flesh of the strawberry – but that’s insane. And labor-intensive. My way of separating the seed from flesh is much easier. And saner. Put your strawberries in a blender (this is the one I recommend) and add roughly a liter of water.
Turn the blender on its highest setting for 15 to 20 seconds. Leave the mixture to settle for 10 minutes. Scoop out and discard the seeds that float to the top – these won’t germinate – they’re the duds.
Pour the remainder of the liquid into a sieve and run cold water through it until you get rid of as much of the pulp as possible. If you plant the seeds with too much flesh still attached, they’ll rot.
Step 4: Plant the Strawberry Seeds
The next stage of growing strawberries from scraps involves planting the viable seeds you gleaned in step three. Get a large tray and some of the highest-quality seed starting medium you can – like an organic, peat-free blend.
Fill the seed tray with the rich seed-starting compost (I like this one from Purple Cow Organics), dampen it, then sprinkle your seeds over, spacing them equally.
Then cover with a fine layer of compost, but don’t firm it down or the seeds will struggle to push up. Water very finely – preferably with a mister.
Keep the tray warm and in a sunny position, like a kitchen windowsill or, if it’s reasonably warm outside, then pop them in the greenhouse.
You can also cover with a propagator lid to keep them warmer and evenly moist. Don’t let them dry out too much, but avoid over-watering or you’ll rot the seeds.
Step 5: Transplant to Pots
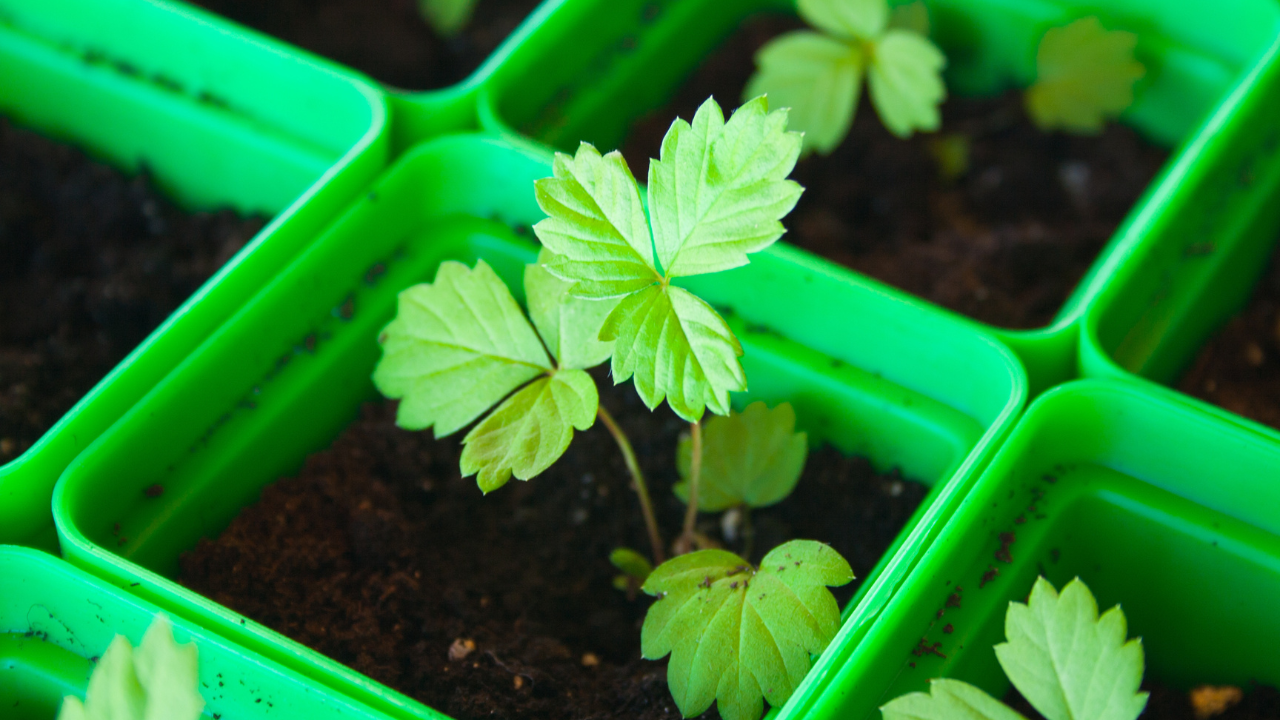
Strawberry seeds take between two and eight weeks to germinate, so don’t panic if you don’t see results quickly – be patient.
Once they shoot and develop their first pairs of true leaves, they should be big enough to handle, at which point you need to transplant them into roomier pots.
Be gentle, as strawberry seedlings are still quite delicate at this stage.
Step 6: Plant in Their Final Position
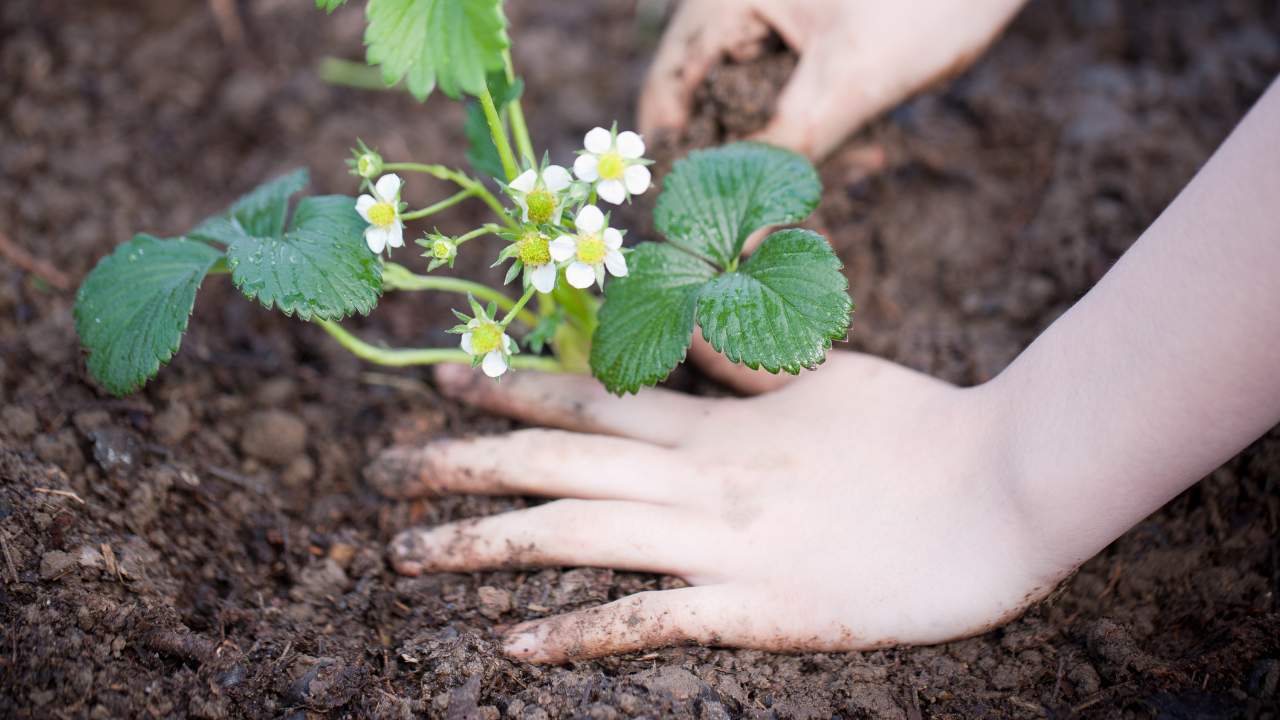
If you bought local, organic strawberries, you purchased them in season. That means your seedlings won’t produce fruit until the following year.
It’s advisable to keep the strawberry seedlings in pots until early the following spring when the risk of frost has passed.
Then, plant them out in their final location. Strawberries like warm, sheltered areas with partial shade and lots of sun. I also highly recommend adding some companion plants that work well with strawberries.
Make sure the soil is rich and has reasonable drainage. Use homemade fertilizer, like coffee grounds or nettle stew, or a specific homemade, organic strawberry fertilizer, throughout the growing season to promote vigorous growth and optimal fruit yield.
Step 7: Pot the Strawberry Runners

If you grow healthy strawberries from scraps, unless you’ve chosen an alpine variety, you should get multiple runners, with several new plants on each, from every plant year after year, so you’ll never run out of strawberry plants.
On average, a strawberry plant fruits at its peak for four years. After this, you’ll want to think about replacing them. So, taking the time to pot up your runners each year makes total sense. Plus, you can give away or even sell the young plants that you don’t want. I make a few extra bucks by potting up my strawberry starts and selling them at local markets, advertising in local social media groups, and having a little stall with an honesty box at the front of my property.
Strawberry runners are clever. They’ll root wherever they find suitable conditions, so just place a pot full of rich compost beneath each little nodule (you’ll see little leaves start to shoot from each nodule) on every runner.
Each new strawberry plant will quickly root, and the runner will continue on and put out a few more plants. Once the runner stops growing, dries out, or you find you have enough plants already, gently tug the maiden plants and make sure they’ve rooted, then take a sharp knife and cut the runner stems away.
Growing strawberries from scraps is pretty easy, and you’ll get a never-ending supply of new plants year after year. If you want to know how to regrow other things, take a look at our 8 Foods to Regrow From Kitchen Scraps. And if you want to know just what to do with all those strawberry plants, check out our Genius Ways to Grow Strawberries post.
FAQs
Can you grow a strawberry from a strawberry?
Yes! As long as you choose the right variety and follow the steps in this article, it’s actually pretty easy to grow strawberries from a strawberry. The basic steps are:
1. Get a really ripe strawberry and harvest the seeds.
2. Plant the seeds in a high-quality seed starting medium.
3. Once they’re big enough, transfer to pots.
4. Once they’ve grown to first-year maturity, plant outside in their final positions.
For detailed instructions, read the full article.
Can I plant a whole strawberry?
You can try, but planting a whole strawberry isn’t a good idea. Strawberries contain a lot of water, and they decay rapidly, so if you just plant a strawberry straight into the soil, it’s more likely that the strawberry flesh will rot and grow mold, which will also destroy the seeds before they get a chance to sprout.
If you really want to grow strawberries from a strawberry, you’re much better off spending an extra couple of minutes harvesting the seeds from the flesh of the fruit and planting them properly.
How long do strawberries take to germinate?
It varies considerably depending on the variety of strawberry, the soil conditions, and your climate. While it can be as fast as one week, it often takes up to six weeks for strawberries to sprout.
Strawberry germination can also be rather sporadic, so you may get a few sprouts after a week or two, and more will appear over the next month.
Be patient!
What are the optimal growing conditions for strawberries?
Strawberries are hardy and versatile, so they can thrive almost anywhere. Their main requirements are at least 8 hours of sunlight and free-draining, loamy or sandy soil. They struggle in excessively damp conditions and with heavy clay soil.
What do strawberry seedlings look like?
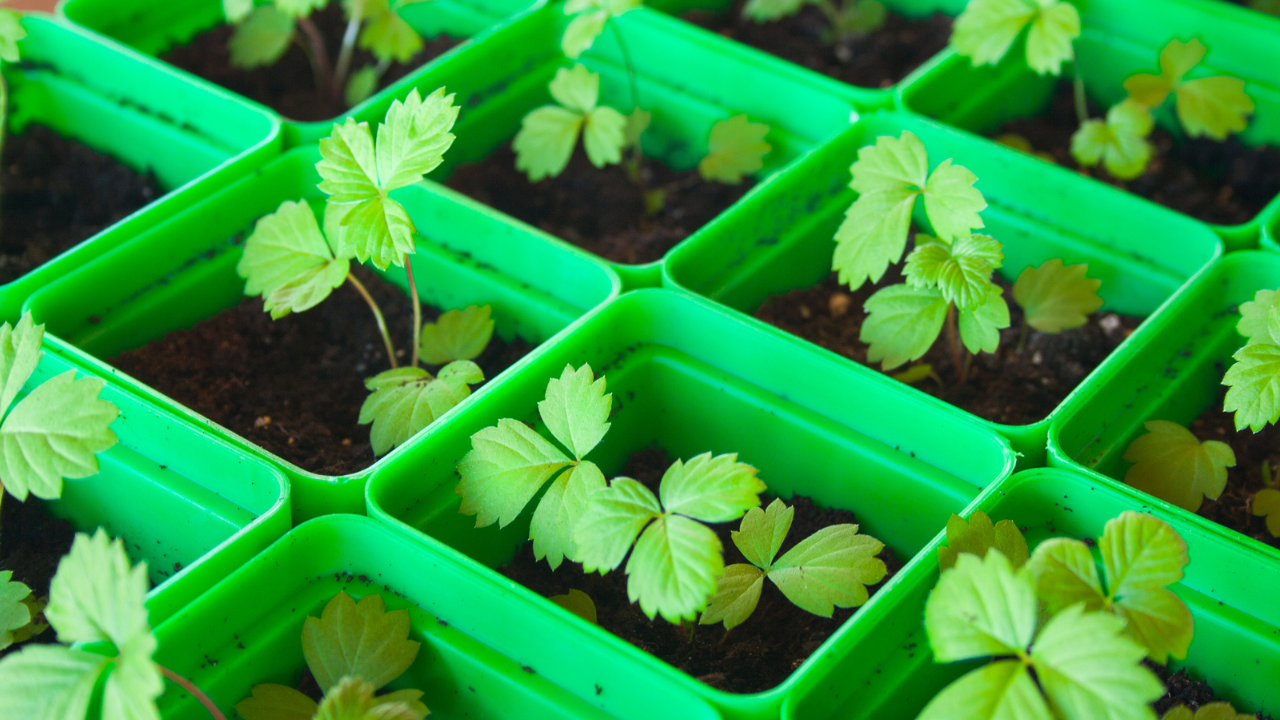
When they first germinate, strawberry seedlings only have two tiny, round “seed leaves”, better known as cotyledons. Then the true leaves start to develop. First you’ll see a pair, with a third appearing shortly afterwards. This completes the first set of trifoliate leaves, and more sets will follow. Strawberry leaves at this immature stage have pronounced serration and are usually fairly light green. The serration becomes less pronounced as the plants mature.
How long does it take to grow strawberries?
How long it takes to grow strawberries from scraps depends on your climate, soil conditions, and strawberry variety. However, you can usually expect to harvest your first strawberries within about 3 months of planting the seeds.
1. Make sure your soil is nutrient-rich, with plenty of organic matter mixed in to provide adequate aeration and moisture. See our organic gardening guide for soil management advice.
2. Help your plants reach their full potential by nipping out the flowers for the first year. This encourages the plant to focus on root and crown growth.
3. Trim runners as soon as they have true leaves if you want to grow them, as this stops them pulling nutrients from the mother.
4. Use organic fertilizer during the growing season, before the fruit sets.
Love this article, the instructions are easy to understand, except I didn’t fully understand what the runners are, where are they on the plant and what do they look like?
Hi Stef, I’m so glad you liked the article! The runners are the overground rhizomes that the strawberry plants put out to replicate themselves. And along these runners, new plants, or “starts” grow. I’ve added a picture in the article for you 🙂
I was just getting ready to toss my strawberry tops and decided to do some research on other options. I might be a little too lazy to follow this process right now, but I’ll definately save this information! How awesome! Thanks!
Ha. Honestly, harvesting the seeds only takes a few minutes! Even if you’re feeling super-lazy, it’s well worth it. And, when you’re harvesting your own strawberries next year, you’ll be so glad you did! 🙂