
Affiliate disclosure: This post may contain affiliate links. Please see full disclosure.
The year I first bothered to chit my seed potatoes, I thought it was going to be one of those fussy Old Gardener rituals that didn’t actually change much.
I was wrong.
The un-chitted spuds in one bed sat there for ages. Weeks went by with nothing showing while the soil warmed up and slugs had a good time. The chitted ones in the next bed were up fast, grew away cleanly, and I was digging new potatoes from them while the others were still playing catch-up.
That’s all chitting really does: it tips the odds your way. You’re waking the potatoes up somewhere safe, getting them to grow short, sturdy sprouts before they ever touch cold, unpredictable soil. It’s simple, it doesn’t cost you anything extra, and for early potatoes especially, it makes a very real difference to how soon you’re actually eating them.
So if you’ve got a bag of seed potatoes in the house and you’re not sure what to do next, here’s exactly how I chit mine and what I’ve learned the messy way.
What chitting actually is
Seed potatoes are just little storage units full of energy and starch. When conditions feel right, they send up shoots from those “eyes” and start growing into plants.
If you don’t do anything at all, that happens in the ground. You plant the tubers, the soil slowly warms, and eventually they sprout under there and push through.
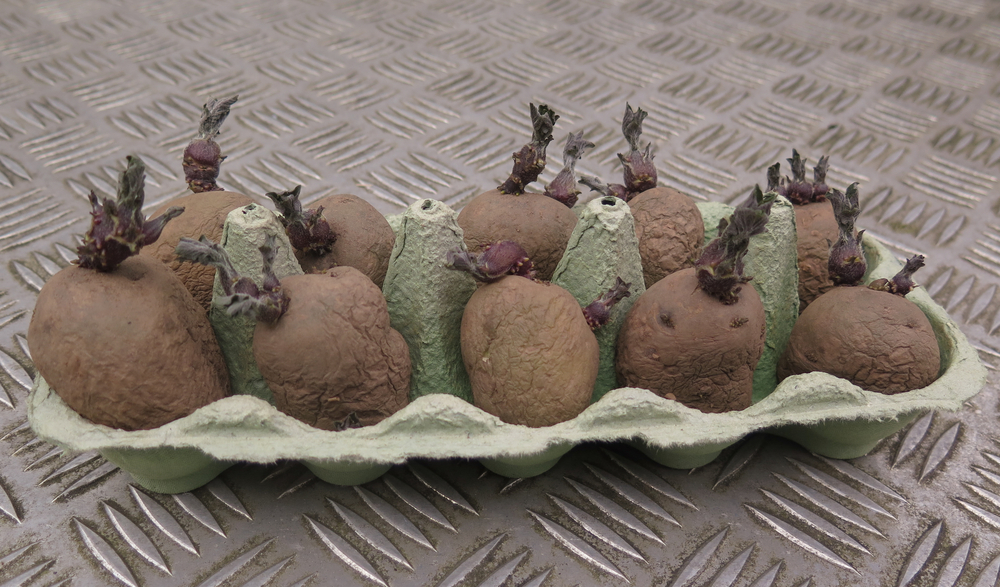
With chitting, you bring that first stage above ground onto a windowsill or into a bright shed. You sit the seed potatoes so the eyes are facing up, keep them cool and frost-free, and let them grow short, thick, coloured shoots for a few weeks before planting.
RELATED: Life Cycle of a Potato
Why I bother chitting (and when I don’t)
Could you skip chitting entirely and still grow potatoes? Of course you could. If you plant good seed potatoes into reasonably warm soil at the right time, they’ll get going on their own.
I still choose to chit most of mine. Here’s why.
It pulls your harvest forward. Chitted earlies are usually ready a good couple of weeks sooner than the ones you just stick in cold ground. That’s a big deal in a short season, or when you’re sick of stored food and craving something fresh.
It evens things out. When I plant chitted seed, the whole row tends to break the surface within a much tighter window. That makes it easier to cover them during a late frost, to earth them up, and to keep on top of watering. Un-chitted seed can be hit-or-miss, with one plant romping away and another still nowhere to be seen.
It helps in dodgy years. In a season when blight shows up early or you get a run of bad weather, potatoes that made a fast, strong start are more likely to bulk up decently before things go sideways.
I almost always chit first earlies and second earlies. I’m more relaxed about maincrops. If I’ve got the space and time, I’ll give them a shorter chitting period too. If I don’t, they go straight in the ground and they’re usually fine.
When to start chitting
The timing sounds complicated until you think about it backwards.
You start with your planting date. For most temperate gardens, potatoes go out about two to four weeks before your last expected frost, once the soil isn’t horrible and claggy and you can dig a trench without creating bricks. The actual date depends on where you live, but the pattern is the same: cold, soggy ground is no good; cool, workable soil is.
Once you know roughly when you’ll plant, count back.
For early potatoes, I like them chitting for about four to six weeks. For maincrop, two to four weeks is usually enough, because they’ve got a longer run once they’re in the soil.
So if you’re aiming to plant around late March, you’d start chitting in late February. If you can’t usually plant until mid-April, you’d probably start in early to mid-March.
You’re aiming for a very particular look on planting day: each seed potato with a small cluster of short, firm, coloured sprouts, about the length of your fingernail up to maybe an inch. If they’re still bare, you left it too late. If they look like white spaghetti, you started too early or kept them in the wrong place.
What you actually need
There’s a lot of over-complicating chitting online, but at home you don’t need anything fancy.
You need seed potatoes. Not whatever’s sprouting in the back of the cupboard. Proper seed potatoes are grown for planting, not eating. They’re certified healthy, which matters because potatoes carry all kinds of diseases in the tubers. Those diseases don’t just ruin this year’s crop; they can stick around and bother your soil, your future potatoes, and your tomatoes.
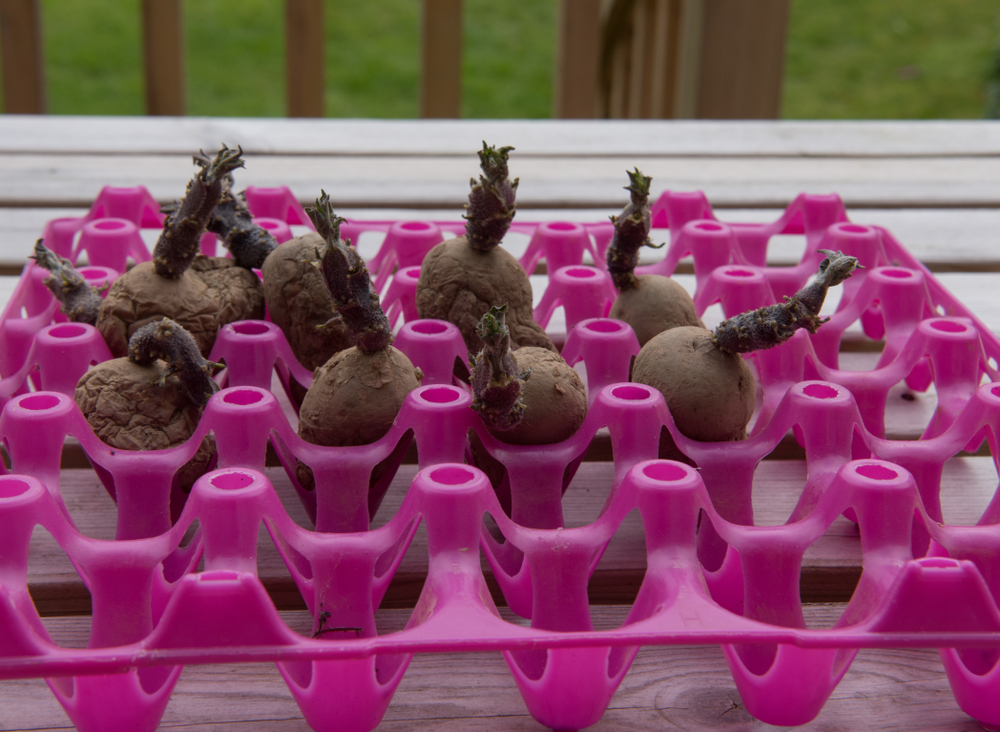
You need something shallow to hold them in. Old egg cartons are perfect. So are seed trays, shallow cardboard boxes, even the plastic trays fruit comes in. The only real requirement is that the potatoes can sit upright and not roll around.
You need a place that is bright, cool, and frost-free. That can be a north-facing windowsill, a bright unheated porch, a spare room that doesn’t get blasted by radiators, or a greenhouse or shed window that doesn’t freeze. You’re aiming for cool spring-like temperatures inside – not a cosy living room and not a fridge.
And that’s it. No compost, no watering, no grow lights, no magical dust. You’re using the food the potato already stored last year.
Sort and understand your seed potatoes
When I bring seed potatoes home, I always open the bag right away.
Tip them out on the counter and actually look at them. They should feel firm, like fresh potatoes from the store, not soft or wrinkled. If one is obviously rotting, moldy, blackened at one end, or reeks, it goes straight in the bin or hot compost. There’s no point nursing a sick potato through chitting.
While you’re there, find the “top” of each potato. One end will be a bit more rounded and will usually have more eyes clustered together. Sometimes you can see tiny buds already starting to swell or show a hint of green or purple. That’s the end you want facing up for chitting.
The opposite end often has fewer eyes and can look a bit flatter. That end will still sprout if it has eyes, but the busy end is your main focus.
You don’t have to cut anything at this point. If the seed potatoes are huge and you know you’ll be cutting them, you can wait until they’re chitted or cut them now and let them dry, but for a beginner it’s much easier to just chit and plant whole, golf-ball-to-egg-sized tubers.
Sit them up to sprout
Set your egg cartons or trays on the table.
Put one seed potato in each little “cup” of the carton, with that eyes-heavy end pointing up. If you’re using a tray or box, stand them close together so they support each other, again with the sproutiest end up.
You don’t need to cover them with anything. Just make sure they aren’t wedged so tight that air can’t move around, and they’re not stacked in two layers.
Once they’re arranged, move the whole lot to their chitting spot: bright, cool, and protected from frost.
If you put them in a warm, dim corner because that’s all you’ve got, you’ll still get sprouts, but they’ll be long, pale, and brittle. If you sit them in a freezing shed, they’ll sit there stubbornly asleep. The magic is in that in-between: enough light to keep the sprouts stocky, enough cool to stop them racing.
What good chits look like

For the first week or two, not much happens. The potatoes are busy inside, getting ready.
Then you’ll see tiny knobs forming around the eyes. Those knobs slowly elongate into little sprouts. On most varieties they’ll have decent colour: greenish, purple, even almost black on some. They stay fairly short and stubby in good light.
That’s exactly what you’re after.
By the time you’re ready to plant, a nice chitted potato will usually have three to maybe six strong shoots, around half an inch to an inch long, with a solid feel to them. They won’t bend like threads if you touch them; they’ll feel more like a very firm seedling.
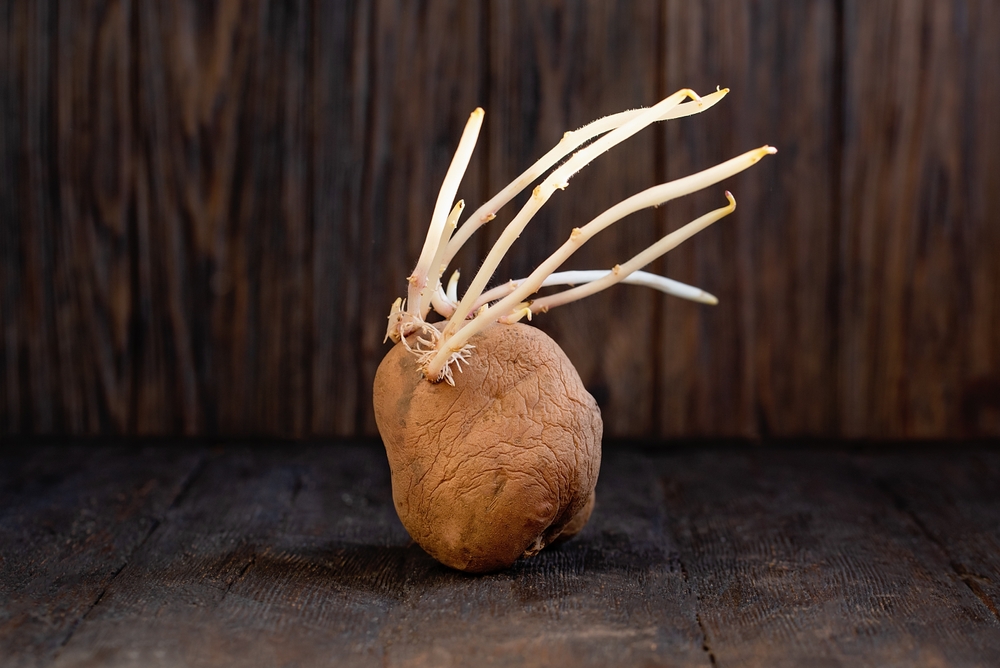
If the shoots are long, pale, and glassy and flop over when you move the tray, that’s what happens in warmth and low light. It isn’t ideal, but it isn’t always fatal either. If they’re ridiculously long, you can gently rub those off with your thumb, move the potatoes somewhere brighter and cooler, and let them resprout. It will delay things, but they’ll usually give you decent plants in the end.
If they’re doing nothing at all and you know it’s been a few weeks, they’re probably too cold or they’re very fresh and still deeply dormant. Move them somewhere a bit warmer but still bright and give them time.
This is the point where you really see the personality of each variety. Some are eager and sprout like mad. Others take their sweet time. That’s normal.
Too many shoots? How I thin them
Some seed potatoes are polite and put out three or four good sprouts.
Others try to become a hedgehog.
When one tuber has a ridiculous number of shoots, you have a choice to make. More shoots usually means more stems above ground and more, smaller potatoes. Fewer, stronger shoots usually means fewer but larger potatoes.
If I’m growing earlies for “new” potatoes, I don’t mind lots of smaller tubers. I often leave more of the shoots on, especially if they’re all roughly the same strength.
If I’m growing a maincrop variety and I want big bakers or chunky roasters, I thin them. I pick the two to four strongest shoots at the top and rub off the rest. It takes seconds and helps the plant focus its energy instead of spreading it across ten weak stems.
You don’t need to be precious about it. Don’t dig around for the perfect shoot. Just look, pick the best, and gently knock the others off.
When they’re ready to plant
They’re ready when the sprouts look sturdy and you’re within a few days of your planned planting date. For most temperate gardens, that’s some time in spring when the soil has stopped feeling like pudding and you can dig a trench without slipping over.
If the weather suddenly turns horrible and you have to delay planting, keep the chitted potatoes as cool as you can and in good light. That slows them down a little. If the sprouts keep growing and start to get silly, thin them again, and just accept they’ll be a bit leggier than you’d like.
The one thing you don’t want is to let them sit chitting for months. A little “ageing” helps, which is what chitting is. Too much and the tuber shrivels, the sprouts get weaker, and you’ve used up a lot of the stored energy before the plant even sees real soil.
Planting chitted potatoes without snapping everything off

When planting day finally lands, the main goal is simple: get those chitted spuds into the soil with most of their nice sprouts still attached.
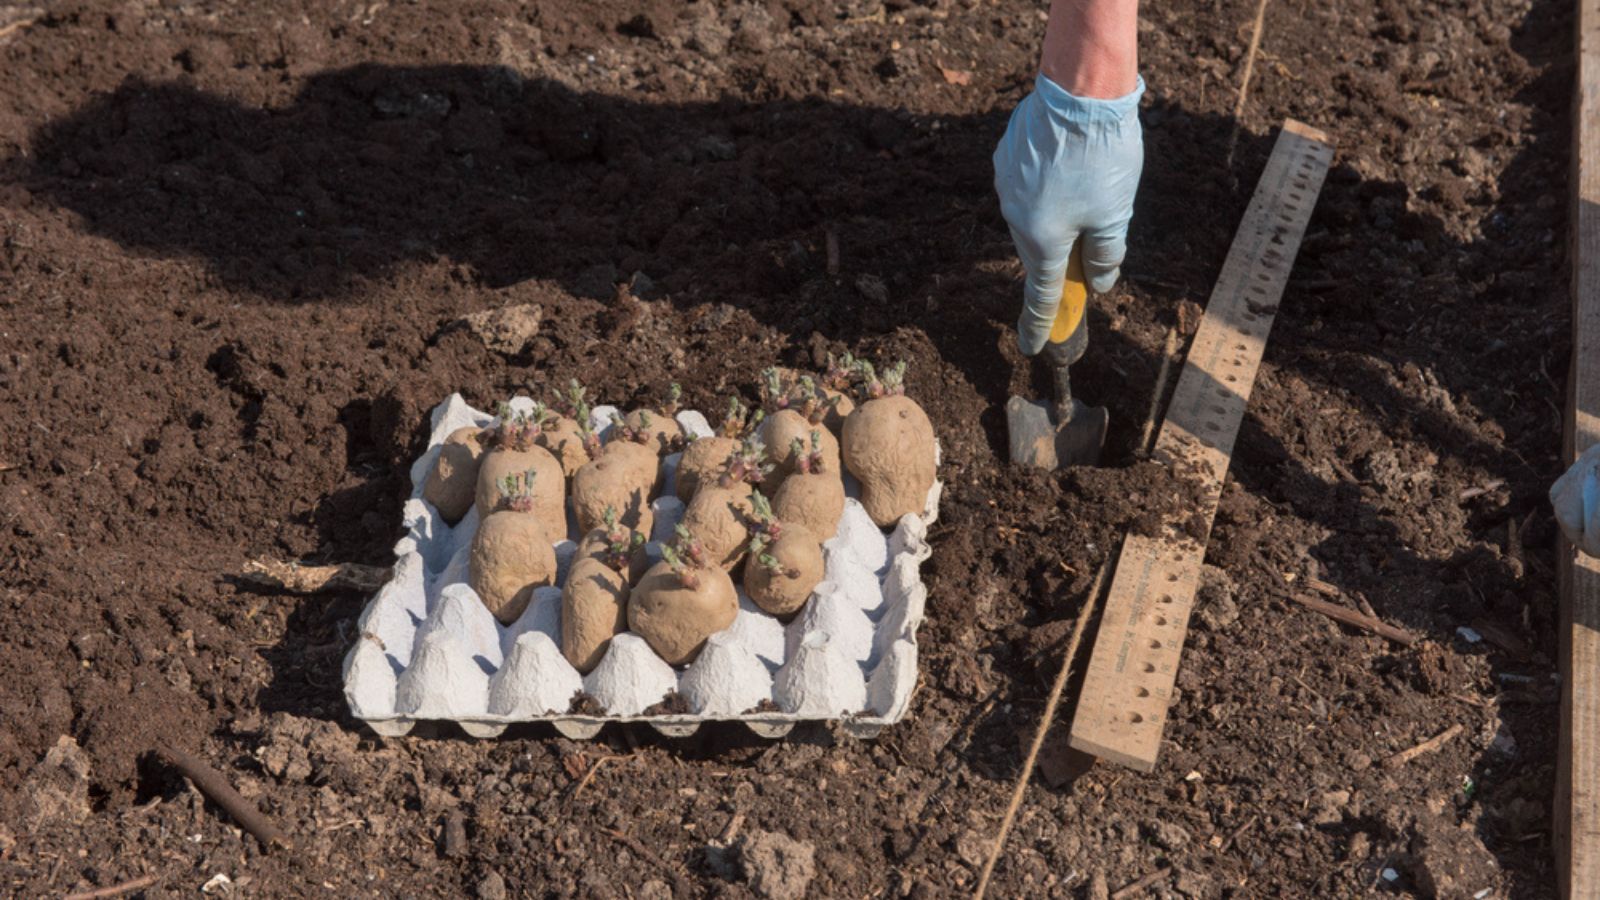
If you’re planting in open ground, prepare the bed first. I like a loosened trench roughly a spade’s depth, with a bit of compost added if the soil is poor. Spacing depends on variety, but as a simple starting point, early potatoes about a foot apart in the row, maincrops a bit further, with space between rows so you can walk and earth them up.
Carry the chitted seed in a tray or crate, not loose in a sack where they’ll bash each other. When you pick one up, hold it in your palm by the tuber, not by the shoots.
Set each potato into the trench with the sprouts pointing up. Cover with soil. Use the finer stuff from the side of the trench first so it falls around the chits without clobbering them. Then pull in the bigger clods.
For containers or grow bags, put a layer of compost in the bottom, set the chitted potatoes on top of that with their sprouts upright, then add more compost over them. Leave room to add more compost later as you “earth up” inside the bag.
You will almost certainly knock off the odd small side sprout as you go. Don’t stress. The main sprouting cluster is what counts.
Once they’re planted, water them in if the soil is dry, then go back to normal potato care: watching for shoots to emerge, earthing up, watering during dry spells.
RELATED: How to Plant Sprouted Potatoes
Common chitting mistakes I see all the time
Because you’re human, and so am I, you’ll probably do at least one of these the first year. It’s fine. You learn.
One is chitting in the dark. Bags left in a cupboard or garage, or trays in a gloomy corner, will still sprout, but the shoots will be long and white and fragile. They’re hard to plant without breaking, and they don’t give the same sturdy start. If that’s happened, move them somewhere bright, rub off the worst of the spaghetti sprouts, and let them recover.
Another is sitting them on a hot, sunny windowsill over a radiator. That combination can cook the tubers on one side and dry them out. They’ll often still sprout, but the potato itself shrivels and you’ve spent a lot of that stored energy too early. Cool and bright beats hot and bright.
Starting too early is a big one. It’s tempting when you’re bored in January. The trouble is, if you start months before you can plant, you end up nursing over-sprouted, exhausted seed for far too long. Aim to start a few weeks before your realistic planting window, not when the catalogues arrive.
Another common problem is relying on supermarket potatoes. Some sprout, some don’t. Many are treated to prevent sprouting. You also have no idea what they’re carrying in terms of disease. If you want to play with a bag of cheap spuds in a container as an experiment, that’s your call, but I wouldn’t rely on them for my main crop.
And finally, leaving the trays somewhere the local mice can raid them. A box of chitting potatoes is basically a buffet with little built-in handles. If you know you’ve got rodents, don’t gift-wrap their dinner. Choose a proper vermin-proof spot, or cover the trays with something they can’t get through.
RELATED: Why Are My Potato Plants Flowering?
FAQs
Can you chit potatoes in total darkness?
You’ll get sprouts, but they won’t be the kind you want. Darkness plus warmth gives long, brittle white shoots. They snap when you look at them. You want light as well as cool temperatures so the sprouts stay short and firm.
Do you have to chit maincrop potatoes?
You don’t have to. They’ll still grow without it, especially in a good, long growing season. I still like to give them a shorter chitting period if I can, because it evens the row out and helps them bulk up a bit earlier, but if you’re tight on space indoors, prioritise the earlies.
How long can you leave potatoes chitting?
Roughly a month to six weeks is the sweet spot. Beyond that, the tubers can start to wrinkle and the sprouts lose quality. If life runs away with you, just plant them as soon as you can and expect them to be a little less vigorous than ideal, not useless.
Do you need to cut seed potatoes?
Not always. If they’re about the size of an egg or golf ball, planting them whole is easiest, especially for beginners. If they’re huge, you can cut them into chunks with two or three good eyes each. Let the cut surfaces dry and form a skin for a day or two before planting so they’re less likely to rot.
Can you chit potatoes in a greenhouse?
Yes, if it stays frost-free and doesn’t swing from freezing to baking every sunny day. If your greenhouse drops below freezing at night, it’s safer to chit in the house and only move them out when the worst cold is over.
You Might Also Like…
12 Best Flowers and Vegetables for Companion Planting Vegetables