
Affiliate disclosure: This post may contain affiliate links. Please see full disclosure.
Thanksgiving centerpieces don’t have to mean a florist’s bill, expensive faux greenery, or a huge arrangement that leaves nowhere for the gravy boat. Some of the nicest tables start with things you already have: garden cuttings, pinecones, a shallow bowl, leftover pumpkins, or jars rescued from the recycling. The trick is to give those ordinary materials a little structure, whether that’s a hidden water container, a tape grid, or a few well-placed twigs. I’ve picked projects that have real tutorials behind them, from quick harvest bowls to more involved woven and sewn pieces. Their low-cost appeal depends on what you’ve got to hand, though. A centerpiece made from foraged leaves and an existing vase is thrifty; buying every decorative extra in the photograph often isn’t. For a dinner table, I favor low displays that leave room for plates and conversation. Save the taller creations for a buffet or sideboard, and use LED lighting around dried foliage, paper, and other combustible materials.
Greenery, pinecones, and seasonal produce
1. Foraged Fall Foliage in a Wooden Crate
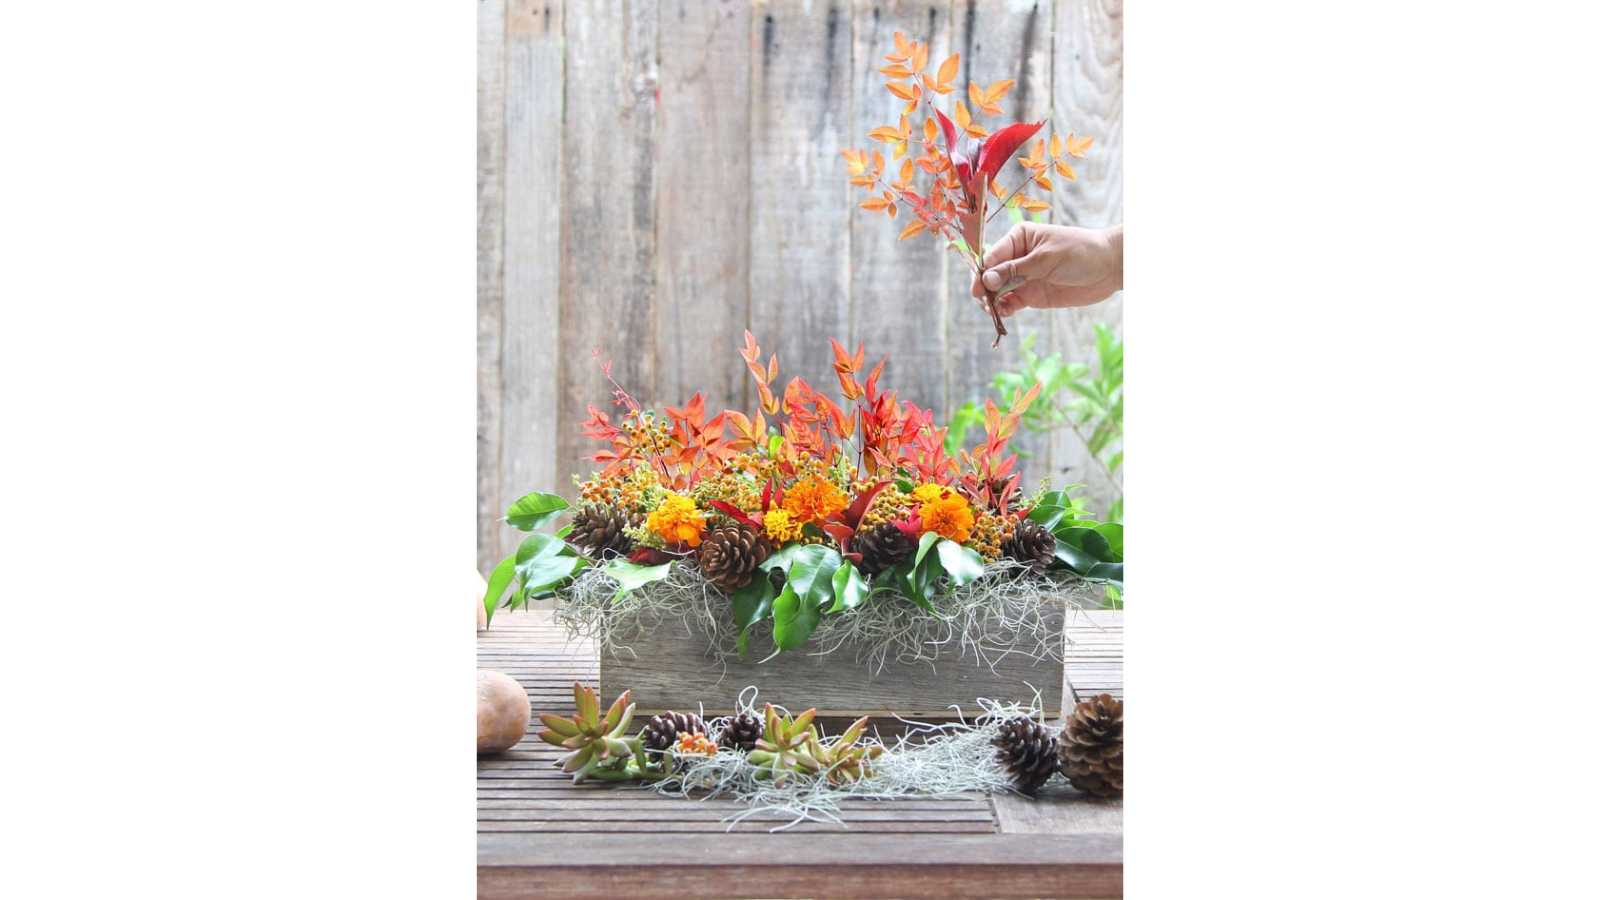
A wooden crate has a much more relaxed look than a formal florist’s arrangement, and this one has a clever secret: plastic water containers tucked inside keep the cut foliage fresh. Ananda mixes leafy branches with flowers, moss, and pinecones, so there is plenty of texture without needing a huge bunch of expensive blooms. Use a crate you already have and cuttings from your own garden to keep costs down. For the dinner table, keep the taller branches trimmed so nobody has to peer through a miniature forest to talk.
2. A Low, Wide Backyard Flower Arrangement
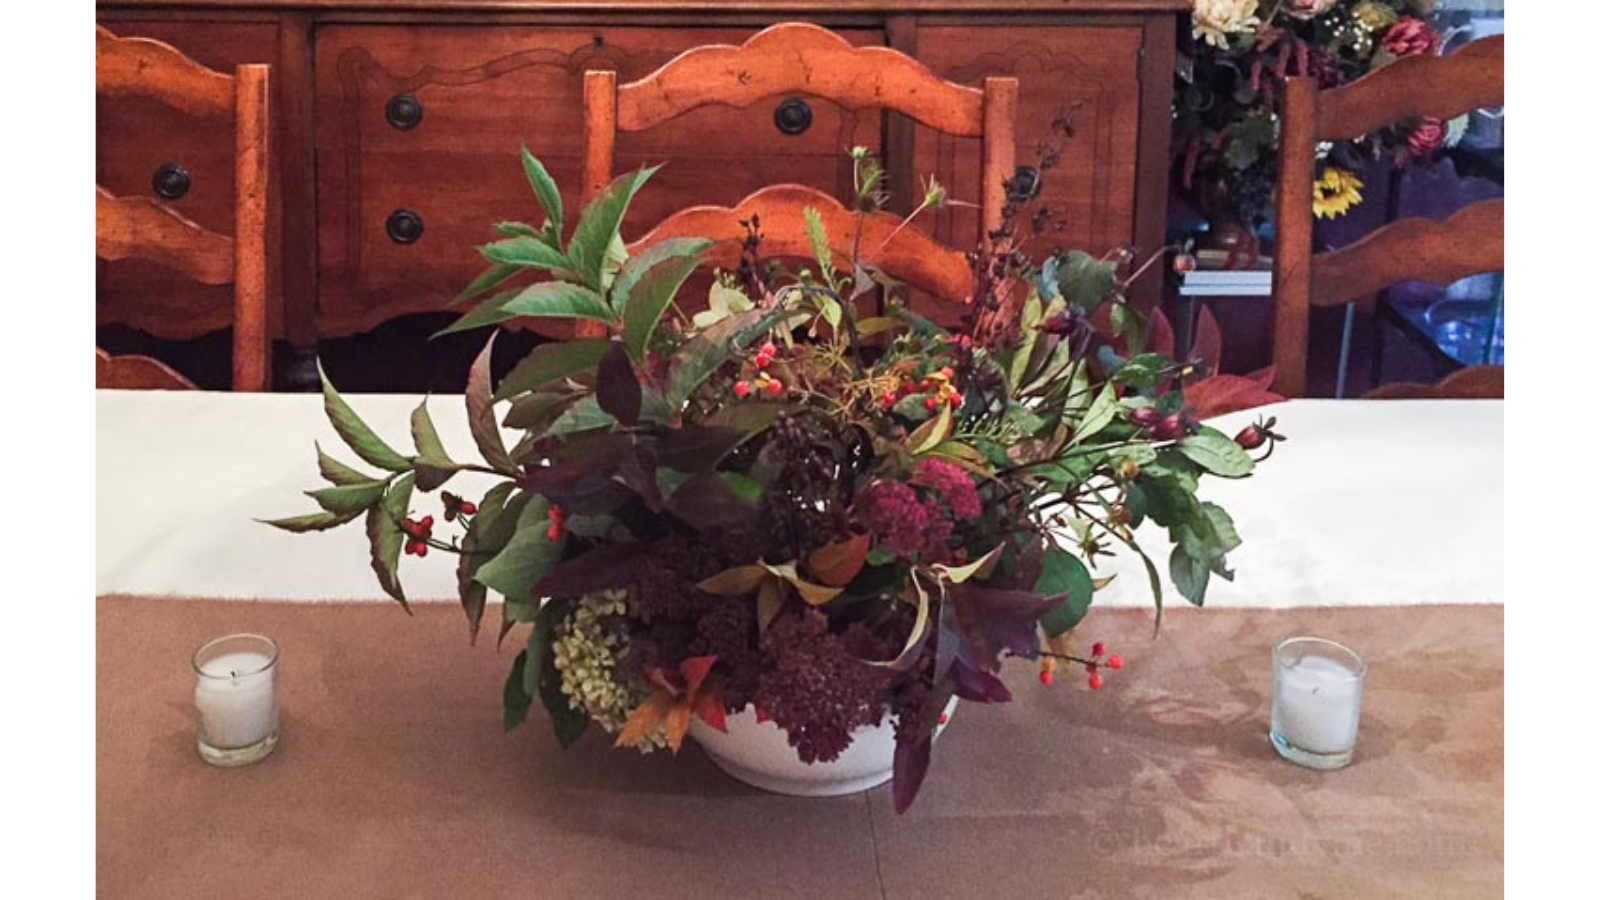
A centerpiece that allows everyone to see each other across the table is worth its weight in gold, especially when Thanksgiving dinner lasts all afternoon. Patti Estep starts with a low, wide container and uses a tape grid, flower frog, or chicken wire to hold backyard cuttings in place. Sturdy branches establish the shape, with smaller flowers filling the gaps. It looks generous without requiring a florist’s bill, and the low profile leaves room for conversation as well as the turkey.
3. A Seeded Eucalyptus Garland for the Table
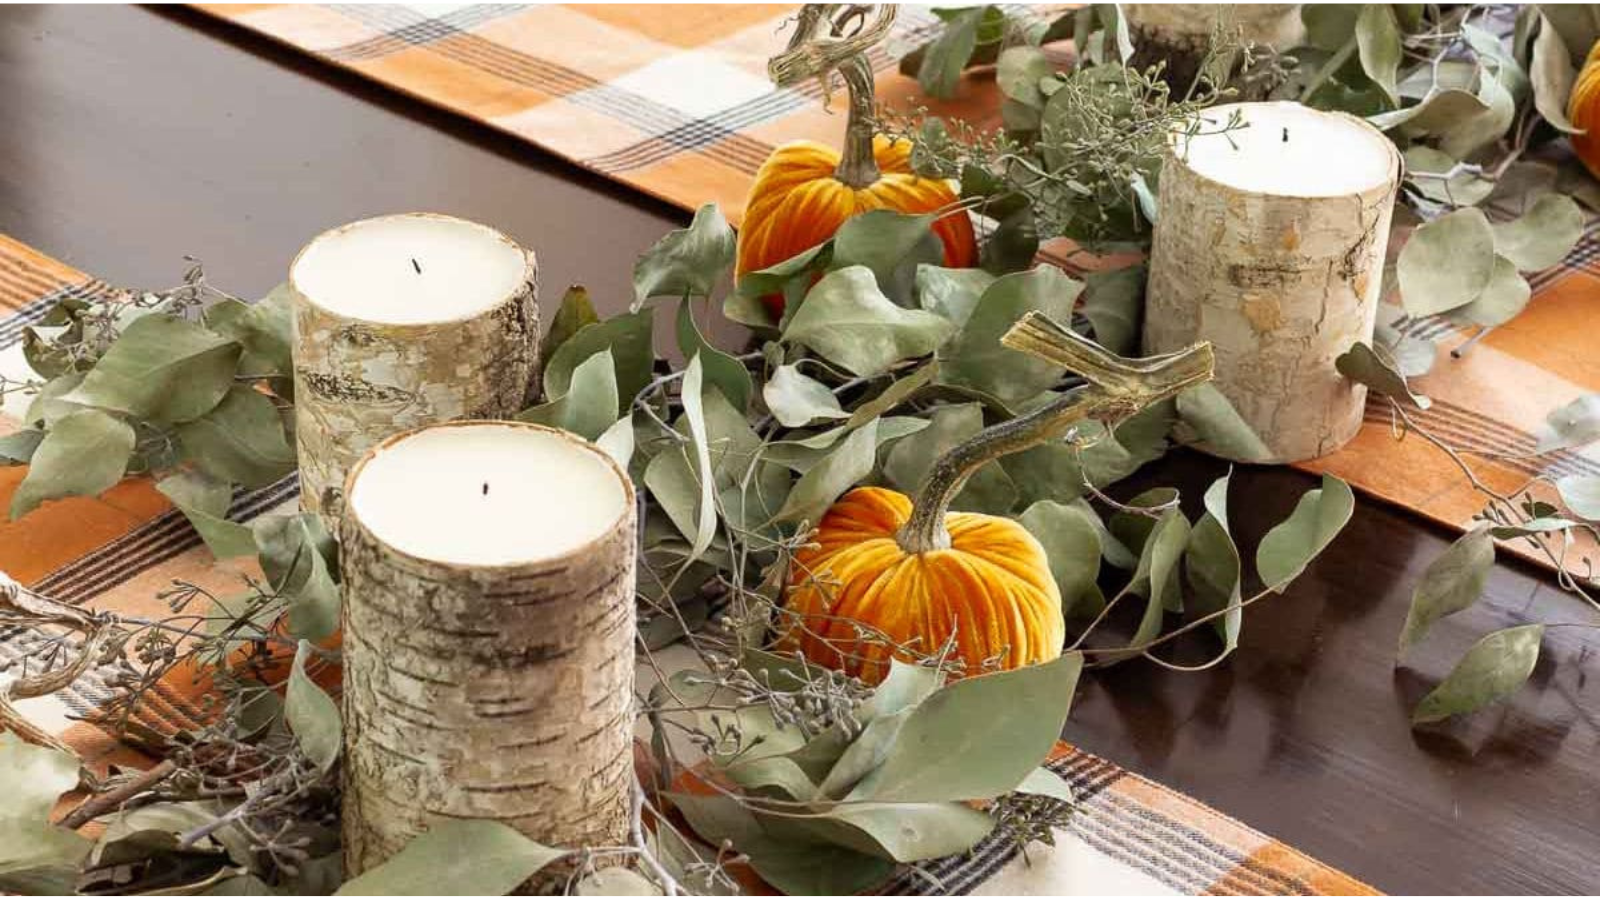
Eucalyptus has a soft, silvery-green look that works beautifully with fall pumpkins and natural wood. Ann Drake makes the garland by wiring little bunches along a rope, overlapping them to hide the fastenings. It gives you a long, narrow centerpiece rather than one enormous arrangement stealing half the table. It’s especially economical if you already have suitable stems or greenery to reuse; buying lots of fresh eucalyptus can add up. Leave it unlit or use LED lights, never candles tucked into the foliage.
4. Pinecone-Filled Harvest Bowl
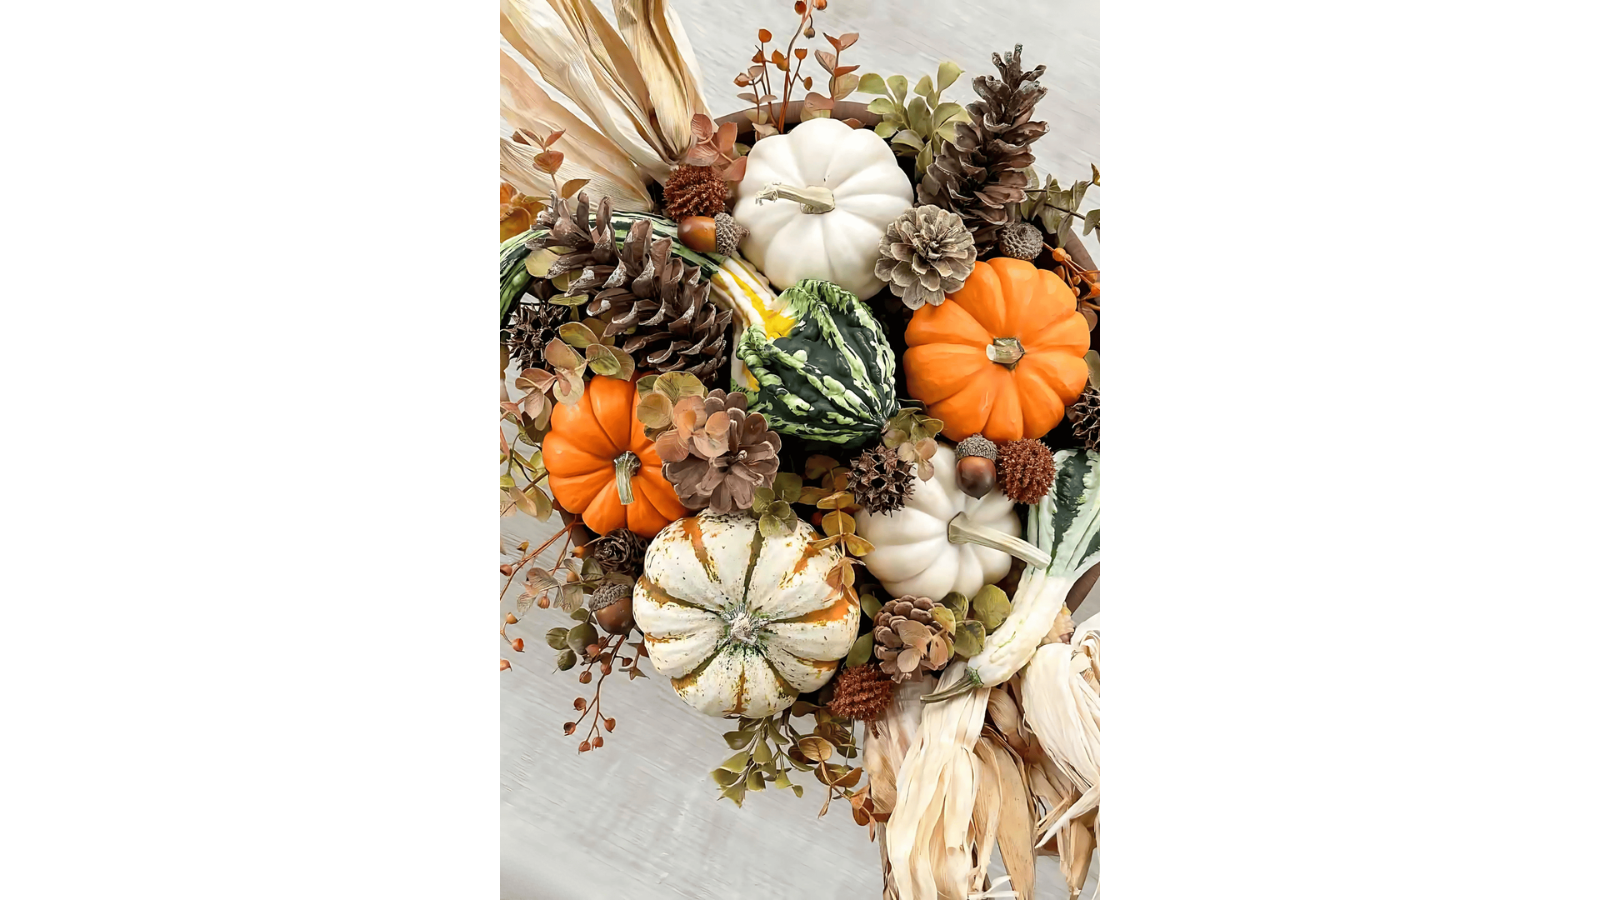
Here’s a useful trick for making a bowl of pumpkins and gourds look fuller than your shopping bag suggests: hide pinecones underneath. Yvonne Pratt uses them to raise the decorative pieces into view, then finishes with greenery and other harvest details. You don’t need the antique dough bowl in the photograph. A shallow bowl you already own will do nicely. Keep heavier produce toward the bottom, and you get an abundant-looking arrangement without having to buy enough gourds to stock a farm stand.
5. Dried Safflowers and Gourds in a Dough Bowl
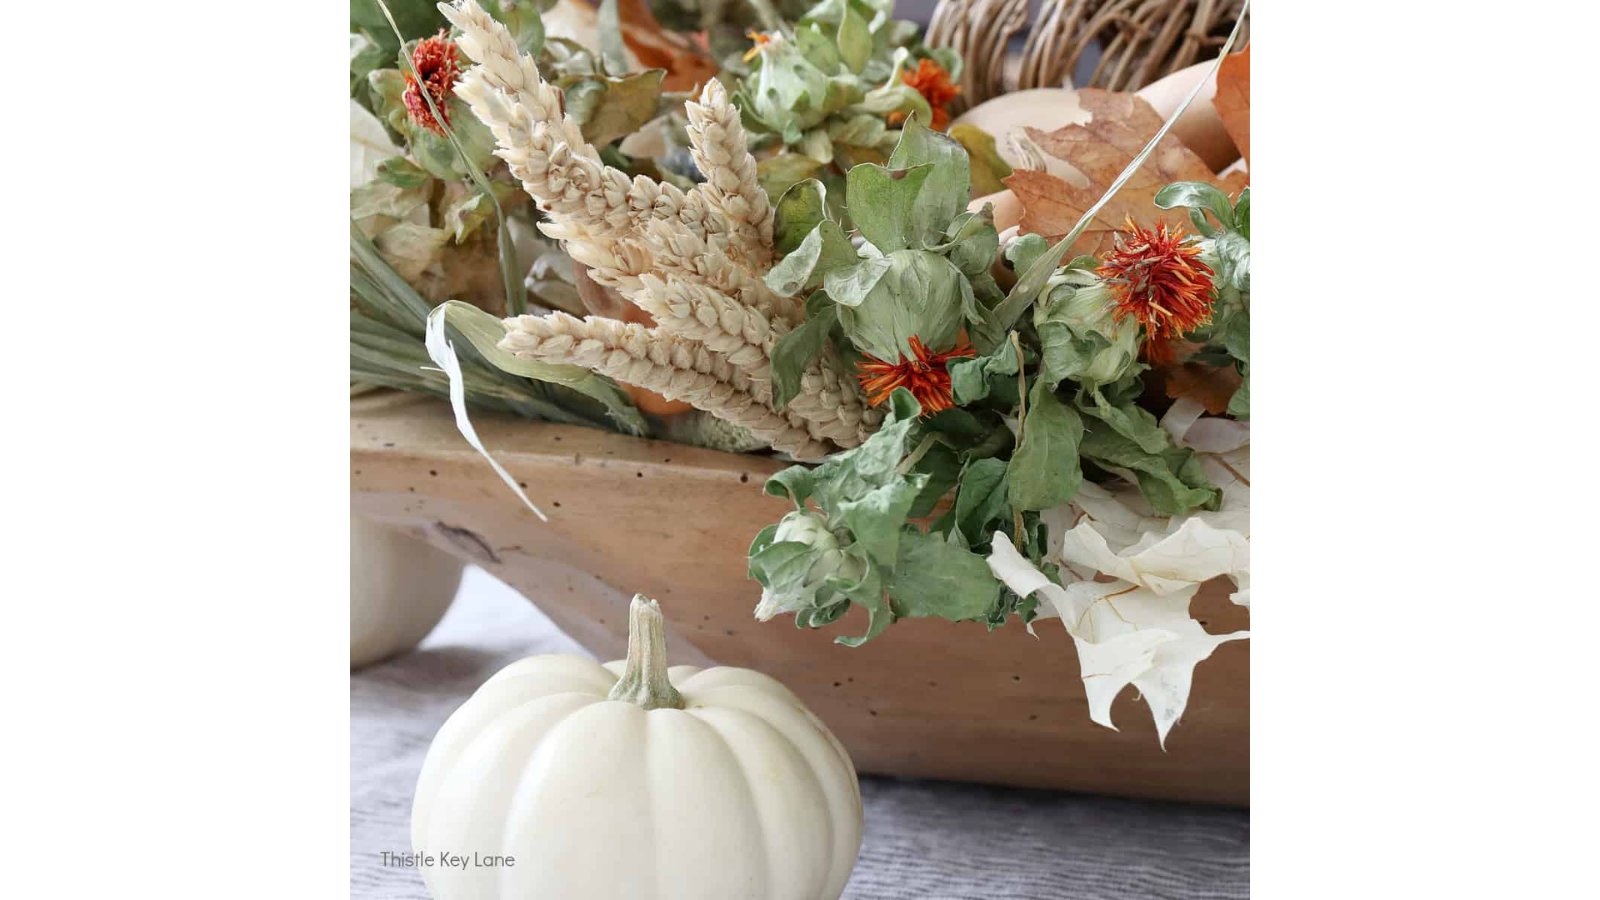
Dried flowers earn their keep when they can come out again for another holiday. Michelle Meyer stretches a tape grid across a dough bowl to support safflowers and foliage, then nestles gourds and lightweight pumpkins among them. The result has a slightly wild, gathered-from-the-garden feel rather than the stiffness of a formal bouquet. Reuse a bowl and stems from an older arrangement to make the budget work. The little lights around the display are flameless votives, a sensible choice with so much dried material nearby.
6. Layered Magnolia Leaves, Seed Pods, and Sedum

Magnolia leaves make a gorgeous base for fall decor, with their rich green tops and warm brown undersides. Rachel layers them with dried pods and sedum over a grapevine wreath, then settles a pumpkin into the middle. The different shapes provide plenty of interest before you add any bought embellishments. No magnolia tree? The tutorial includes alternative leaves and pods. Skip the optional pedestal if you want a lower arrangement that fits an ordinary dining table.
7. A Foraged Table Wreath Around a Pumpkin
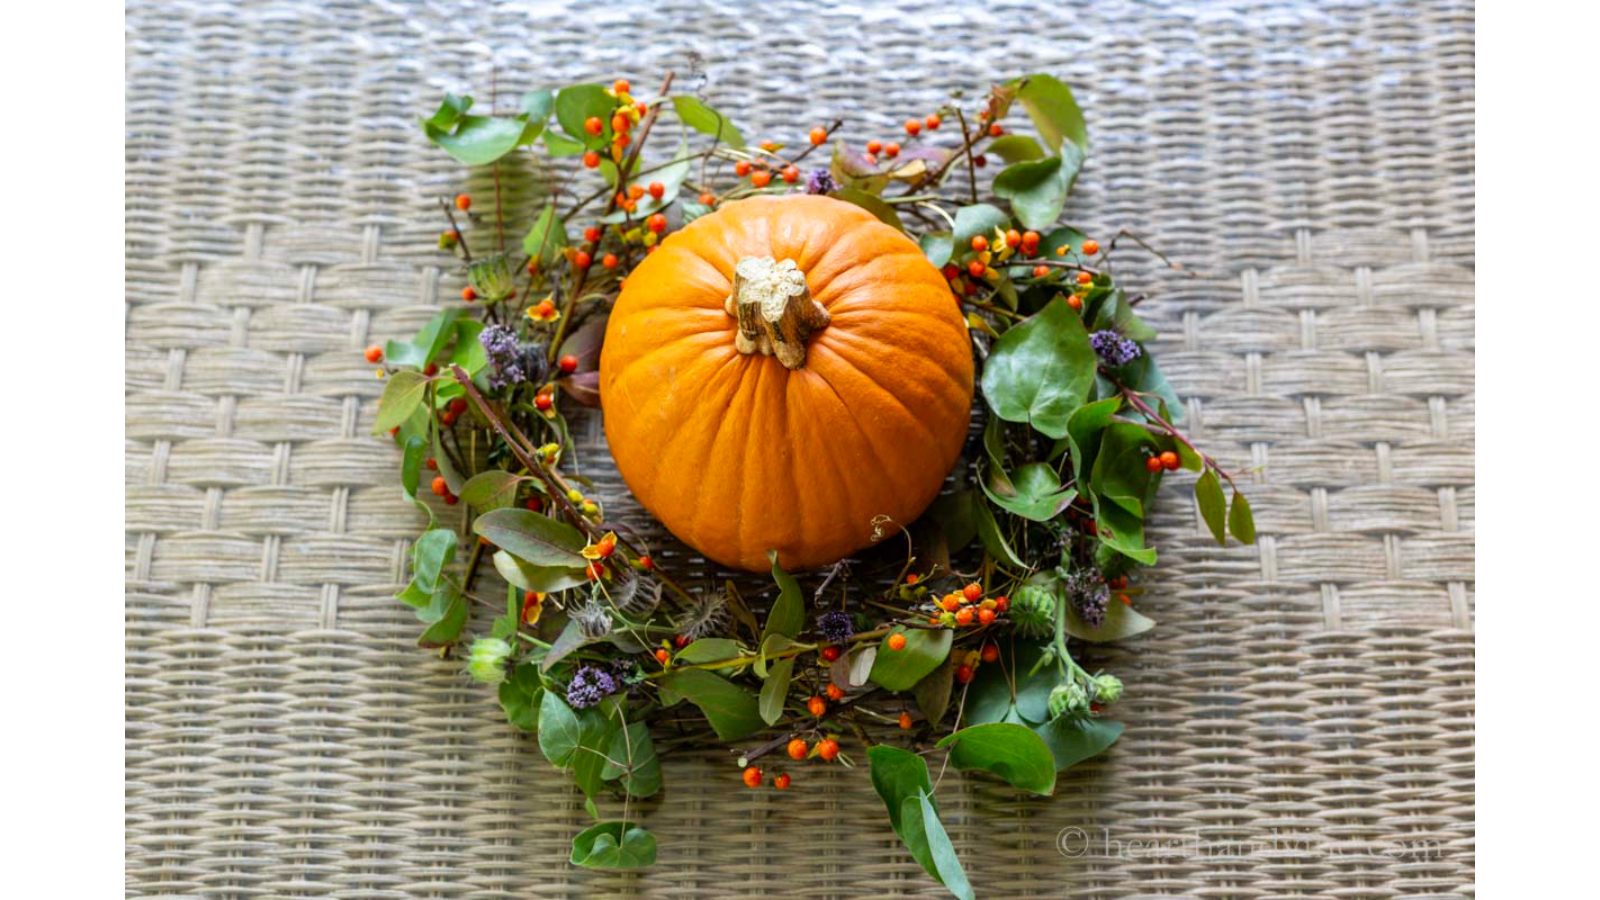
This wreath has the loose, natural appeal of foliage gathered on a walk, without asking you to buy a full bouquet. Patti Estep weaves stems around a wire ring, testing how well the cuttings hold up out of water before committing to the design. A small pumpkin finishes the center and makes it feel unmistakably autumnal. Garden trimmings are the thrifty option, provided you know exactly what you’ve picked and have permission to gather them. Keep the pumpkin in the middle rather than swapping it for an open candle.
8. Mini Pumpkins Topped With Living Succulents
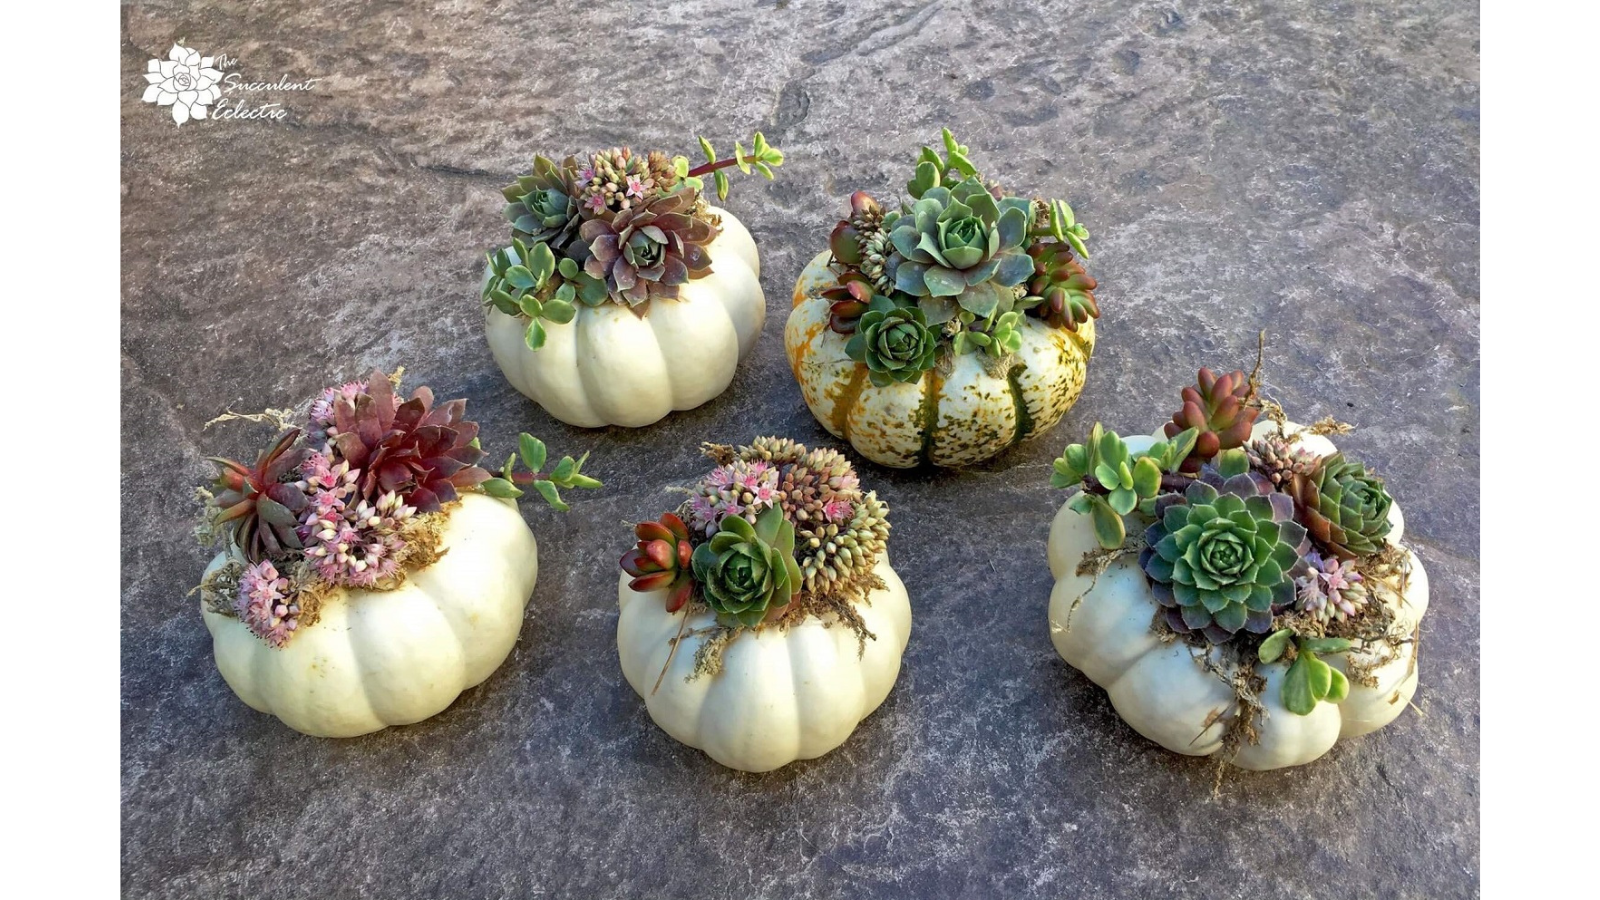
Mini pumpkins are charming on their own, but Kat McCarthy takes them a step further with moss and little succulent cuttings attached to the intact tops. Group several together and they look like tiny living gardens, with no carved pumpkin or watering container required. This is best value if you can take cuttings from plants you already own; buying a new succulent for every pumpkin quickly defeats the point. The tutorial also explains how to care for the cuttings and replant them when the pumpkins begin to soften.
9. An Acorn-Filled Double-Vase Centerpiece
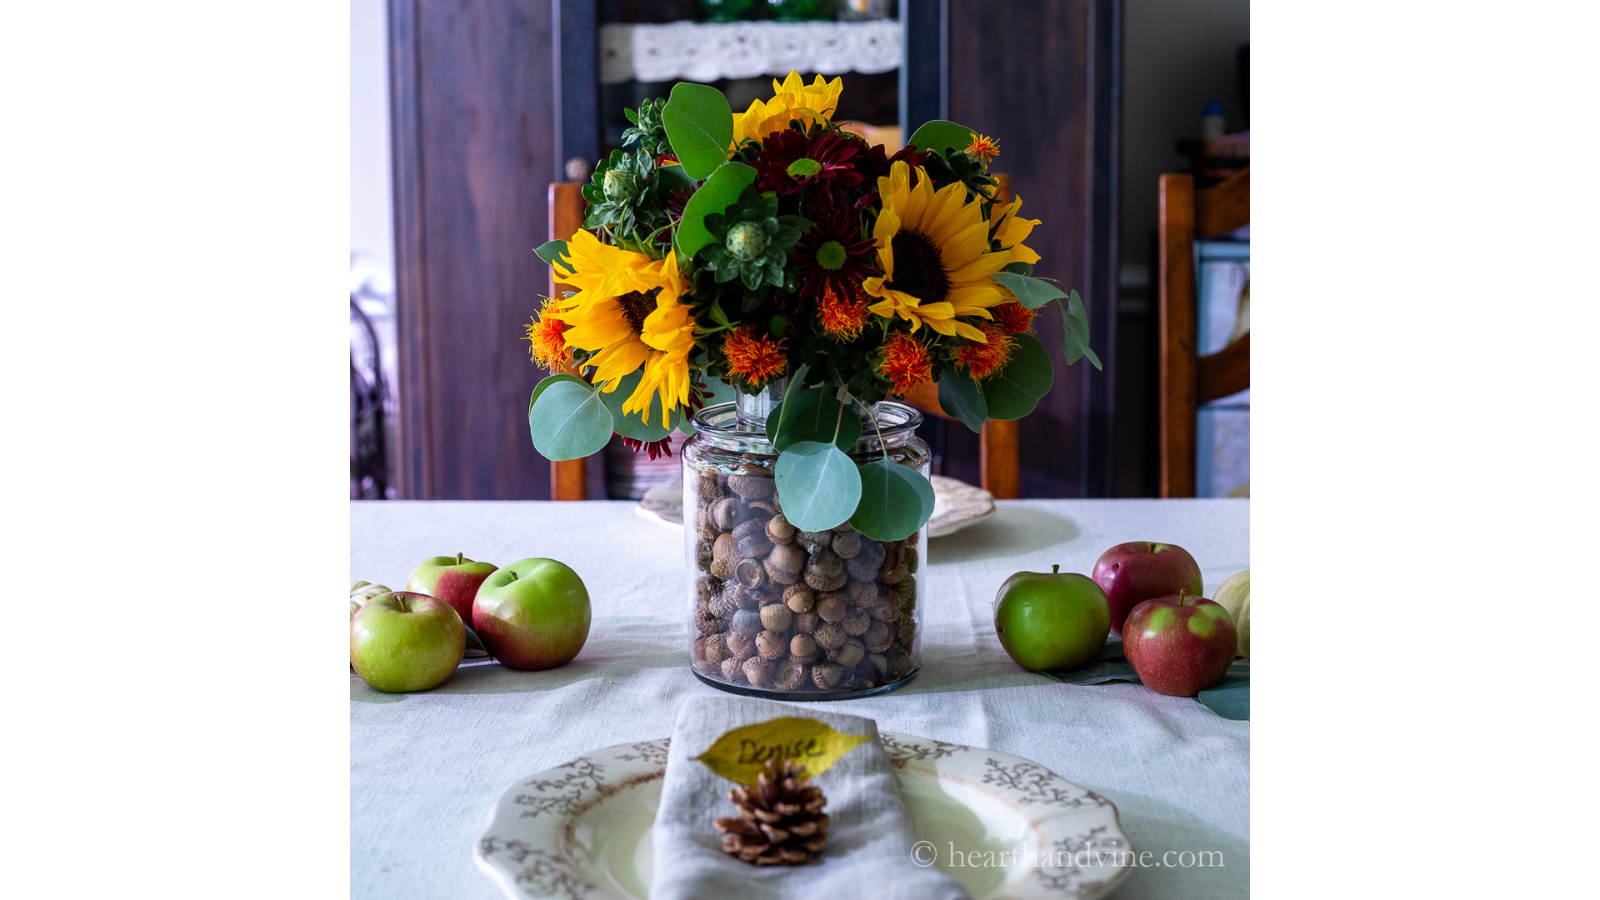
An ordinary vase of flowers looks much more interesting when it appears to be sitting in a sea of acorns. Patti Estep puts a smaller vase inside a larger glass container, filling the gap with gathered acorns while keeping the flowers and their water separate. A simple tape grid helps the stems stay where you put them. It’s a neat way to use two vases you already have and just a few flowers. Dry and clean the gathered acorns first, and choose shorter stems if the arrangement will sit between diners.
Recycled and thrifted containers
10. Twig-Covered Tin Cans With Paper Leaf Stems
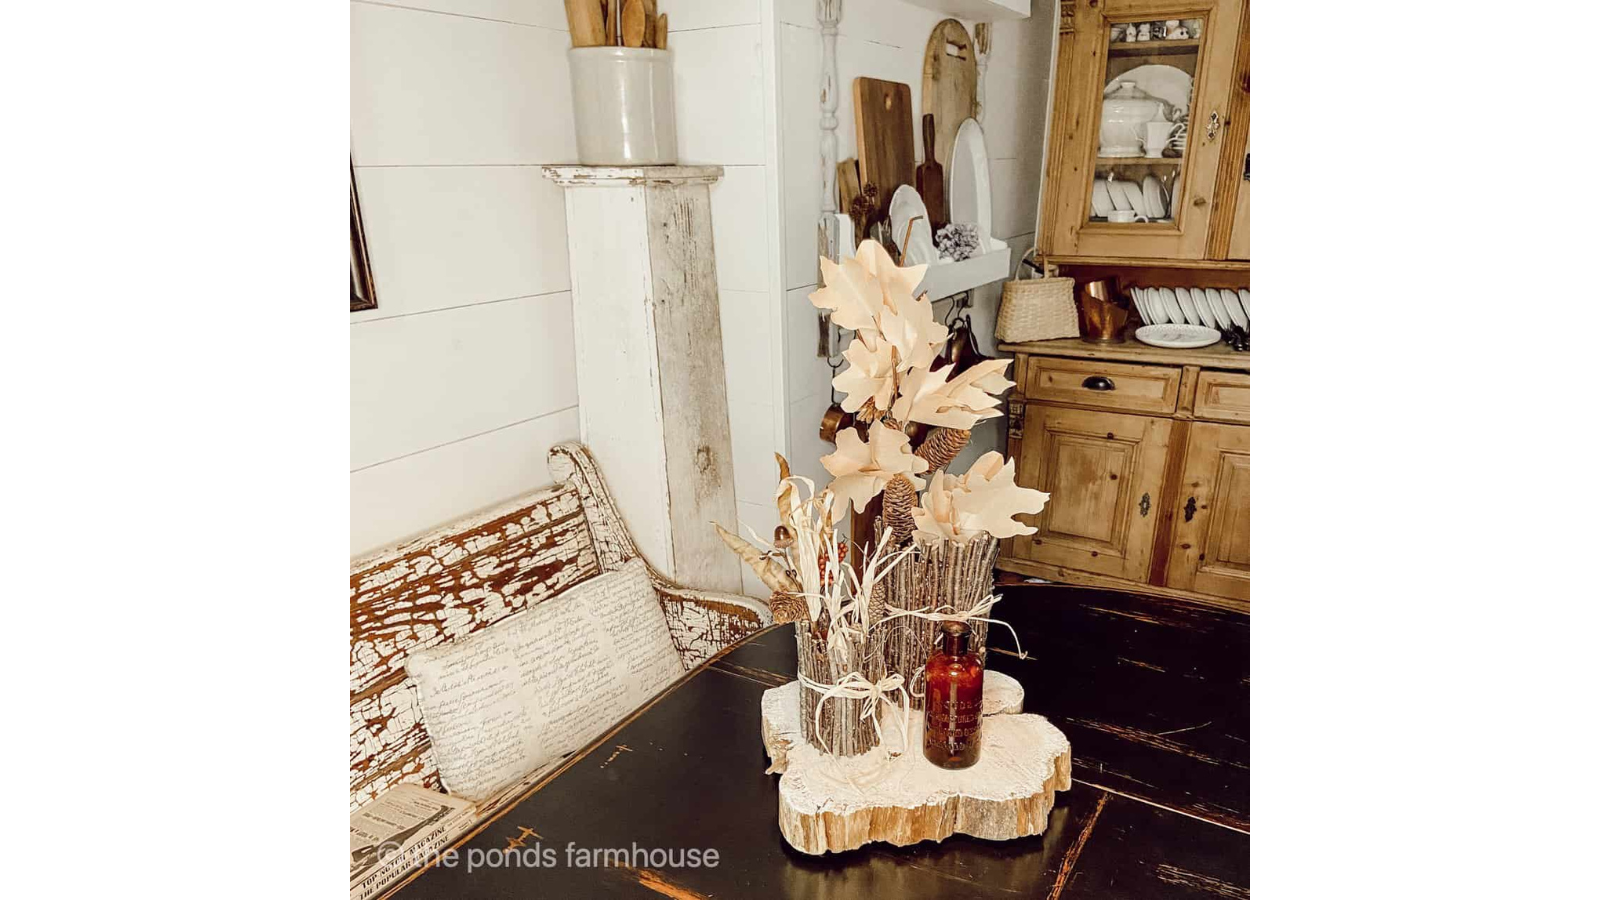
Saved food cans, twigs, and paper scraps aren’t glamorous materials, yet Rachel turns them into a surprisingly handsome Friendsgiving display. The cans wear little twig jackets, while handmade paper leaves provide the height and autumn color. Raffia, pinecones, and a wood slab pull the pieces together. The project links to the separate can-covering and leaf-making tutorials, so you can follow the actual construction rather than guessing from a photograph. As shown, the stems are tall; shorten them for dinner or put the display on a sideboard.
11. Painted FALL Jars With Burlap Letters
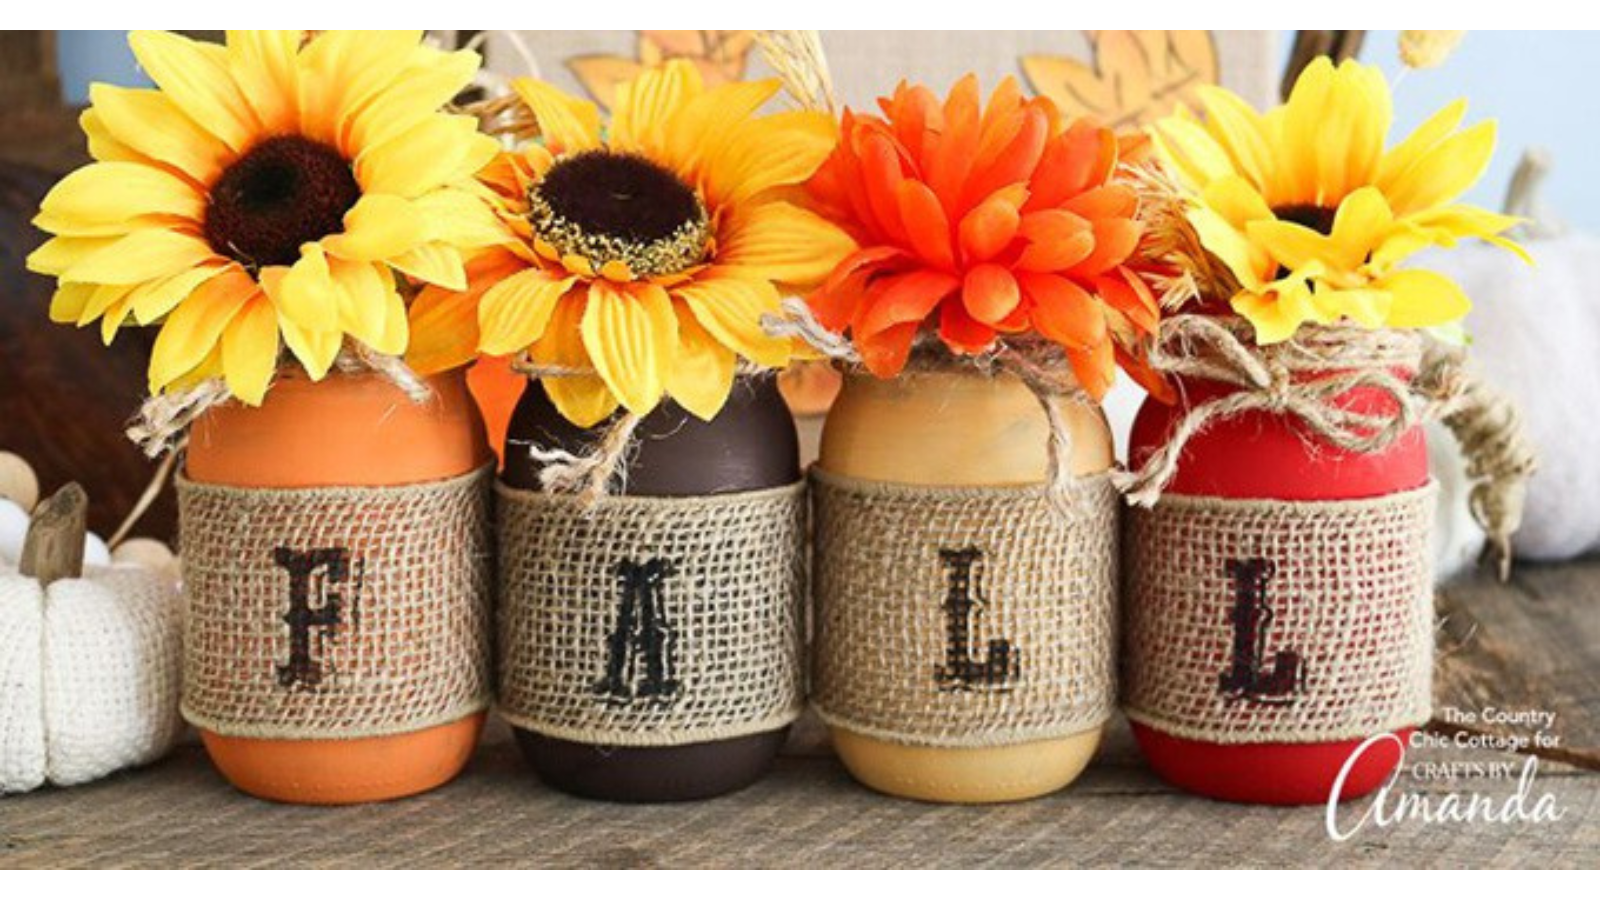
Four pint jars spell out FALL in this cheerful centerpiece from Crafts by Amanda. Paint, burlap bands, and stenciled letters give the containers a coordinated look even if the original jars don’t match. You can line them up along a table, cluster them together, or tuck serving platters between them. Leftover paint and flowers from the garden help keep this one genuinely inexpensive. There is no reason to buy four extravagant bunches of faux flowers just to fill four recycled jars.
12. Gold-Tipped Feathers in Painted Soup Cans
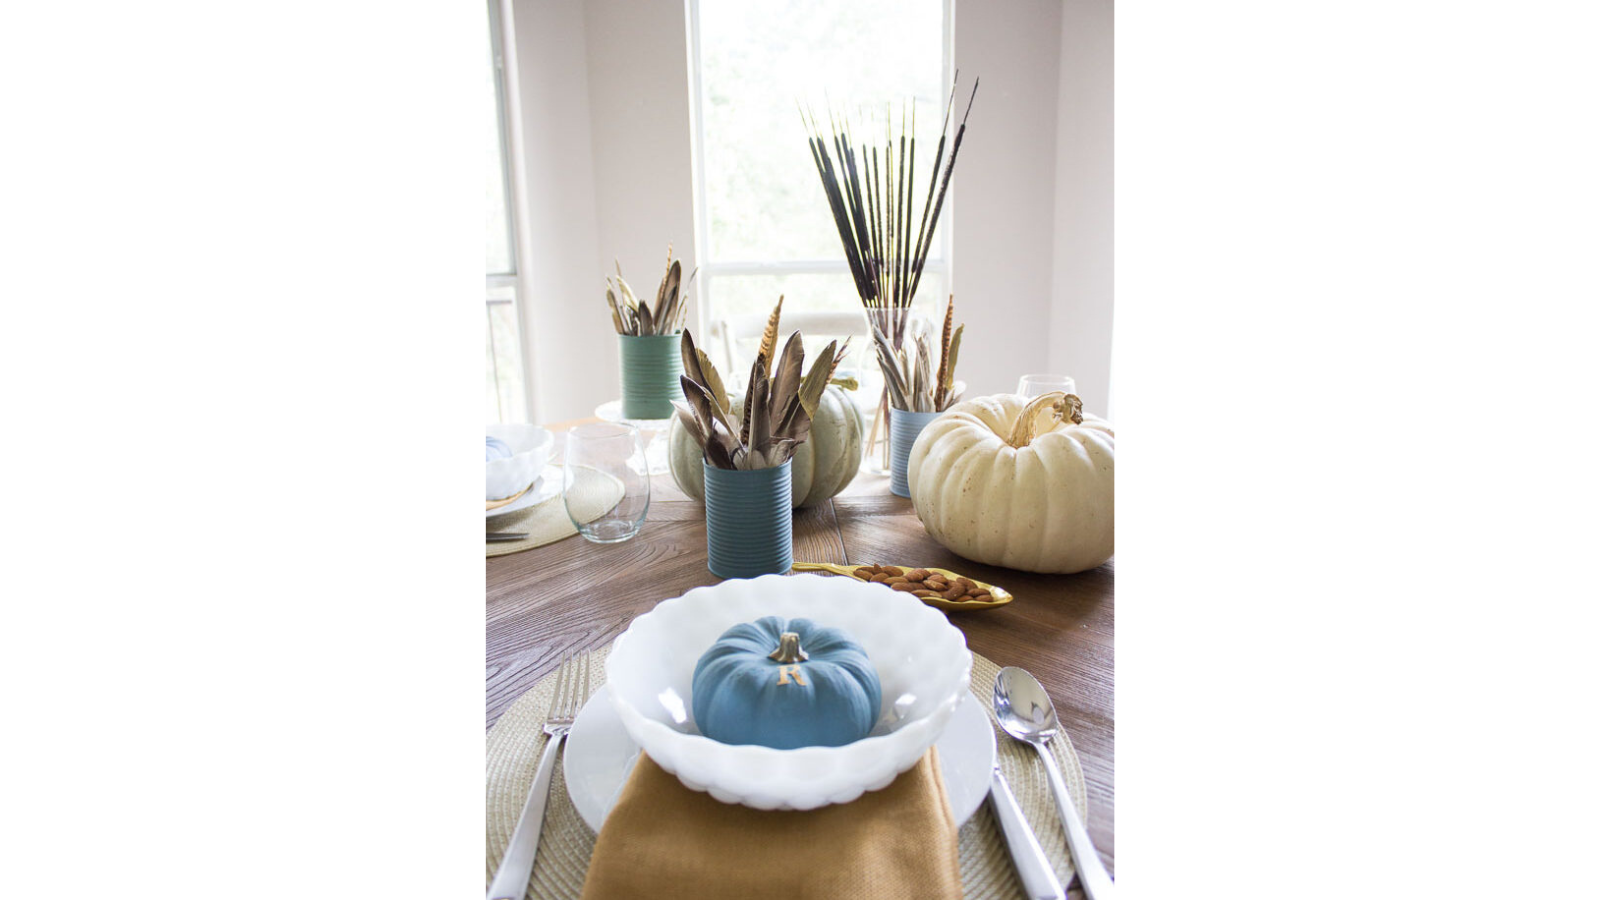
Soup cans might be the least promising starting point for elegant Thanksgiving decorations, but the finished feather arrangements have a lovely lightness to them. Haeley Giambalvo paints the cans, finishes them with wax, and sets craft feathers into small foam supports, picking out a few feather tips in gold. The metallic accents give the grouping a little polish without requiring fresh flowers. Save the cans and use leftover paint if you can. Trim the feather height for dinner, or display the taller versions on a buffet.
13. White Thrifted Vases With Flameless Tapers
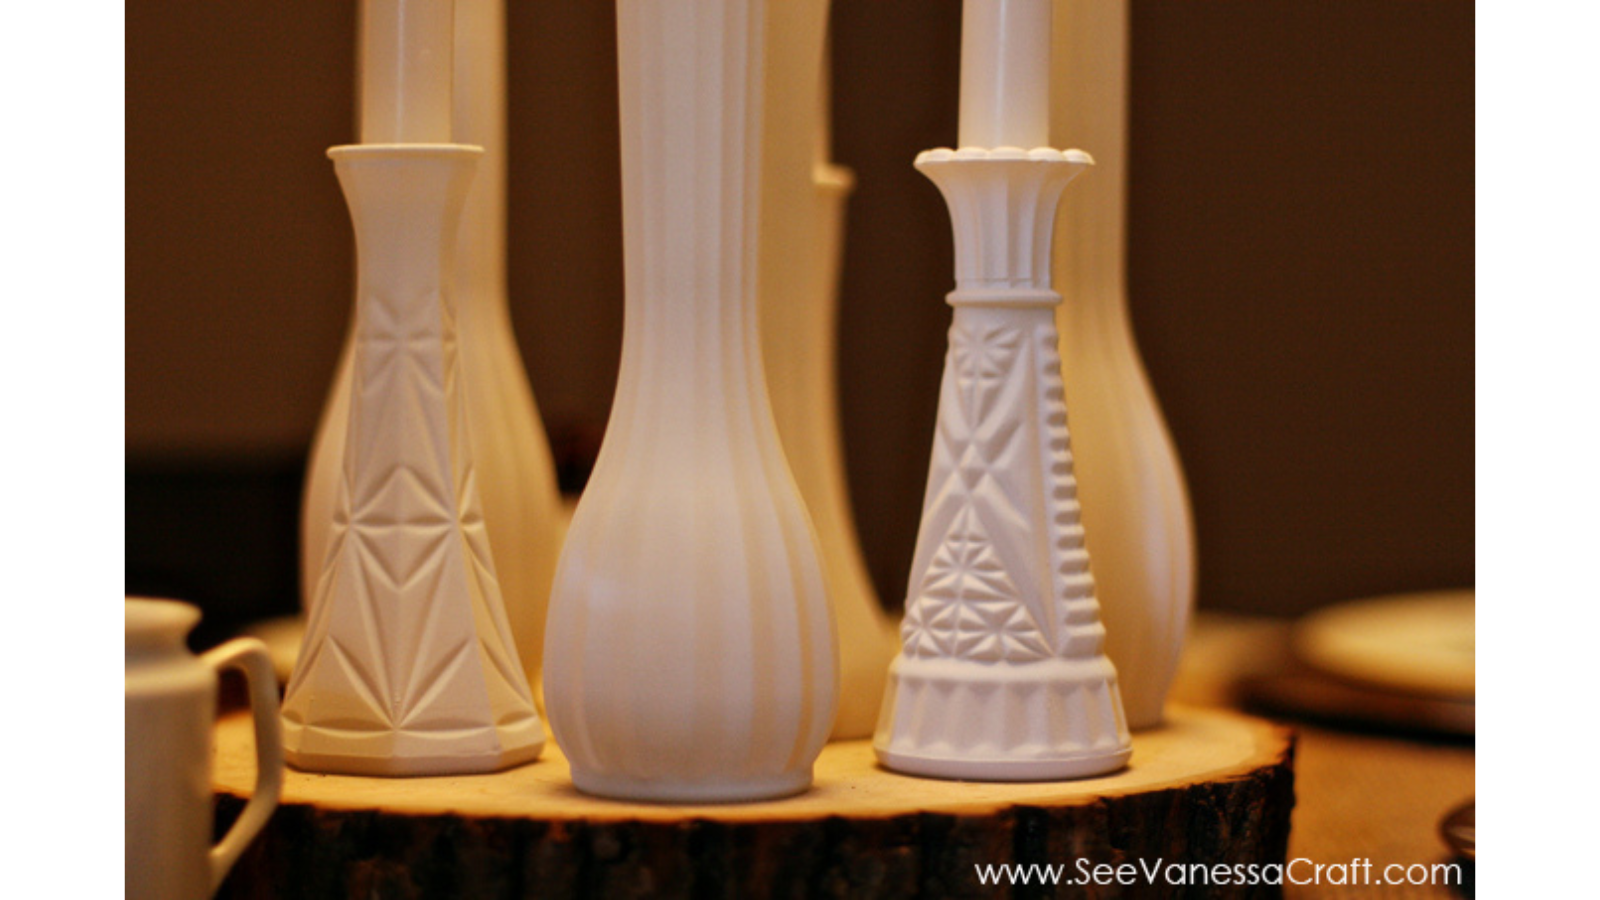
A handful of mismatched glass vases becomes a coordinated display with a few coats of white spray paint. Vanessa groups the painted thrift-store finds on a wooden base and gives them the look of slim candleholders. It’s a smart use for pieces that are inexpensive precisely because nobody wants the original colors. Allow for the cost of paint and battery-operated tapers if you don’t own them already. This is a tall arrangement, so it’s better on a sideboard than between two people trying to eat dinner. Use LED tapers only.
14. Wine-Cork Vases for Dried Stems
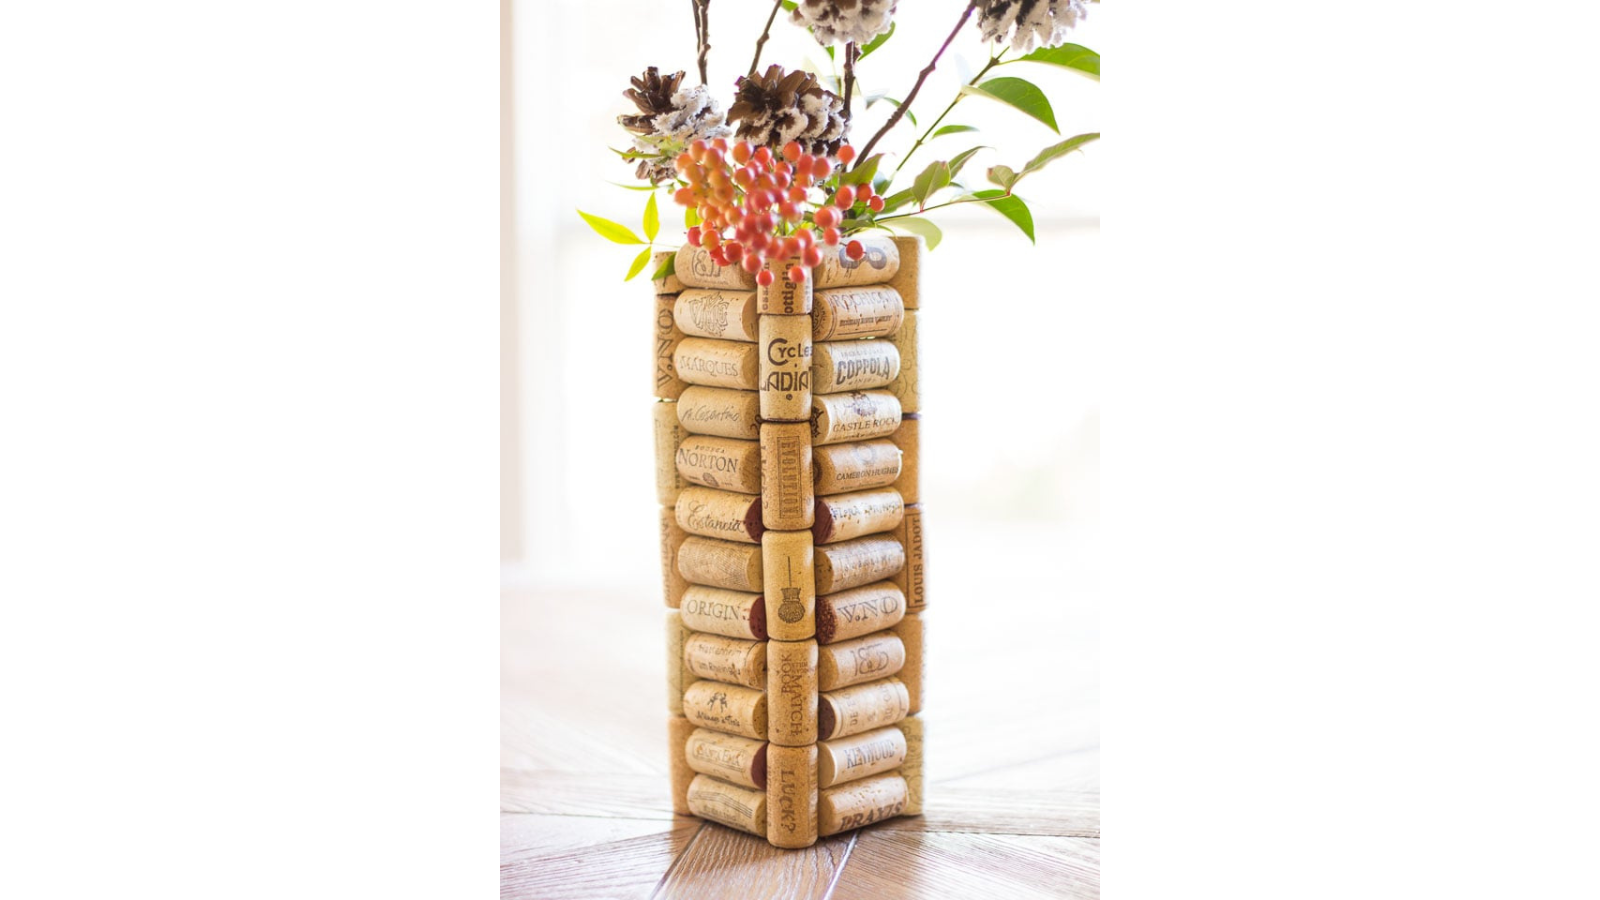
If you’ve been saving wine corks for a project, this is one that can finally make a dent in the collection. Haeley Giambalvo glues them in tidy rows around a square or rectangular glass vase, with vertical corks giving the corners a finished edge. The smaller version uses around 40 corks, so you don’t need a cellar’s worth. It looks particularly good with a few dried stems. The savings make sense when the corks and vase are already yours; buying bags of corks rather misses the point.
15. Copper Pumpkin Pails With Short Flowers
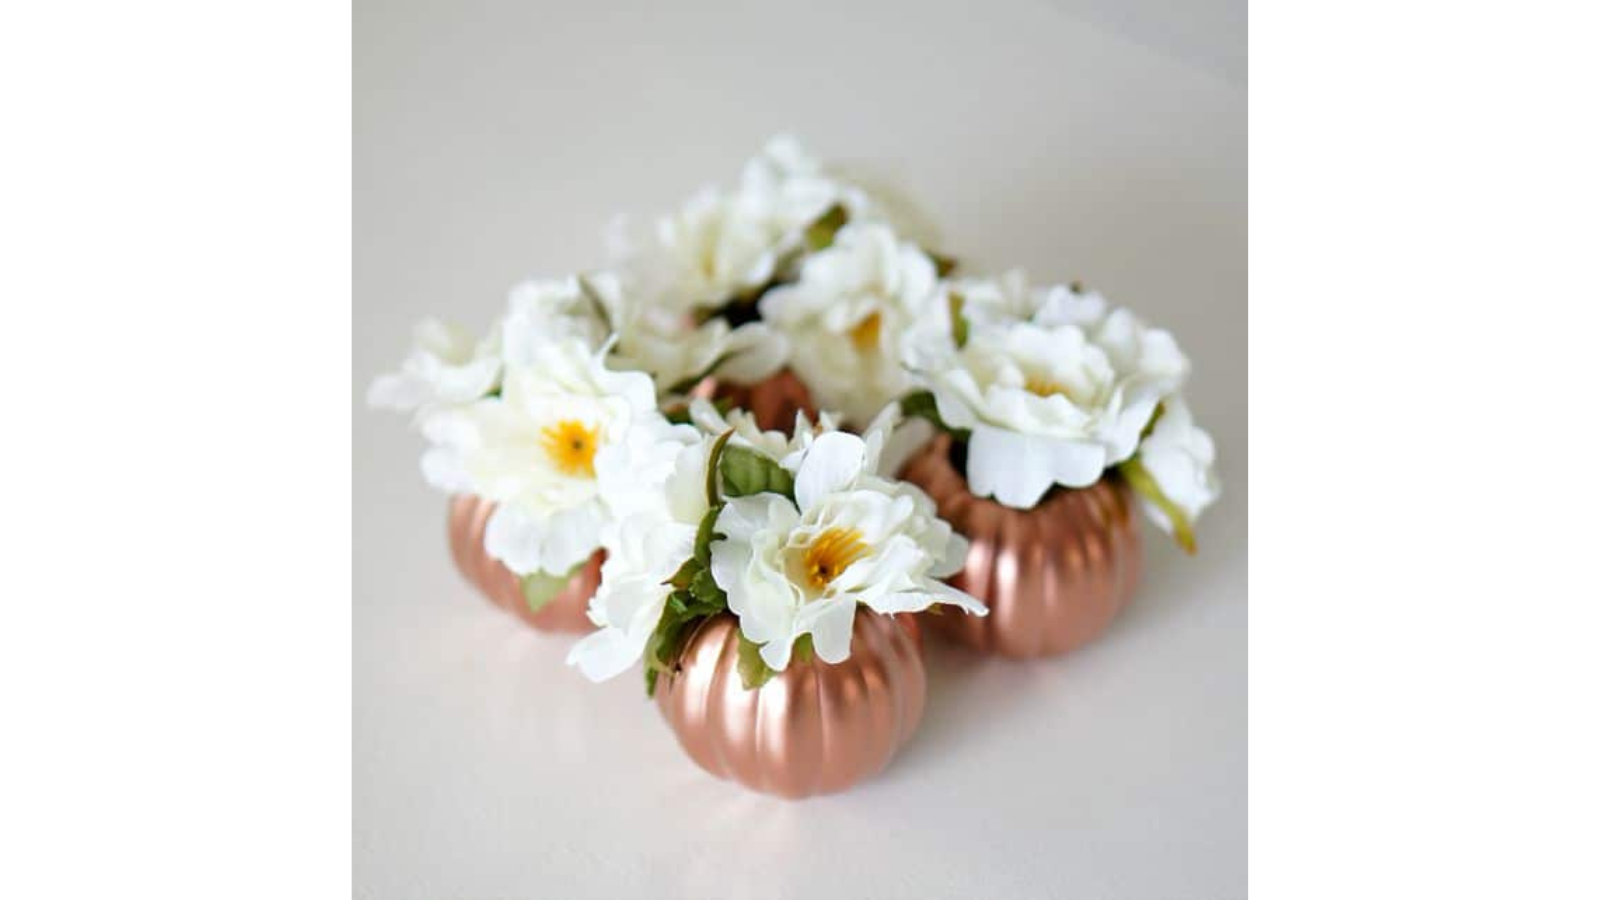
Those little plastic jack-o’-lantern buckets can stay out after Halloween with a quick coat of copper paint. Kathy weights the pails with dry filler, adds just a few short flower stems, and turns the carved faces inward so they read as autumn containers rather than trick-or-treat buckets. A small group makes a low centerpiece without needing many flowers. Leftover spray paint makes it an especially cheap makeover. Any rice or beans used as craft ballast should stay with the craft supplies, not go back into the pantry.
16. A Craft-Stick Crate of Fall Flowers
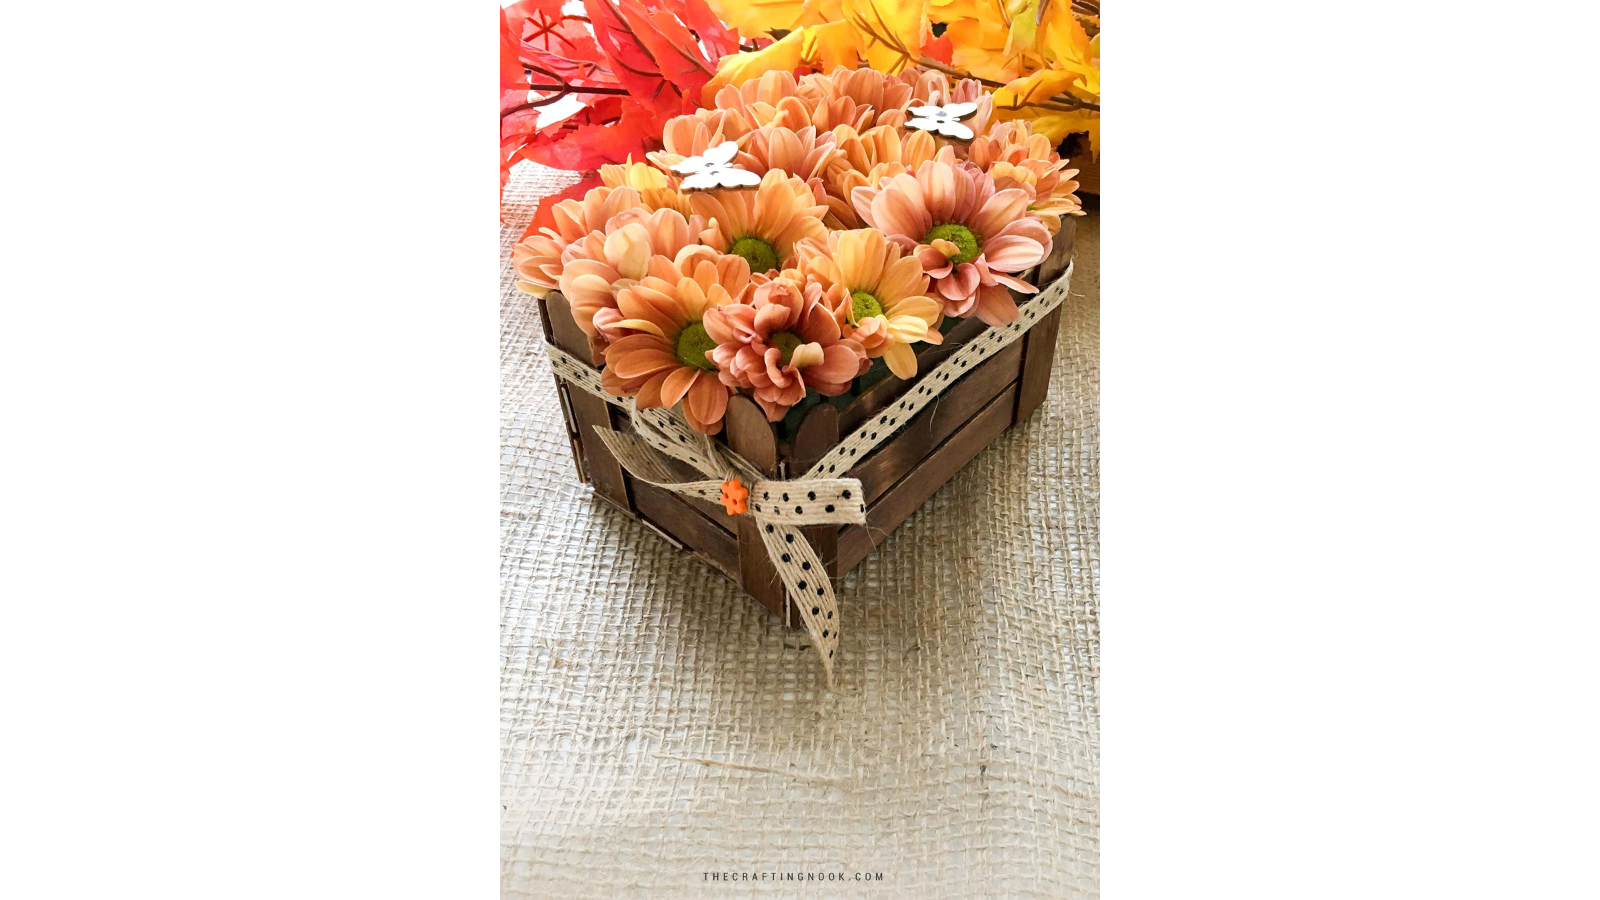
This little flower crate starts with ordinary craft sticks, which makes it appealing if you want something handmade without building an actual wooden box. Camila Rojas explains how to assemble and reinforce the sides, add ribbon trim, and adapt the filling for fresh, dried, or faux flowers. The finished crate is compact enough for a smaller table. Use scraps and flowers you’ve already got where possible. If you’re working with fresh flowers and wet floral foam, line the crate so moisture doesn’t soak through the wood.
17. Painted Wood Shapes With Dried Floral Stems
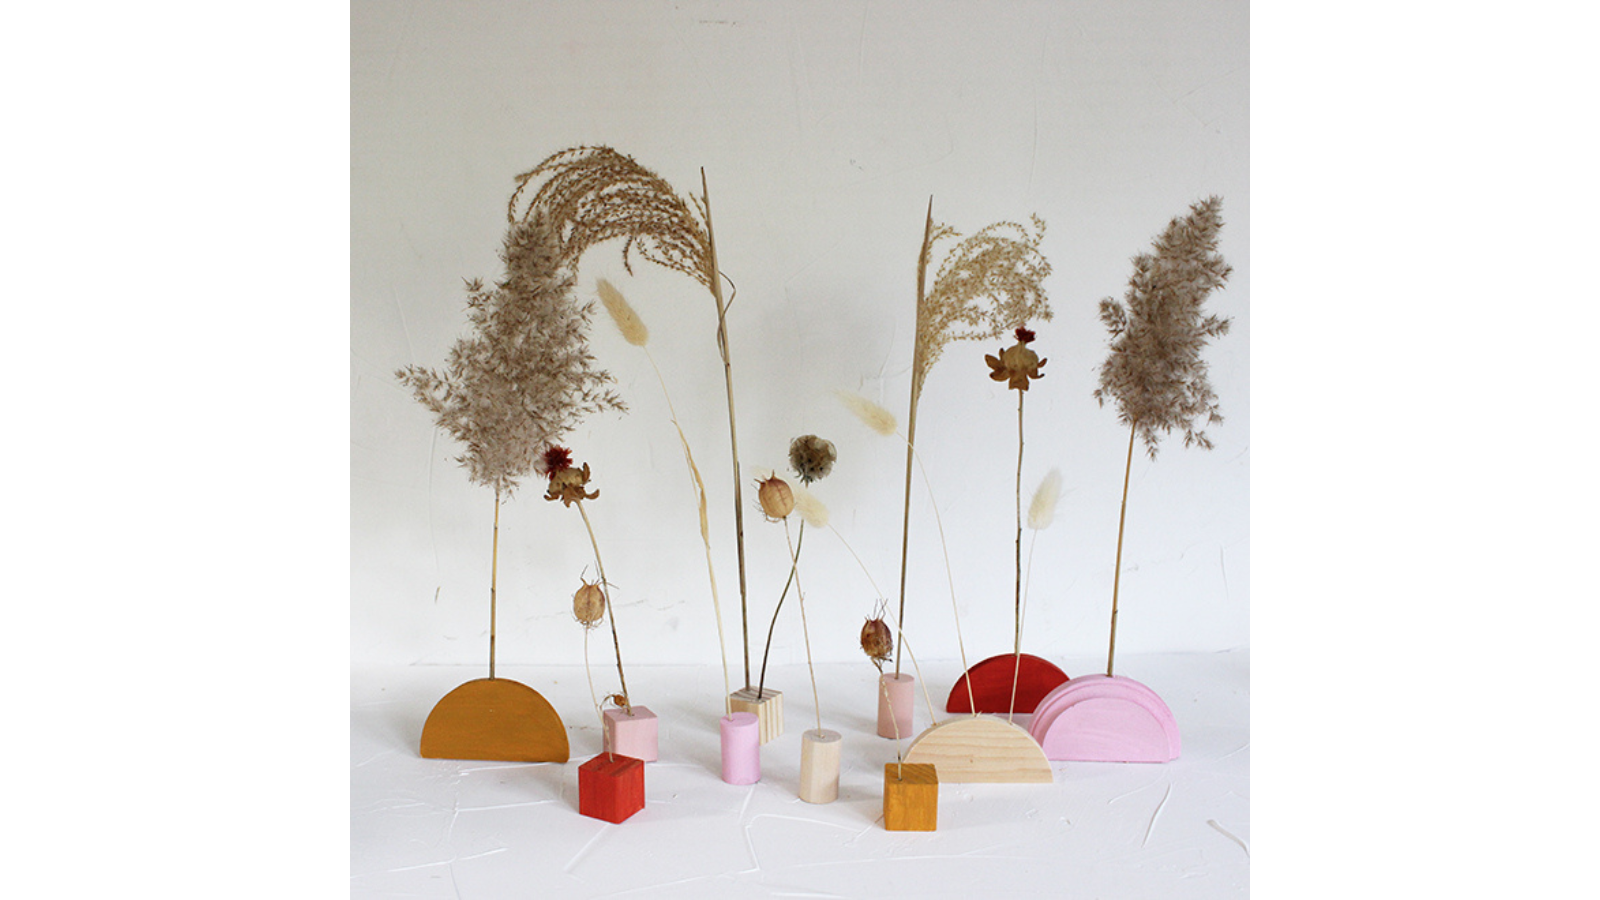
A few dried stems can make more of an impression when each has its own tiny vase. Lauren Koster drills small holes into wood shapes, sands and paints them, then adds delicate flowers. Space the holders along the table rather than putting everything into one dense arrangement. They’re especially useful when you want to leave room for serving dishes. This is a good project for using odd bits of wood and leftover paint, although you do need a drill, and a purchased set of fancy shapes can push up the price.
Flowers, wheat, and harvest bundles
18. A Real Pumpkin With Supermarket Flowers
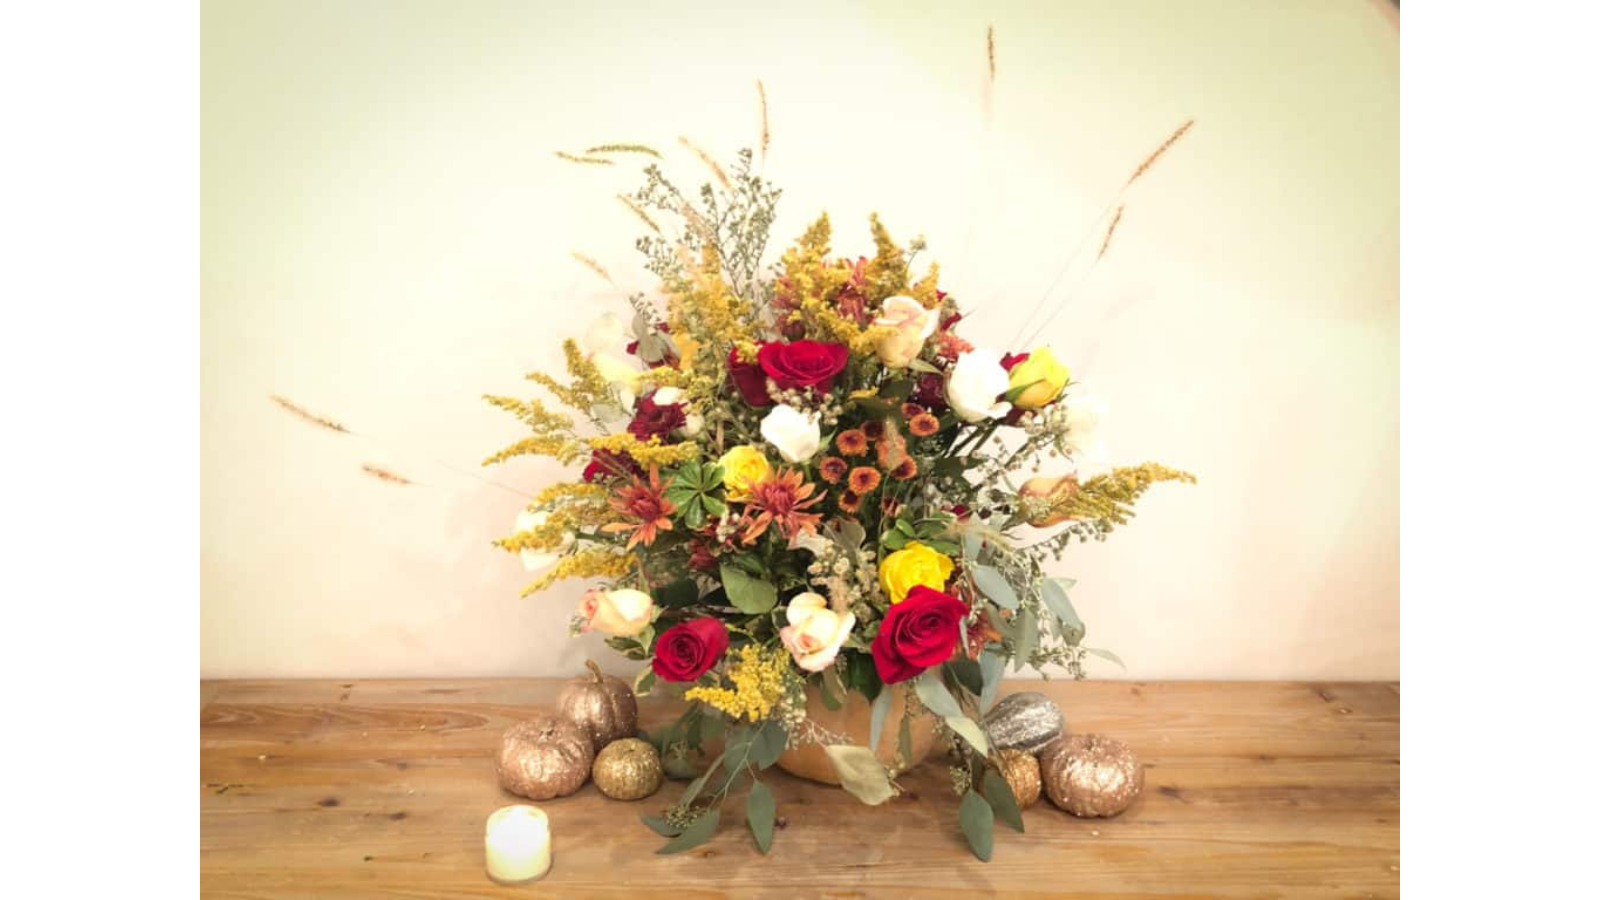
A proper pumpkin filled with flowers always looks festive, and it doesn’t require a designer bouquet. Emily hollows one out, adds floral foam, and builds the display with supermarket flowers and saved dried stems, starting with the bigger pieces. Turning the pumpkin as you work keeps one side from getting all the attention. Use a pumpkin you already have and a modest bouquet for the budget version. Keep the stems short for a seated meal, and treat the finished pumpkin as decoration rather than a food container.
19. A Reusable Craft-Pumpkin Flower Vase

If you want a pumpkin centerpiece you can bring out next year, the faux version has a distinct advantage over the real thing. Crystal Owens cuts into a craft pumpkin and uses foam to support fall stems, wood flowers, and pinecones. The result has height and drama without depending on fresh flowers that will fade before the leftovers are gone. It’s particularly economical with a pumpkin bought on clearance and stems you can reuse. Keep the taller branches for a buffet, or shorten the arrangement for the table.
20. A Freestanding Wheat Sheaf With a Burlap Bow

A wheat sheaf has a wonderfully old-fashioned harvest look, and Trish Flake shows how to make one stand without hiding it inside a vase. Two bunches are wired together, the stalks are trimmed, and the bottoms are fanned out to create a stable base. A burlap bow is all the decoration it really needs. The wood slice underneath is optional, which helps keep the materials list short. As photographed, this is a tall statement piece; put it on the buffet or make a shorter bundle for dinner.
21. A Foam-Core Wheat Bundle That Uses Fewer Stalks

This wheat arrangement uses a different trick from the freestanding sheaf: a foam cone does some of the work. Kim P. glues wheat stems around the cone in layers, giving the bundle a full silhouette without packing the center with stalks. Twine and ribbon disguise the construction. It’s worth comparing the price of the cone with the wheat you’d otherwise need, rather than assuming foam automatically makes it cheaper. The tutorial allows a smaller cone, which is the sensible choice for a dining table.
22. Color-Wrapped Wheat in a Glass Vase

Wheat is usually all golden stalks and seed heads, but Michael Wurm Jr. adds a playful strip of color by wrapping little bundles with embroidery floss. Several of these bound groups stand together in a clear vase, where the bright bands become part of the design. It’s a lovely project for using those short lengths of floss left over from other crafts. An owned vase and a modest amount of wheat are enough. Cut the stalks down if the arrangement starts interfering with conversation.
23. Pinecone Flowers on Skewer Stems

Pinecones make surprisingly convincing chunky flowers once you put them on stems. Lilly drills shallow holes in the bases, glues in wooden skewers, and gathers the resulting blooms in a vase. You can leave their natural brown color alone or paint them in autumn shades. The photograph shows the creator’s holiday-color version, but the same method works with fall leaves and a warmer palette for Thanksgiving. Use a heavy, stable vase because a bunch of pinecones carries rather more weight than ordinary daisies.
Handmade bowls, cornucopias, and finishing pieces
24. A Grapevine Cornucopia Woven by Hand
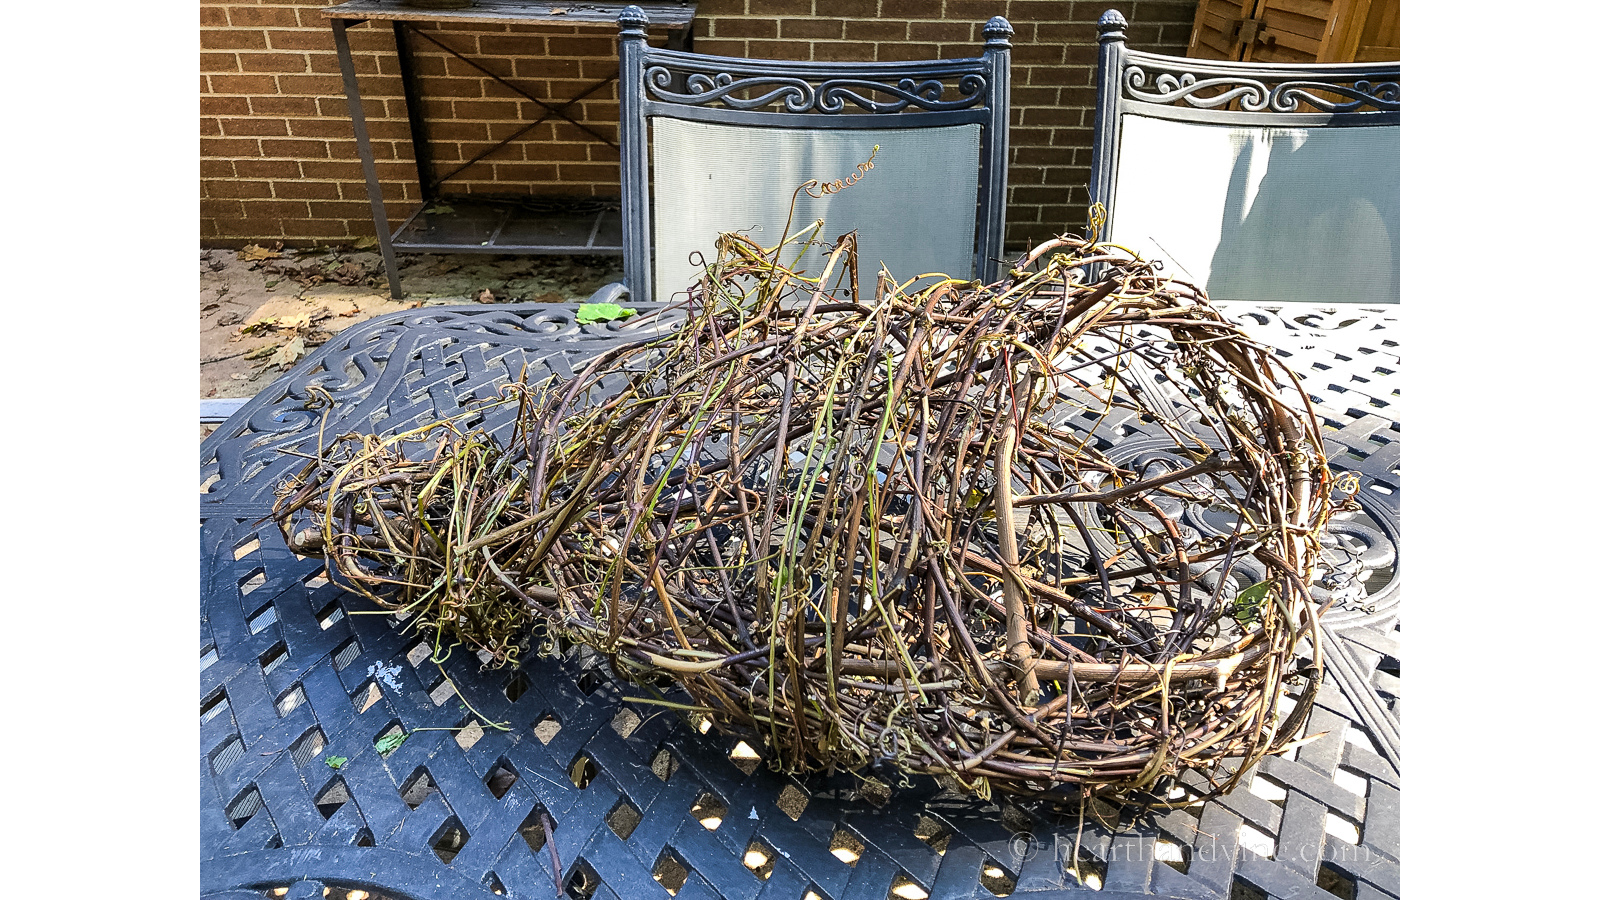
A handmade horn of plenty feels right for Thanksgiving, and this one starts with actual grapevine trimmings instead of a purchased wicker basket. Patti Estep bends thicker vines into the opening and frame, then weaves thinner lengths around them to form the cornucopia. It’s satisfying work if you have access to suitable vines, although it takes more patience than filling a ready-made bowl. Tuck in decorative gourds and small pumpkins for a low centerpiece. Keep food off the raw vines and wire rather than using it as a serving basket.
25. A Quilted Fabric Cornucopia
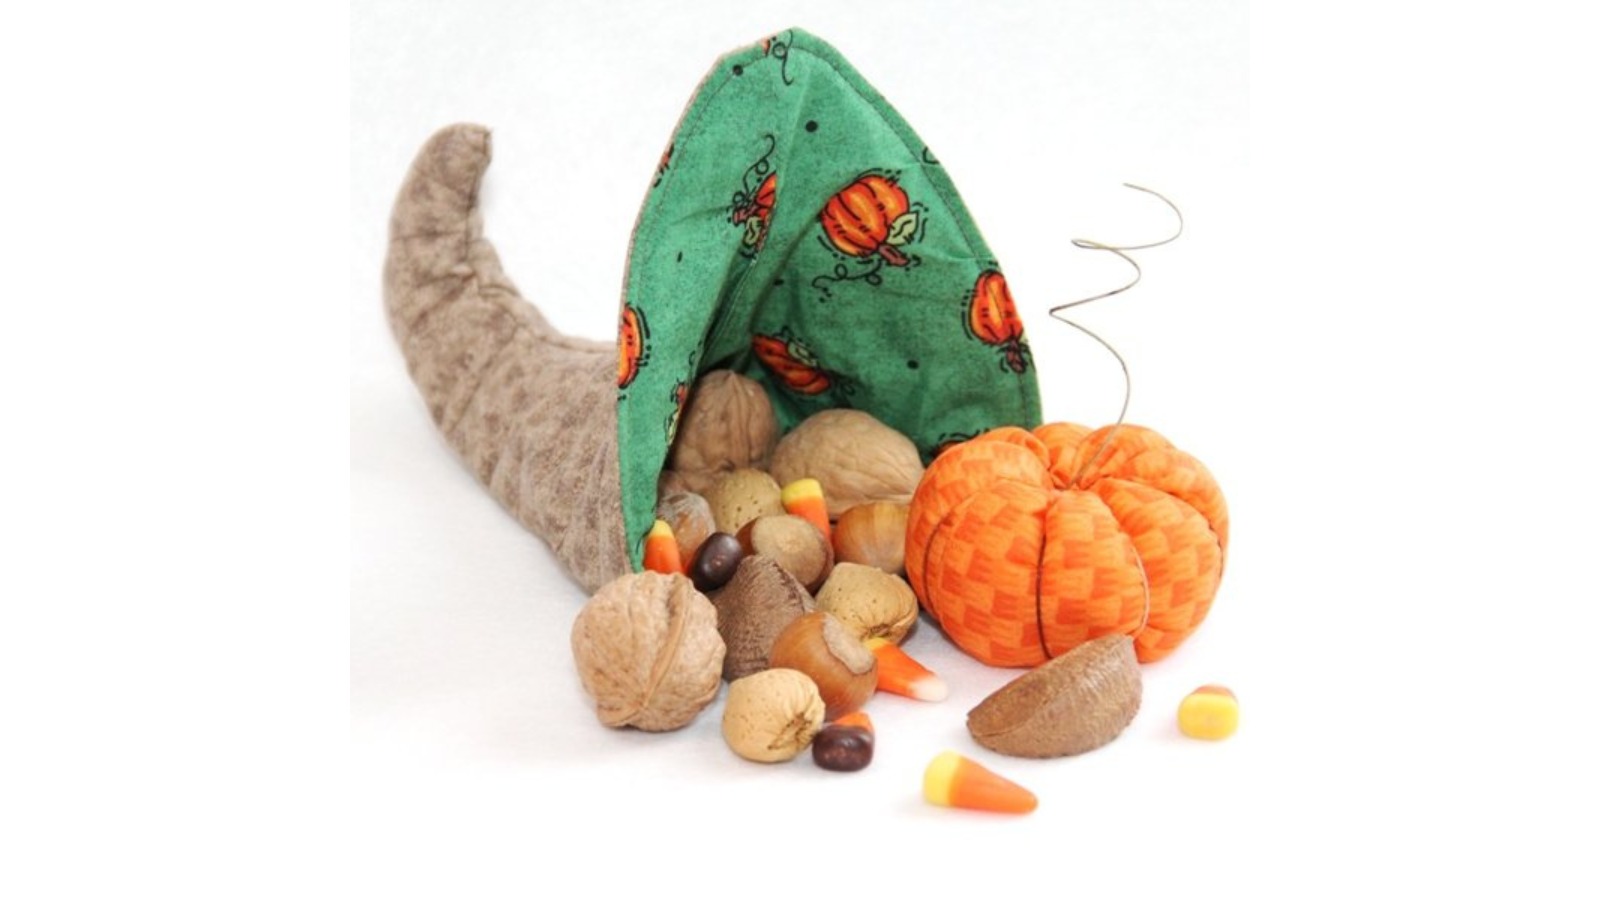
For anyone whose scrap-fabric pile is beginning to demand its own cupboard, Crafty Staci’s quilted cornucopia is a cheerful way to put some of it to work. The supplied pattern uses fabric, muslin, and batting to make a soft, lined horn of plenty that can come out year after year. It’s a proper sewing project, so you’ll need a machine and some confidence with quilting and assembly. Fill it with fabric pumpkins or other decorative pieces rather than loose food. The cost stays low when you’re using stash materials.
26. A Faux-Leaf Bowl for Pinecones

This bowl looks rather delicate, but its leafy shape comes from an everyday craft technique. Amy layers artificial leaves over a balloon with fabric stiffener or Mod Podge, then removes the balloon once everything has dried. The result is a shallow autumn bowl that looks great filled with pinecones or acorns. Inexpensive faux leaves and glue you already have make it a budget-friendly project; just don’t leave it until Thanksgiving morning, because the drying stage matters. It’s for decoration, not unwrapped food or candles.
27. Spice-Covered Pomander Balls in a Bowl
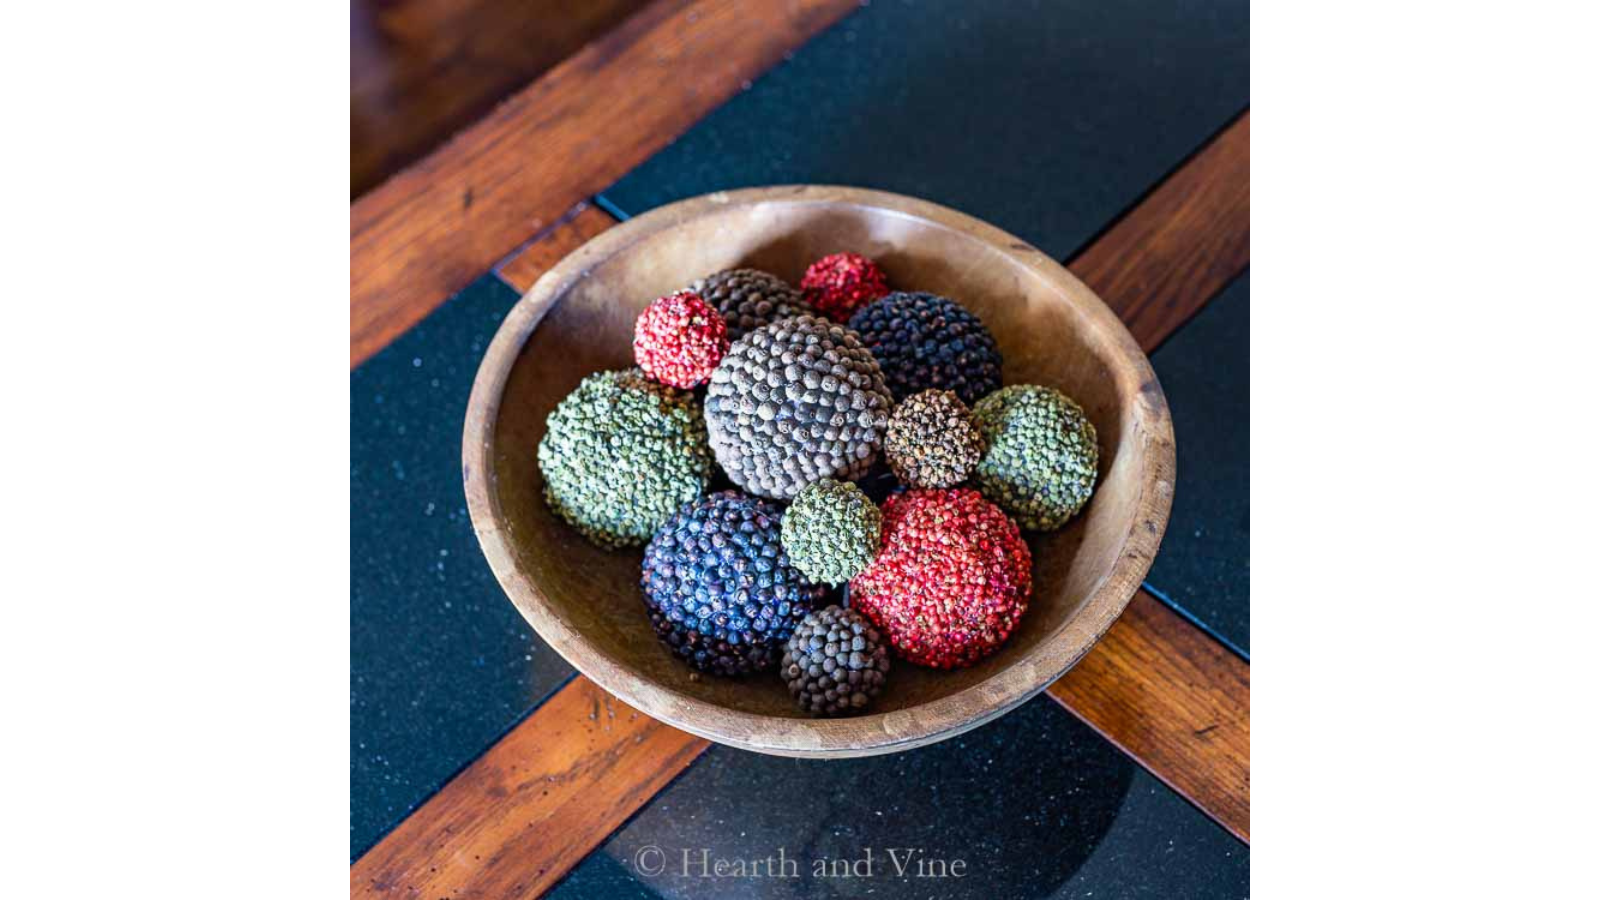
These pomanders are little balls of whole spices, with cloves pressed into foam and other spices attached using low-temperature glue. Patti Estep makes them for display in a bowl, where the textures and warm colors feel especially appropriate for Thanksgiving. There’s no need to purchase a dozen different expensive spices to copy the idea. A small grouping using affordable cloves or supplies you already have will do the job. They’re decorative craft pieces, not edible pomanders, so keep them apart from the serving dishes.
28. Orange Pomanders With Greenery and LED Candles

Fresh oranges studded with cloves are one of those decorations that look good before you’ve added anything else. Crissy arranges them with greenery, berry stems, and LED pillar candles in a long bowl, building a centerpiece with plenty of natural texture. Her original tutorial is styled for Christmas, but the oranges and foliage work just as well for late fall, especially without overtly Christmas-themed extras. Make a few pomanders and use a bowl you own rather than buying the oversized display vessel. Stick with LED candles among the greenery.
29. Pumpkins With Sculpted Paper Leaves and Vines

A few leftover pumpkins can have a second life as elaborate little botanical sculptures. Brittany Jepsen makes curling stems from crepe-wrapped wire and adds shaped, painted cardstock leaves, turning ordinary pumpkins into a much more imaginative Thanksgiving display. The sculpted vines are what give this project its character, so you don’t need to reproduce the whole styled table to get the effect. Two or three pumpkins can be enough. Bend the wire details low so they don’t poke into diners’ sightlines.
30. Salvaged-Book Pumpkins With Twig Stems
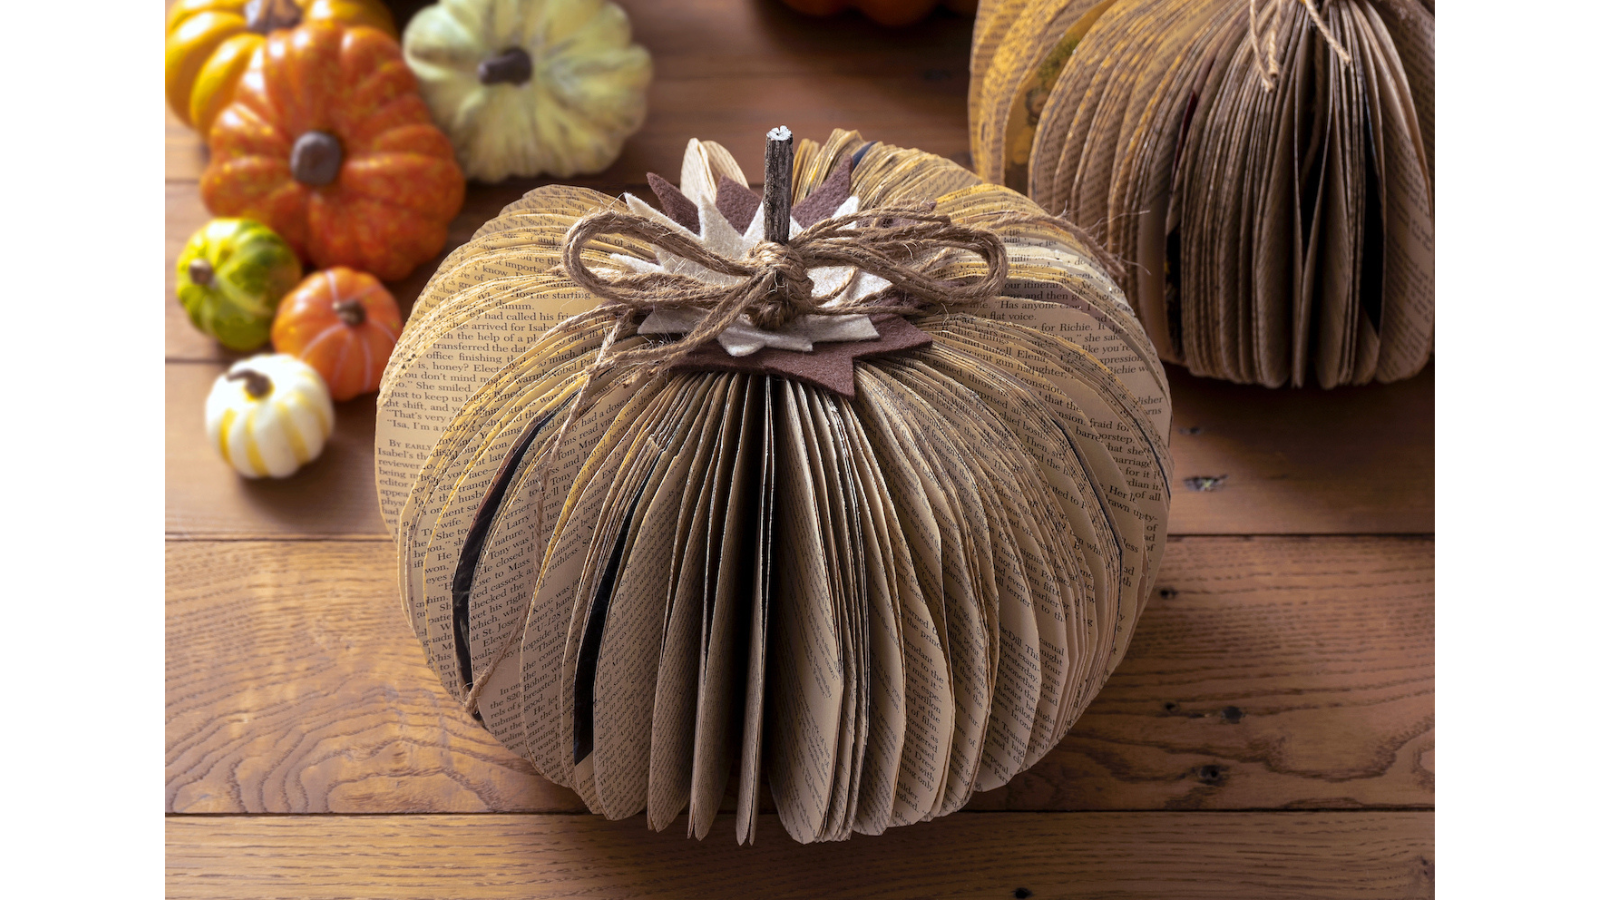
There’s something satisfying about turning a battered old book into an object worth keeping. Amy cuts the pages into a pumpkin profile, fans them around a twig stem, and finishes with felt leaves and twine. The page edges give the pumpkin lovely soft texture, especially beside real gourds or autumn leaves. Use a damaged or discarded book rather than sacrificing something you’d actually want to read. It takes more careful cutting than expensive supplies, and paper decorations should stay well away from open flames.
31. A Branch-and-Paper Gratitude Tree
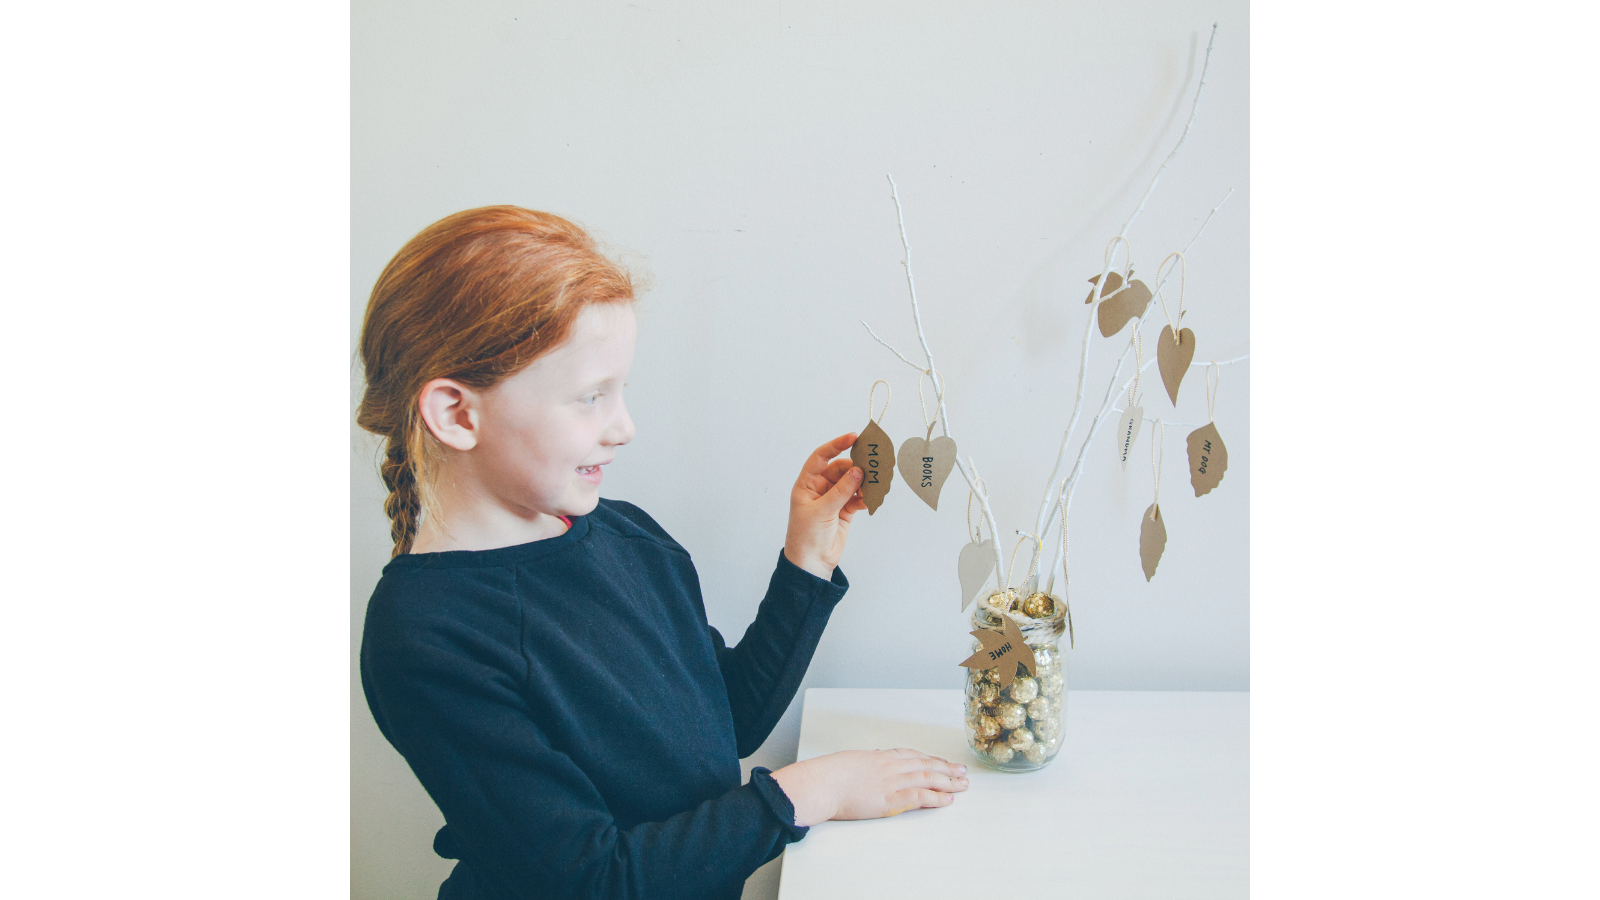
A gratitude tree gives everyone something to contribute, which is more interesting than a centerpiece people are only allowed to look at. KiwiCo uses painted branches in a filled jar, with paper leaves hanging from strings for handwritten notes of thanks. Gather branches, use a jar from the cupboard, and cut leaves from scrap paper to keep it simple. Because the branches stand tall and guests need room to add their notes, this one belongs on a side table or buffet. Bring the messages to the table after dinner if you want everyone to share them.
You might also like…
25 Thanksgiving Side Dishes That Don’t Need the Oven

